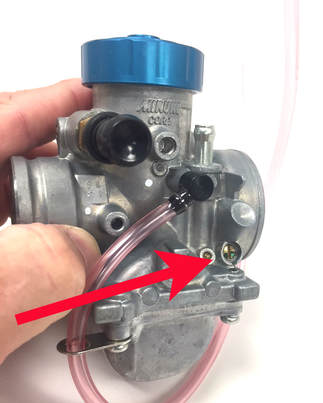
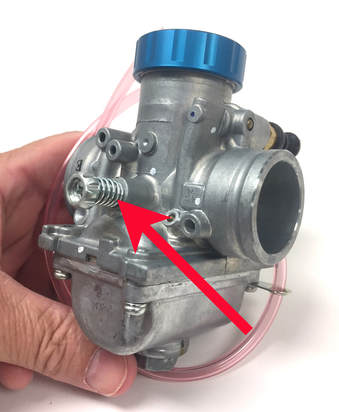
TT-R125 Mikuni Pre-Jetted Carburetor Kit
Installation Instructions
Introduction
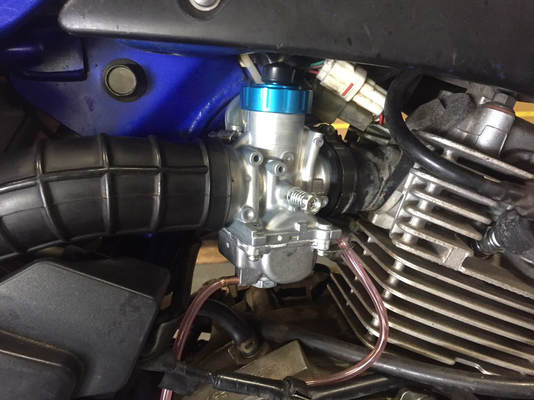
The Mikuni VM24 and VM26 carburetors are extremely versatile carbs that offer great performance and easy maintenance. We’ve picked these carbs to use in our TT-R125 carburetor conversion kit because they are very close in size to carbs used on the stock bike. Please note: The VM26 kit is only recommend for bikes with performance cam and/or head modifications.
This kit is a very straight forward carburetor upgrade for the TT-R125. Using these instructions, anyone with basic mechanical skills and a few tools can tackle the job.
Fitment
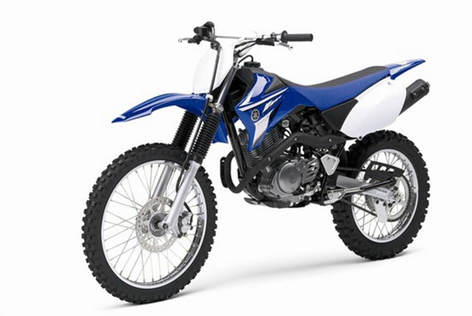
This kit is designed to fit all models of the TT-R125 including the basic early model (kickstart only), the E model (electric start), the L model (larger front wheel and disc brake) and LE model (larger front wheel, disc brake and electric start). Over the years these bikes have been manufactured, many owners have modified their TT-Rs with a large variety of aftermarket products including performance exhausts and cams, handlebars, controls, seats and aftermarket body plastics. Our kits are designed to fit stock bikes that are ridden between sea level and about 3500 feet. If your bike has engine, exhaust or air box modifications or if you generally ride your TT-R at higher altitudes than 3500 feet, then it is possible you might have to make jetting changes to obtain maximum performance.
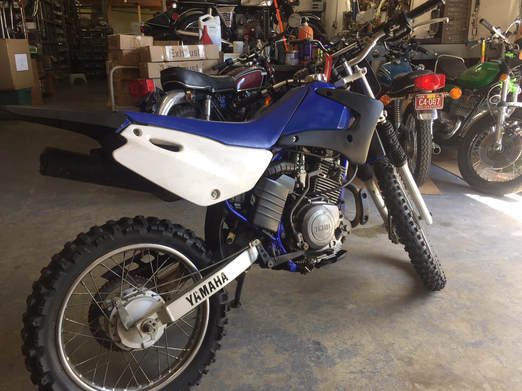 This 2004 LE model was the test bed for our kit and typical of many customer bikes.
Our test bike for this conversion is a stock 2004 LE model. Over the years, this bike has been ridden a lot, but is typical of many of the bikes our customers have.
Yamaha has used just two carburetors and three air boot combinations during the entire lifespan of this model. On 2000-2007 models, Yamaha used the 5HP1 carb which utilized a single throttle cable. All subsequent years (up to this writing in 2018) have used the B2-14101 carburetor with a push/pull cable set up.
Our kits are designed to use a single stock cable from the 2000-2007 models. If you have a later model, your dual cables will not fit and you’ll need to obtain a stock cable from a 2000-2007 model. These cables are available from a Yamaha dealer or you can often find good new and used cables on eBay. Because we have not had a later model TT-R125 to test, we have not determined if the stock throttle assembly from a post 2007 models can be adapted for use with the older cable.
The 2000-07 cable has an elbow and is designed to be inserted into the cap of our carb kit. If you purchased our billet cap (blue cap), you’ll find the cable easily attaches exactly like the stock cable. We will talk more about fitting the cable in our assembly instructions.
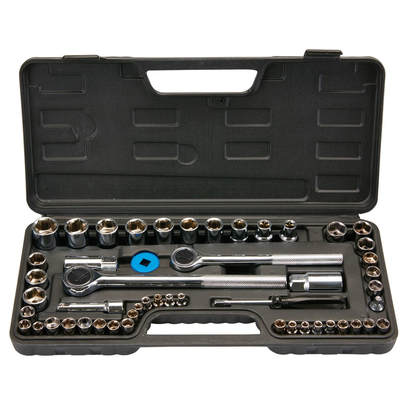 Tools like this inexpensive metric socket set can be found on-line
The tools you’ll need
Make it easy on yourself and use the right tool for the job. If we’re very specific about a tool, it’s because using anything else will eventually cost you time and money. If you don’t have the right tool, get it and save yourself a lot of aggravation. If you try to use tools like an adjustable wrench or a vice grip, you’ll round-off nuts or bolts and have to replace them. With metric tools so cheap and available on Amazon, eBay or Harbor Freight, it’s just penny wise and pound foolish not to get the right tool.
One of the best tools you can use is a cell phone or digital tablet. Professional mechanics used to draw a lot of diagrams, but these days, they take lots of pictures. Some also use a spiral bound notebook and to take notes. These notes and pictures save a lot time and frustration on projects – especially when you are disassembling something you are unfamiliar with.
If you own a motorcycle, you should have all of the tools listed below to perform general maintenance on your bike. Rather than list the individual sockets or wrenches, we have put them down as kits, because that’s how they are normally sold. You won’t need every wrench or socket that comes with the kit, but it makes more sense to buy the entire kit rather than buying these tools individually. Here is a list of tools and items you will need:
- A flat blade screwdriver set
- A Phillips-head screwdriver set
- Metric Hex Key (Allen wrench) set
- Metric combination wrench set (6mm-19mm)
- Metric socket set (6mm-19mm)
- Razor knife (for cutting hose)
- Needle nose pliers
Stock Carburetor Removal
|
Safety Note: Handle all fuels with extreme care in a well-ventilated area. Gasoline is highly flammable and extremely dangerous. Drain fuel using great care. Do not allow any smoking or electrical sparks nearby while transferring fuel. Do not leave fuel in open containers unattended. Do not allow children to handle fuel. |
Notes on fuel:
Because of possible fuel contamination, we always recommend you drain any existing fuel from the tank. One of the main causes of carburetor failure is contaminants in the fuel. You don’t want to mess up your new carb with dirty gas. If you question whether or not your fuel is dirty, empty about a cupful from the petcock into perfectly clean, white, plastic container. A white container is best because it allows you to see the sediment easier. Place the container on a level surface in a well-ventilated area and let it sit for 30 minutes. If after 30 minutes, you can see sediment on the bottom of the container, you need to change out your fuel. This is not a guarantee you will get your gas tank completely clean unless you empty all the fuel, wash out the tank with Dawn detergent (breaks down oils) and water and blow dry the tank with compressed air. Make sure the tank is COMPLETELY DRY before adding any fuel.
The Best Way to Transfer Fuel:
In a well-ventilated area with the petcock in the off position, attach about 2 feet of ¼ inch hose to the petcock (the length of the tubing may vary depending on size of the container being used). Place the other end into a container designed to hold fuel. Make sure there is enough room in the container for the fuel in the tank before transferring the fuel. The Yamaha can hold up to1.7 gallons, so don’t use anything smaller than a two gallon, fuel-approved container. Turn the petcock on and stay with the container until the tank is empty. Do not smoke anywhere near an open container. Avoid any sparks while transferring fuel.
 With the carb off, we drained the fuel directly into a container, but it is much easier to use a drain tube from the float bowl with the carb still on.
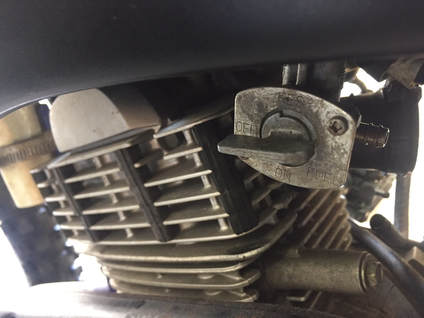
- On the left side of the tank (from the driving position) turn off the fuel petcock.
- Disconnect the fuel line from the petcock
- Because of possible fuel contamination, we always recommend you carefully drain any existing fuel from the tank (see Safety and Fuel Notes above):
- Moving to the right side of the bike, pull the drain tube from under the float bowl and route it to a small container. If the drain tube is missing, use a piece of lawn mower fuel line (available at auto parts and hardware stores) to direct fuel from the float blow into a plastic container. Note: You can use the same container you used for checking fuel from the petcock. This will provide a second check of the fuel. If you see a lot of debris coming out of the float bowl, then you definitely should clean your fuel tank. While holding the drain tube in the container, open the drain screw at the base of the float bowl with a flat blade screwdriver and allow all the fuel in the float bowl and fuel line to drain into the container. Carefully discard this fuel.
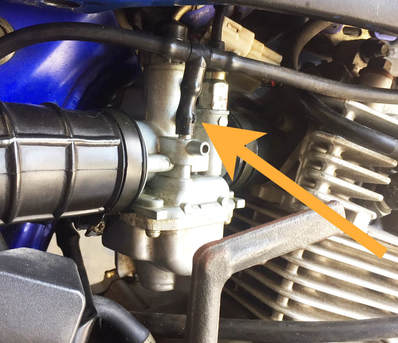
- Remove the old vacuum line from the carburetor. This line will not be reused (photo above left).
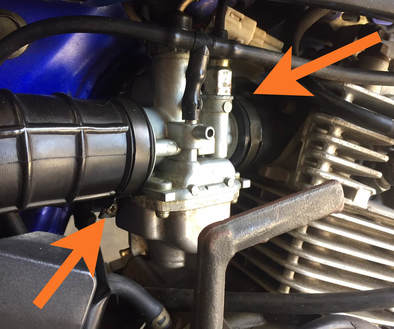
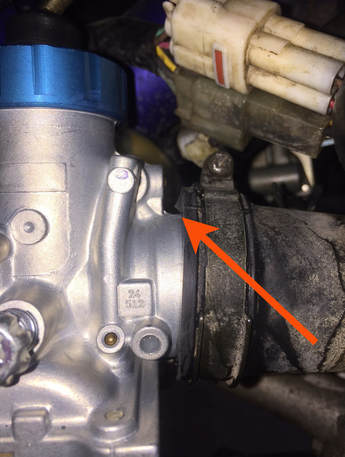
- Using a #2 Phillips screw driver, loosen the hose clamps on the air boot and rubber manifold adapter (see photo above right).
- With the clamps loose, carefully work the carb back and forth until it releases from the air box boot and intake manifold.
- Use a 14mm wrench to remove the choke plunger and choke cable (see photo below left ).
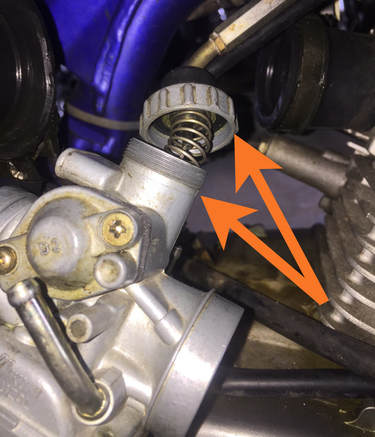
- Unscrew the mixing chamber cap and pull out the throttle slide/valve (see photo below right).
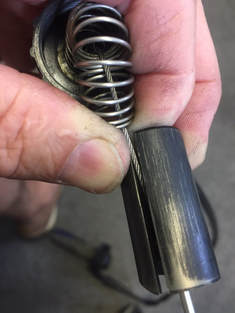
- Carefully compress the throttle slide spring by pulling it up from inside the slide and holding it against the mixing chamber cap with your thumb and fore finger. This will provide a little slack in the cable. Then slide the cable down the slot cut in the slide, push it out of the recess in the bottom of the side and remove it (see photo below).
- The stock carburetor (minus mixing cap) is now completely disconnected and can be put aside. It is suggested that you keep all stock parts.
- Place a small rag inside the intake manifold to keep any debris or parts from falling into or down the manifold opening.
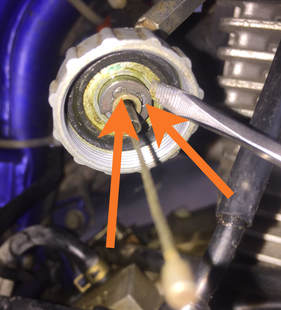
- You will now need to remove the clip inside the mixing cap that holds the cable in place. To keep from losing this small clip, place large, light-colored rag (an old T-shirt works well for this), on the engine block under the mixing cap. Place another cloth under the bike on the ground. If you drop the clip (which is highly likely), this will help you find it.
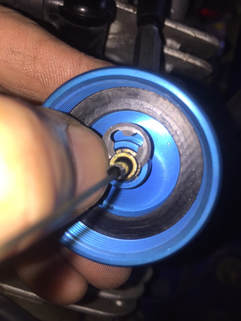
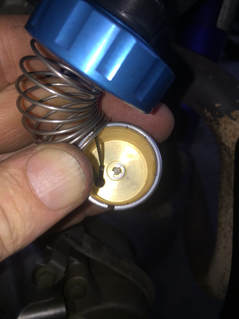
- If you look closely at the clip under the cap (see center picture above), you will notice two small notches cut in the clip. Place a small screwdriver (#1 size) in one of the notches and by twisting the head of the screwdriver work the clip free from the cap. Sometimes it helps to move back and forth from notch to notch to move the clip a bit at a time. With the clip removed, the cable will pull out of the cap. Be sure to retain the clip and the O-ring dust seal which is on the outside of the cap. These parts will be reused in the installation.
- Put the mixing chamber cap, throttle slide, needle and spring back into the stock carburetor and set this aside. No parts from the original carburetor will be used
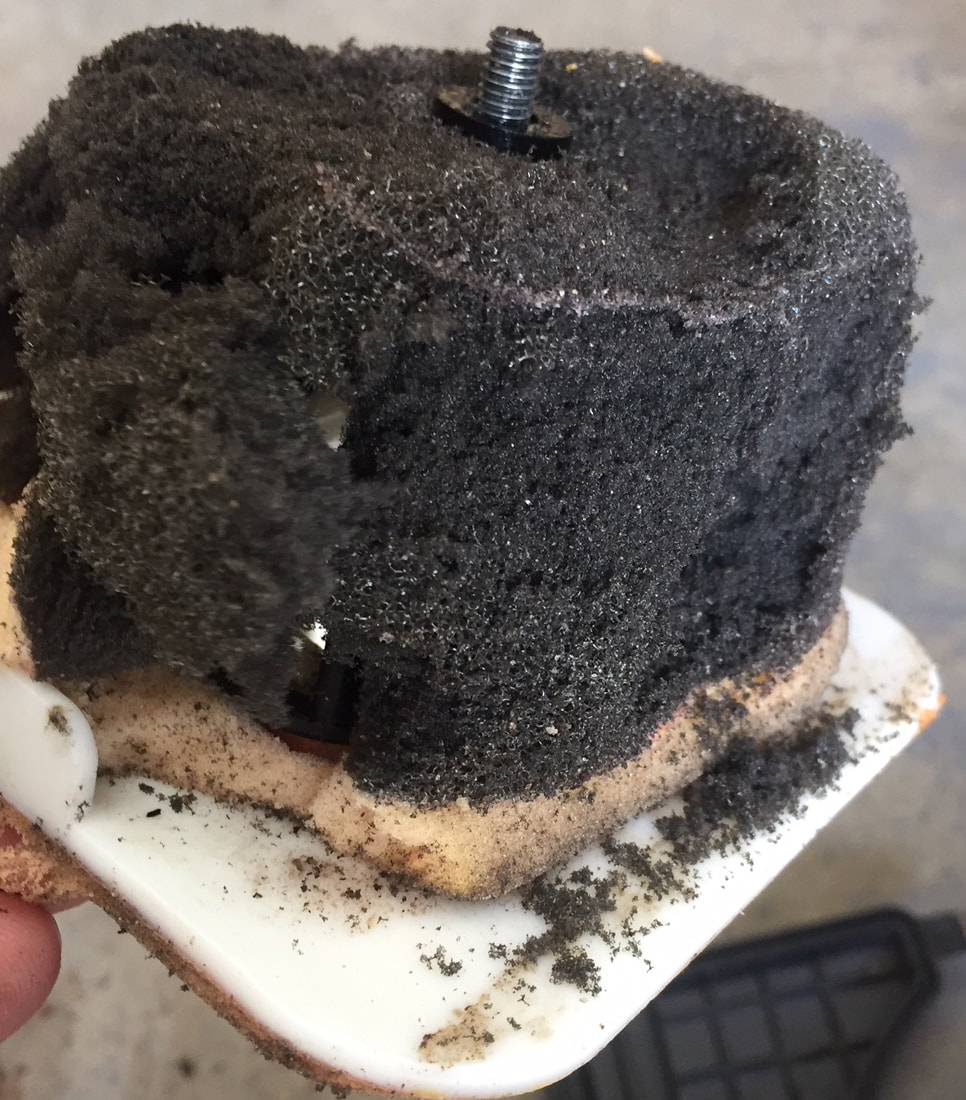
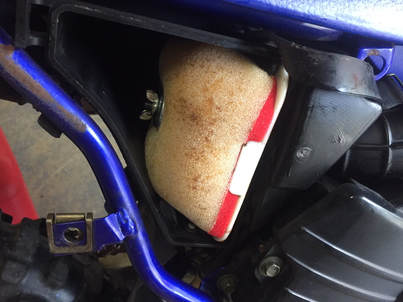
We highly recommend replacing the air filter when you install a new carb kit. The above right photo shows what was left of the air filter on our project bike. These air filters deteriorate very quickly in warm temperatures. When they get to this condition, tiny pieces of foam from the filter end up in the cylinder, carb, air box and air box boot. It’s a real mess and will definitely affect how your bike runs. Additionally, in this condition, the air filter won’t keep anything from getting in your carb. These foam filters are not durable and should be replaced annually at a minimum before they have a chance to break down.
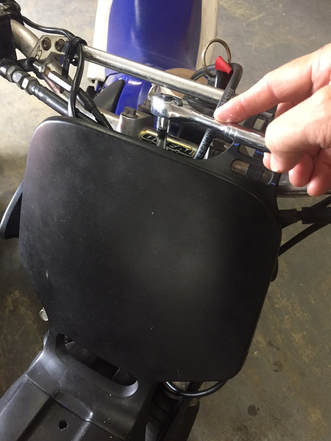
- Use a 10mm socket and ratchet to remove the top number plate retaining bolt which is located just in front of the handlebar on the triple-tree (left photo above). Release the retaining strap which wraps around the handlebar and clutch cable. With the bolt out and the strap off, the number plate will lift out of the mounting points in the fender.
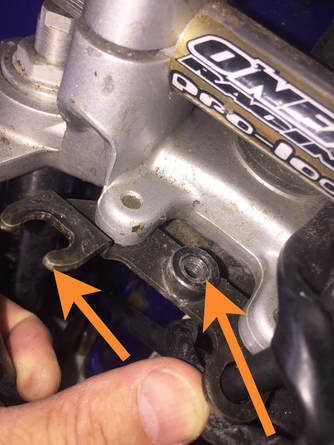
- Using a 17mm wrench to loosen the base of the choke cable and remove it from the bracket (photo above center). Gently pull the clutch cable up, routing it through the cable retaining bracket to remove it.
- With the choke cable and knob removed, you may replace the number plate. With this step completed, you are now ready to move onto the assembly phase.
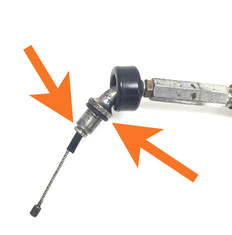 Stock elbow through 2006. Dirt seal above. Retaining clip groove below.
Aftermarket Carburetor Installation Procedure
- Remove the blue, mixing chamber cap, throttle valve spring, spring seat plate, slide (throttle valve) and jet needle from the new carburetor. Place the stock Yamaha throttle cable through the O-ring dirt seal, then through top of the cap (see photo, right). If your bike is a 2008 model or newer, you will need to make some modifications. Please see note below:
|
Note on throttle cables: Our kit is designed to use the single throttle cable arrangement that came on 2000-2007 models. In 2008 Yamaha shifted to using a push/pull cable system. The pull cable on the 2008 and later throttles can be used with this cap, but you will need to install an older model throttle cable elbow adjuster to retrofit your pull cable. This cable adjust screw set can be purchased from OEM Yamaha parts providers online. The part number is 5DG-14106-00. With this elbow, the 2008 and later cables can be attached using the method in step #2. All you need to do is to slide on the new elbow over the end of the existing pull throttle cable before inserting it into the cap . You can identify the pull cable by holding the ends of the two cables and twisting the throttle. The cable that gets shorter when the throttle is twisted is the pull cable. The other is the push cable. With the cable identified, you can disassemble the throttle assembly and remove the push cable before attaching the pull cable to the cap. |
 The cable guide or elbow, provides a smooth path for the cable
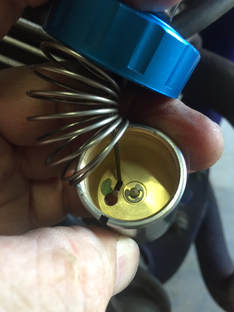
- If you look at the cable guide on the carburetor end of the throttle cable (not the inner wire) you will notice there is a small grove in the bottom of the guide (see arrow on the left in the photo to the right). With the dirt seal in place and the guide inserted through the cap, place the small retaining ring (clip) in the groove of the throttle cable. Use a small set of needle nose pliers to push the clip in place (see photo below left).
- While holding the mixing chamber cap in one hand, pull on the end of the inner cable with the other hand until the cable is taught.
- On the bottom of the throttle slide you will notice a something that looks a bit like a keyhole. Turn the slide over and look at the other end. You will see a recess at the end of the slot next to the larger hole. This is where the end of the throttle cable will be located.
- Put the end of the throttle cable in the hole in the bottom of the slide (photo center below) and then slide it across the slot to where it will fit in the recess on the underside (photo bottom right).
- Make sure the slide needle is in place in the center hole and then put the spring seat plate in place. Make sure the tab on the side of the seat plate is facing down. This is designed to fit in the groove where the throttle cable is located. This will keep the throttle cable from working itself out of the groove.
- With the spring seat plate sitting flush and flat against the inside base of the slide, you can release the throttle slide spring.
- Insert the throttle slide into the mixing chamber of the carburetor body. Make sure the small, full-length groove on the side of the throttle slide aligns with the small pin on the inside of the mixing chamber. The alignment pin can be observed near the top of the mixing chamber and the idle screw (much larger) can be seen near the bottom. The cutaway on the throttle slide should always face the air boot. With the slide in place, screw in the mixing chamber cap.
- Cut a 4-5 inch section of new, ¼” fuel line. Please note: once the carb is in place you might need to trim the fuel line to keep it from kinking. Do not allow the fuel line to kink as it would restrict fuel flow to the carb.
- Attach the fuel line to the carb and clamp it at the base of the fuel intake nipple.
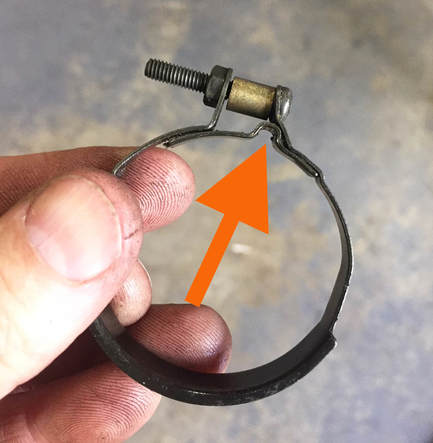 The "U" shaped notch at the top of the clamp fits over a rubber lip on the top of the manifold
- Use a sharp razor knife and trim the rectangular rubber protrusion from the top of the rubber manifold adapter (see photo above left). This will allow the carburetor to sit properly in the manifold.
- If you look closely at the clamp for the rubber intake manifold (do not mix it up with the clamp for the air boot - they are similar but not the same), you will notice there is a small, upside-down “U”-shaped notch stamped into the clamp. This is put there to keep the clamp upright and to keep it from rotating around the manifold. Remove the stock, Phillips screw and the spacer from the manifold clamp. Insert the new, shorter, Allen-held screw (supplied with the kid) into the manifold clamp, but do not replace the spacer. The OD of the new carburetor is about 1mm smaller than old carb. Once the clamp is tightened it will take up the space in the manifold.
- With the new Allen screw in place on the clamp, put the hose clamp on the manifold. The screw heads on both clamps should be accessible from the right side of the bike. Be sure to seat the “U” notch in the lip at the top of the manifold. With the clamp in place, and the screw lose, insert the new carburetor fully into the intake manifold. Make sure the carburetor is vertical and then tighten the Allen-head screw. With the screw tight, the carburetor should not rotate without great effort.
- Place a finger inside the intake bell and operate the throttle. Make sure the throttle slide is traveling fully to the top and when released, drops down fully without hesitation. You can use a small mirror to visualize the movement.
- Remove the Phillips screw from the intake clamp and replace it with the longer Allen screw provided with the kit. Place the clamp on the air boot. The screw on the air boot should be on the bottom of the boot and accessible from the right side. Work the air boot over the intake bell on the carb. The intake bell of the new carb is about 2mm larger than the stock carb so it will not go on as easy as the original carb, but it will go on. You may need to use a small screw driver or other small tool to work the edge of the boot over the intake bell. Once the boot is completely around the edge of the carb, you can squeeze the boot in the middle and push it fully into place on the carb. With the boot in place around the intake bell, tighten the Allen head screw.
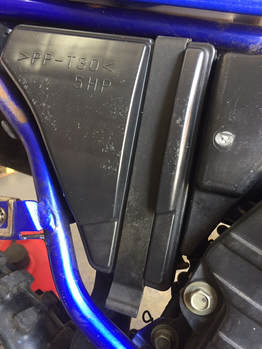
- Replace the air filter with a new one (photo above left) and replace the air box cover. Be sure to replace the rubber retaining strap to keep the cover in place (photo above right).
- Congratulations, you have completed the installation phase.
Initial start and tuning
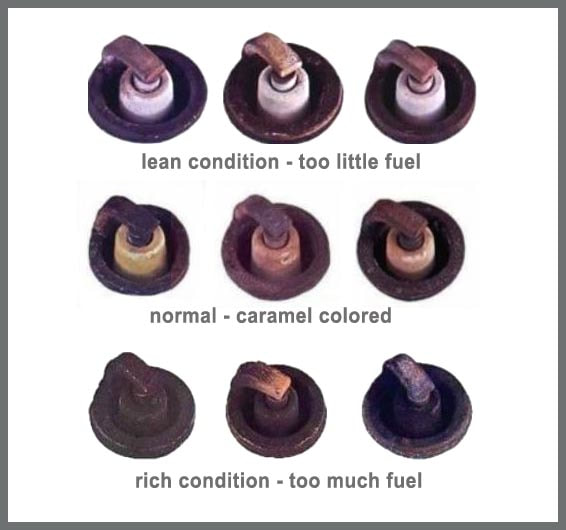
You could start your bike at this point and chances are it would run okay. But if you stopped the install at this point, the bike probably wouldn’t run to its full potential. This next step doesn’t take that much time and it will ensure your bike is running properly. Tuning and jetting is individual to every motorcycle. Some bikes have more wear than others. Some may be fitted with aftermarket pistons, cams, exhaust or air cleaners. These changes effect a bike’s jetting set up. Not only should your bike idle smoothly with a new carb, you should also make sure the fuel mixture entering your intake manifold is correct for your bike. A fuel mixture that is too lean will sometimes make your bike feel like its performing better, but it can also ruin your engine very quickly. A mixture that is too rich can protect the engine from damage, but will also make the bike run poorly. The best way to tell if your mixture is spot-on is by the color of a new spark plug after running the bike under certain conditions for a few minutes.
Take a look at the color of the ceramic insulators in the photo to the right. The spark plugs with bright white insulators are indicating a lean condition, or not enough fuel. The dark or sooty plugs are indicating too much fuel in the mix. The plugs in the middle are a nice caramel color. They indicate the correct fuel mixture. Ideally, you want your plugs to be this color.
When we ship these carb kits, they are jetted for stock bikes ridden in an altitude range of sea level to about 3500 feet. If a bike has been modified with performance parts or if it is ridden at higher altitudes for any length of time, it will probably need jetting correction. If your bike is mostly stock (no performance cams or exhaust system) and you do most of your riding at an altitude below 3500 feet, then this kit should already be properly jetted for your bike. Keep in mind, you'll still need to adjust the idle and mixture screws.
For customers who have made performance modifications to their bikes, it's a good idea to begin testing your jetting with the jets we've already installed. Your bike will run with these jets and they will provide you with a baseline for correction. Please follow the steps below:
For customers who have made performance modifications to their bikes, it's a good idea to begin testing your jetting with the jets we've already installed. Your bike will run with these jets and they will provide you with a baseline for correction. Please follow the steps below:
- If your bike was running okay with your old spark plug, you may leave it in for the time being. If the plug is fouled (black or sooty in color, you should replace it).
- Temporarily adjust the air/mixture screw by first gently tightening the screw in all the way. Do not over-tighten this screw or you could damage the seat for the screw. Once in all the way, back the screw out 1-1/2 turns.
- Start your motorcycle. After a minute or so of warm up, let the bike settle to an idle. If it does not idle, try turning in the idle screw (picture above right) until the engine can maintain a smooth idle.
- With the bike at a smooth idle, slowly begin backing out the air/mixture screw (picture above left). The idle should rise a bit. Continue slowing backing off the air/mixture screw until the idle peaks. When it does, turn the idle screw in ¼ turn.
|
Please note: The information provided below on jetting is abreaviated to inclued only the pilot jet. To find out more about jetting, please ask for a PDF of our Mikuni tuning manual. |
Checking the Jetting:
On a Mikuni round-slide carburetor, there are four ways to adjust your fuel/air mixture:
Checking the jetting at idle:
On a Mikuni round-slide carburetor, there are four ways to adjust your fuel/air mixture:
- The pilot jet - Also known as the slow jet, this jet controls the fuel/air mixture at or just above idle. The idle mixture is further controlled by the air mixture screw mentioned above.
- The slide cutaway - The cutaway in the throttle slide begins working the moment the throttle slide is lifted. The larger the cutout on the slide, the more air that enters the fuel/air mixture.
- The needle jet and jet needle - These two items work together to control the mixture in the mid range
- The main jet - This jet controls the fuel air mix from the top 25-percent to full throttle.
Checking the jetting at idle:
- Warm up the bike and install a new spark plug (correct type recommended by the manufacturer). With the engine warm, start the bike without using the choke. Let the bike idle about five minutes. Do not rev the engine. Keep the engine at idle speed the entire time. Remember you are only checking the idle circuit and only one circuit can be checked at a time.
- Shut the bike down with the key or kill switch (do not choke to stop it) and let the engine cool for a few minutes before you remove the spark plug.
- Check the color of the insulator on the spark plug. If it’s bright white, you’re not getting enough fuel in the mixture and you’ll need a larger pilot jet. We include a larger jet with the kit. If it’s just slightly white, you can try screwing in the air mixture screw about ½ to 1 turn and run the test again with a new plug. If the plug is dark in color, you’re getting too much fuel and you’ll need to restrict the fuel flow at idle with a smaller jet. There is one included with the kit, but we sell all available sizes for this carburetor.
