 The CB coming to life from buckets of parts
The summer before my son left for college, we decided to build an authentic cafe racer, similar to one I would have built in the 1970s. For the previous two years, Ricky had been helping me clean out my late father's warehouse. He had his eye on a pile of CB450 parts that once belonged to my cousin. He had traded them to Dad for something - who knows what. There was enough parts to build a bike, just not a running one. After years of having water leak down on the containers from the holes in the rusted corrugated steel roof, most of the parts were no longer serviceable. So, over the next few months, we picked up another couple of rollers. We probably spent about $250 for the pair. Those bikes provided most of what we needed to make the bike run.
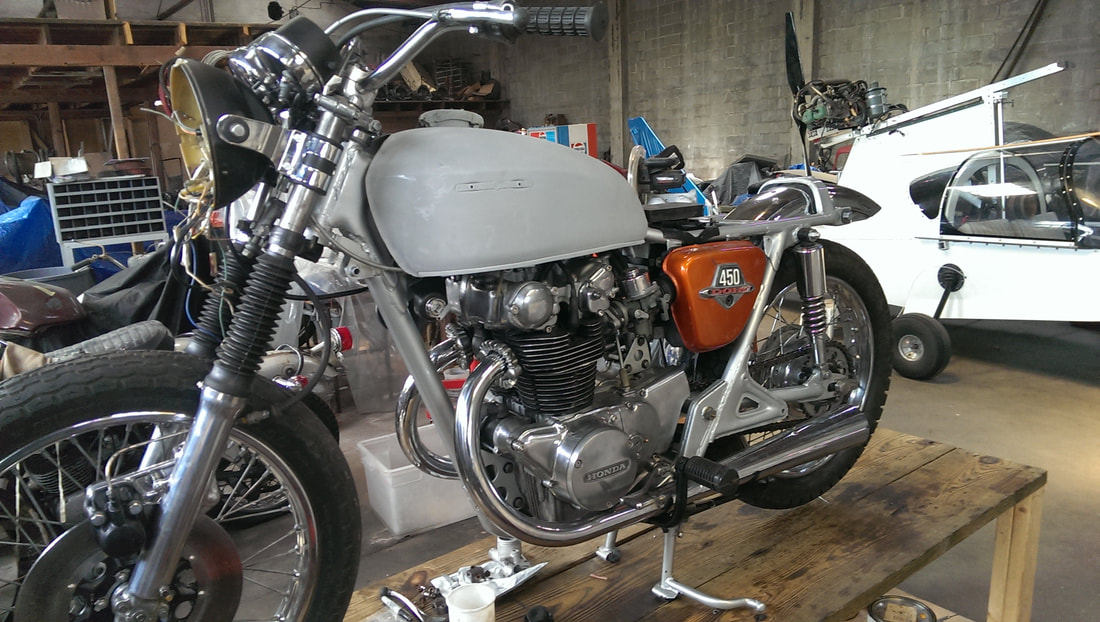
Ricky jumped into the project sorting out the parts. After a couple of weekends of sorting, Ricky cleaned and sanded the frame. It wasn't long until we had a fresh looking roller. The engine was a mess. It took four motors to build one good one.
Ricky jumped into the project sorting out the parts. After a couple of weekends of sorting, Ricky cleaned and sanded the frame. It wasn't long until we had a fresh looking roller. The engine was a mess. It took four motors to build one good one.
|
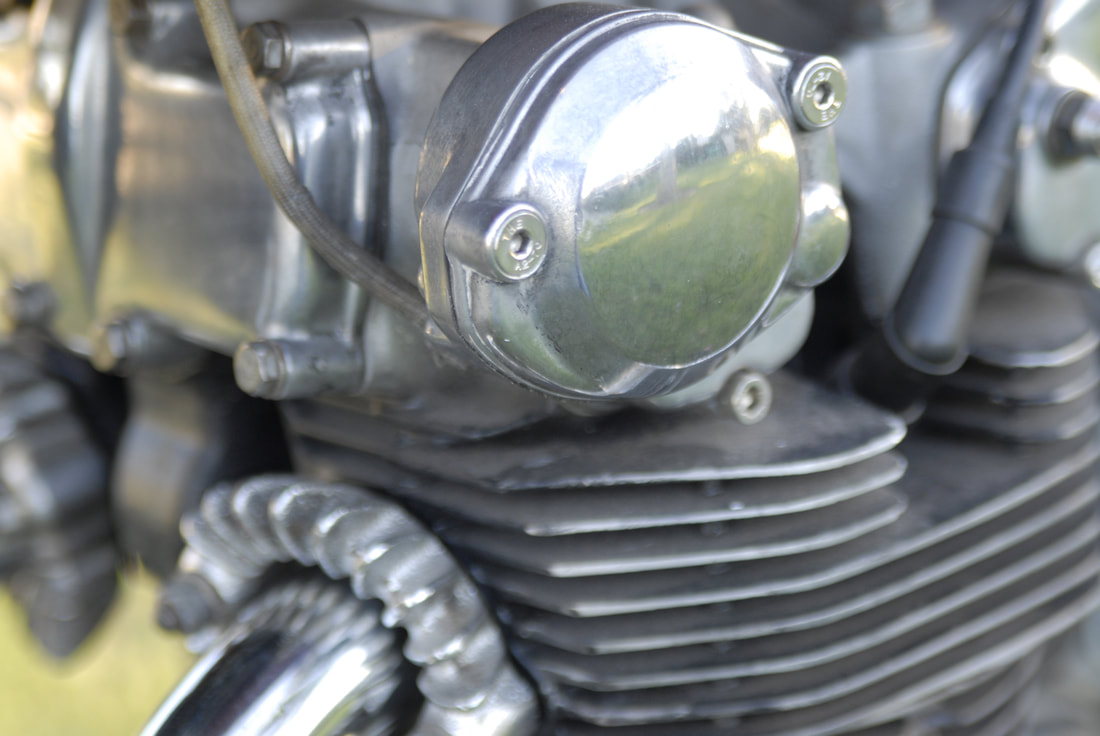
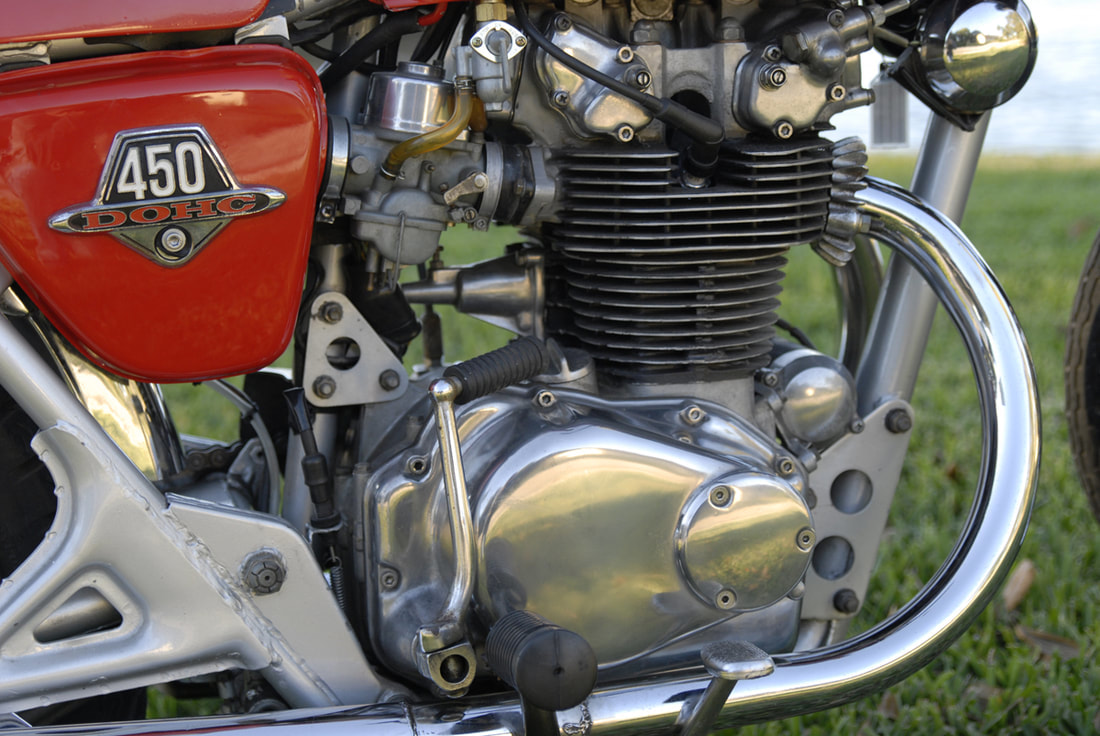
Ricky spent hours sanding the parts and learning to buff them to a high polish. He did a great job. I helped with a few of the more complex parts, but for the most part, he handled most of the polishing on this project. 
Fiberglass seat being hand-formed

Ricky did a great job polish fork legs and engine components
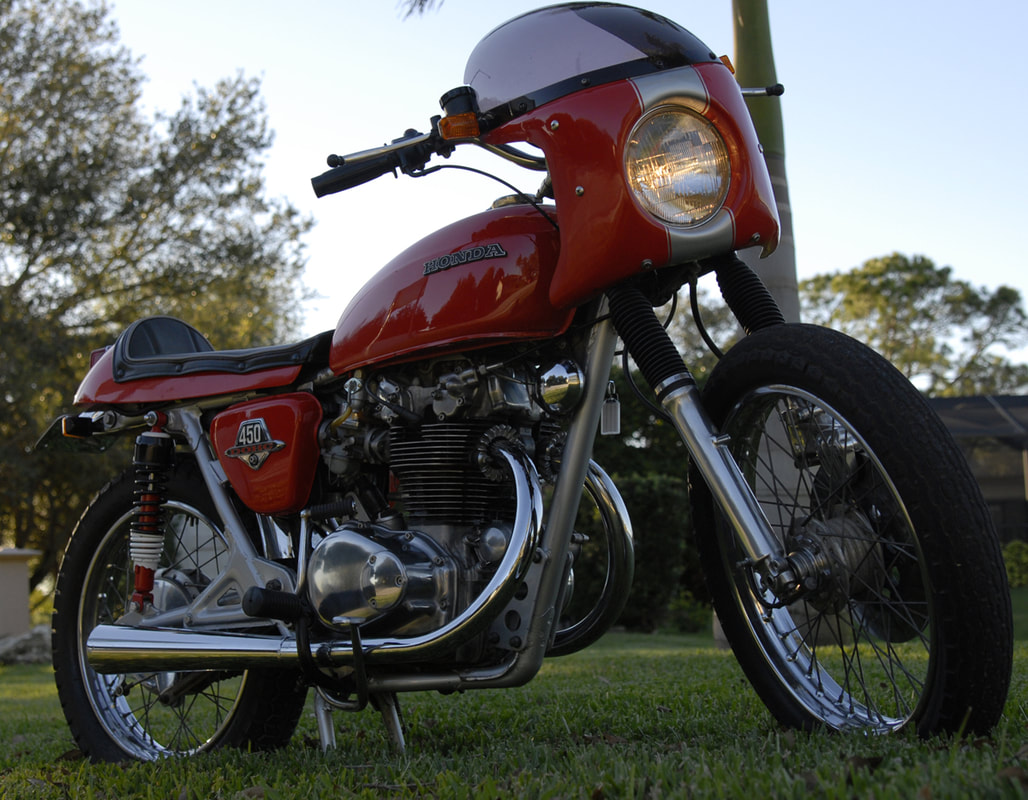
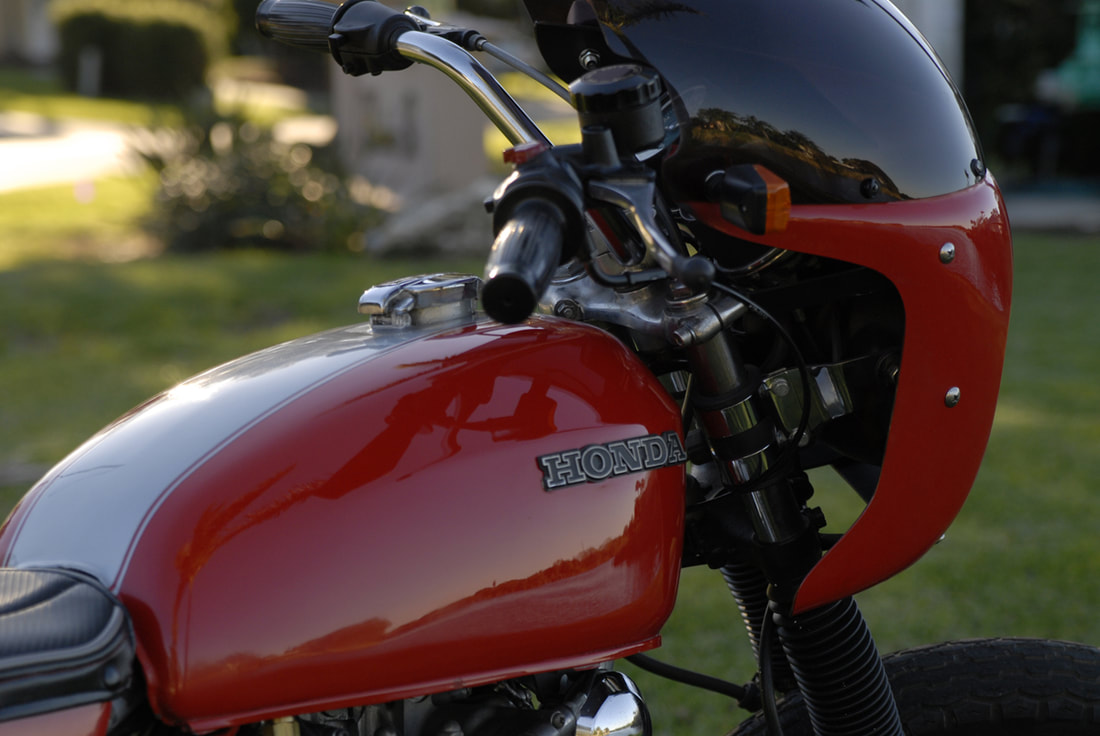
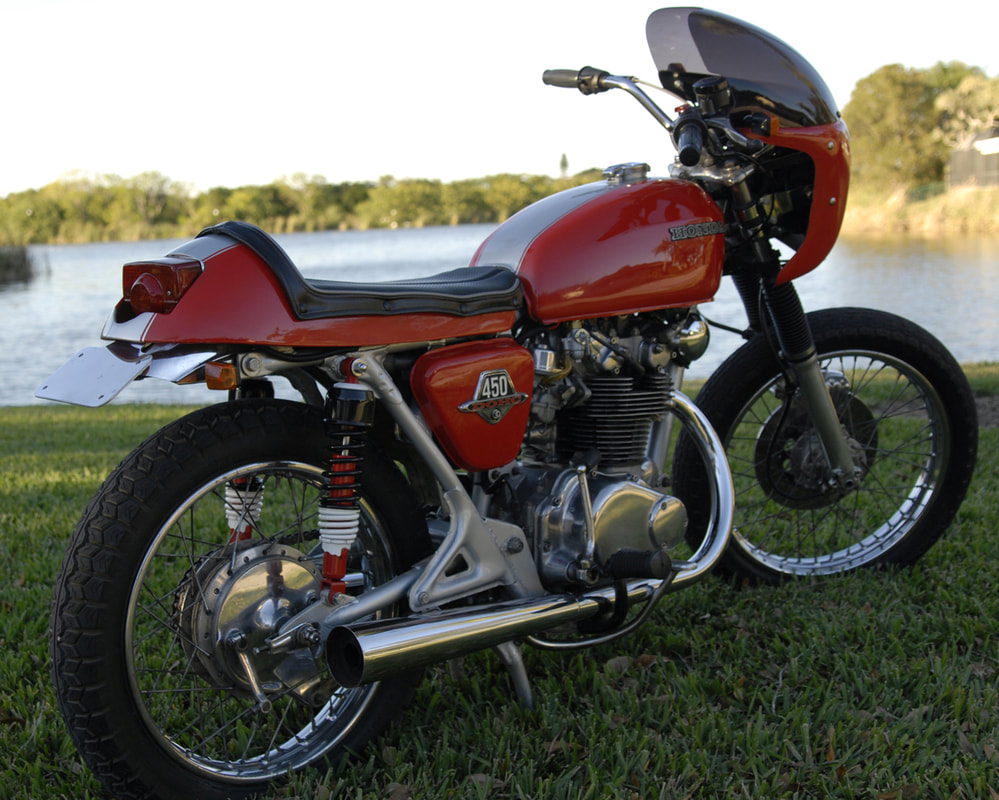
A little more about the paint. The centerline racing stripe was was a nod to race cars and the boys who rode the ton back in the 1960's. The had laid seat was a difficult project. I probably had about 25 hours getting it right. I used the original seat pan and integrated the stock Honda taillight. I could have made the taillight much more sleek, but I wanted an authentic feel to the bike. I fabricated the license place holder from some stock aluminum. The fairing was aftermarket item from Niche Cycle. It looked a lot like one I made from scratch about 35 years ago - and it was a lot less work than building a custom one. I did have to fabricate aluminum brackets for it to fit the way I wanted. We also bought the shocks from Niche. |
We had a hard time finding a decent tank. Most were rusted out or badly dented. But the last parts bike we bought had a great gas tank and original side panels, so we used them on the project. Ricky handled most of the sanding and prep work. He also shot the primer. He doesn't like to paint, so I agreed to shoot the bike for him. It's funny, Ricky's favorite color is red, but for some reason, he wanted to paint the bike black. I'd been dreaming of this beautiful silver and red bike for months, but he just wanted to get it finished. At the time, Ricky hadn't learned the value of patience. I told him he could paint the paint himself with rattle cans. He came to his senses, but we put the paint off for a few weeks.
I really wanted to build a really beautiful bike that didn't look like a "cookie cutter" cafe racer. Without telling him, I went ahead and shot the bike. I also completed the assembly, putting on the seat and side panels. I knew of a really good upholster and had him make up a seat cover. He used some great looking fabric and put red ribbing in the seat. It was a bit pricey but well worth it. A few days later, on his 18th birthday, I made an excuse to drop by the shop. He didn't know I'd been working on the bike all week. He was blown away. The moment he saw the red paint, silver stripe and seat mounted on the bike, he fell in love with it. If offered to grab a can of Rustoleum and shoot the bike flat black. Suffice it to say, that wasn't necessary. Sometimes kids just have to learn to trust their parents. 
|
|
|
The pipes and mufflers were something my cousin made probably 40 years ago. They are a one-piece unit with the muffler welded to the header. We really liked the look, so we polished them and decided to live with the imperfections.
This bike was a great father-son project and I think we were both pleased with the results. We later used this bike as a test bed for a Mikuni carb kit I designed for Niche.
Even though we pour so much energy and time into these projects, I (and I hope my son) have learned that they are after all, just things. So about a year or so after we finished the bike, we traded to a buddy for a really nice 1968 TR6 Triumph. Another new project!
