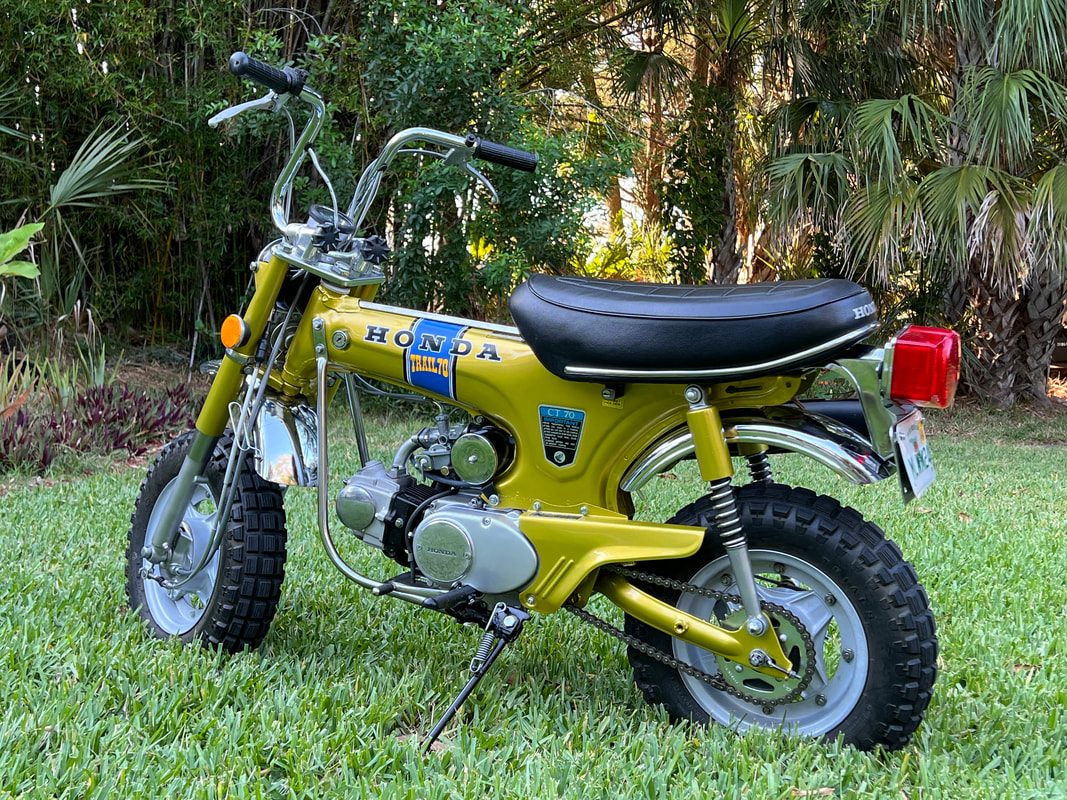
1971 CT70 Honda Mini Trail
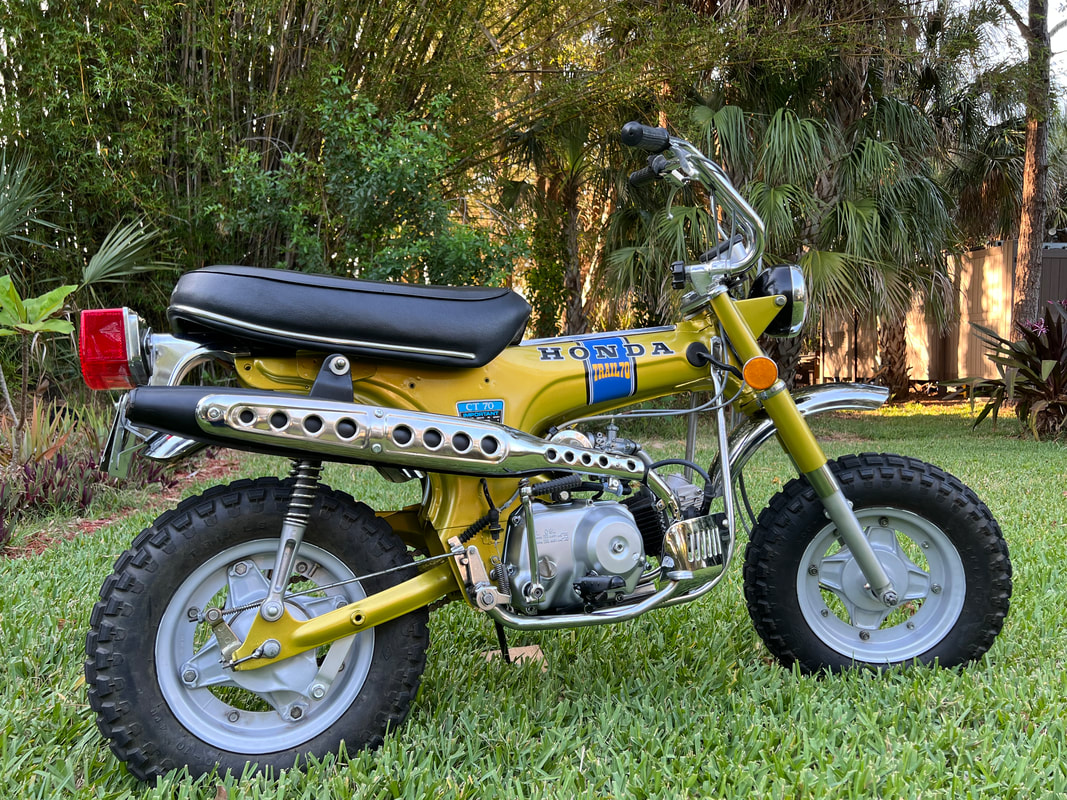
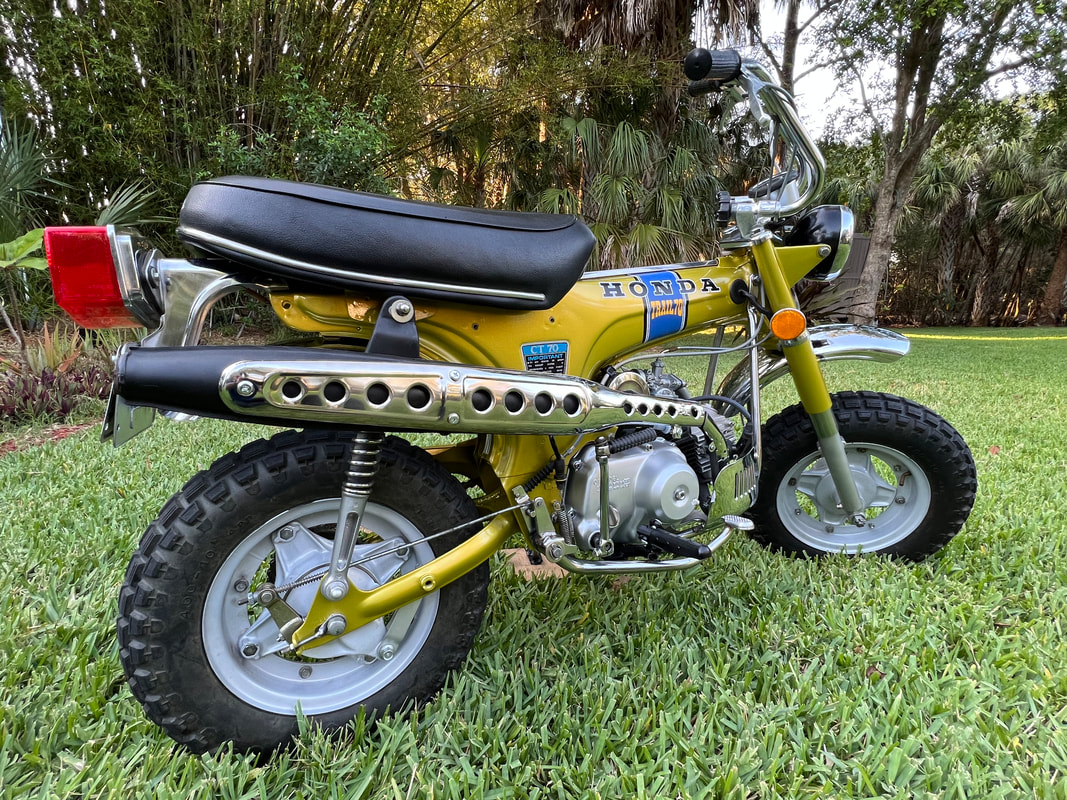
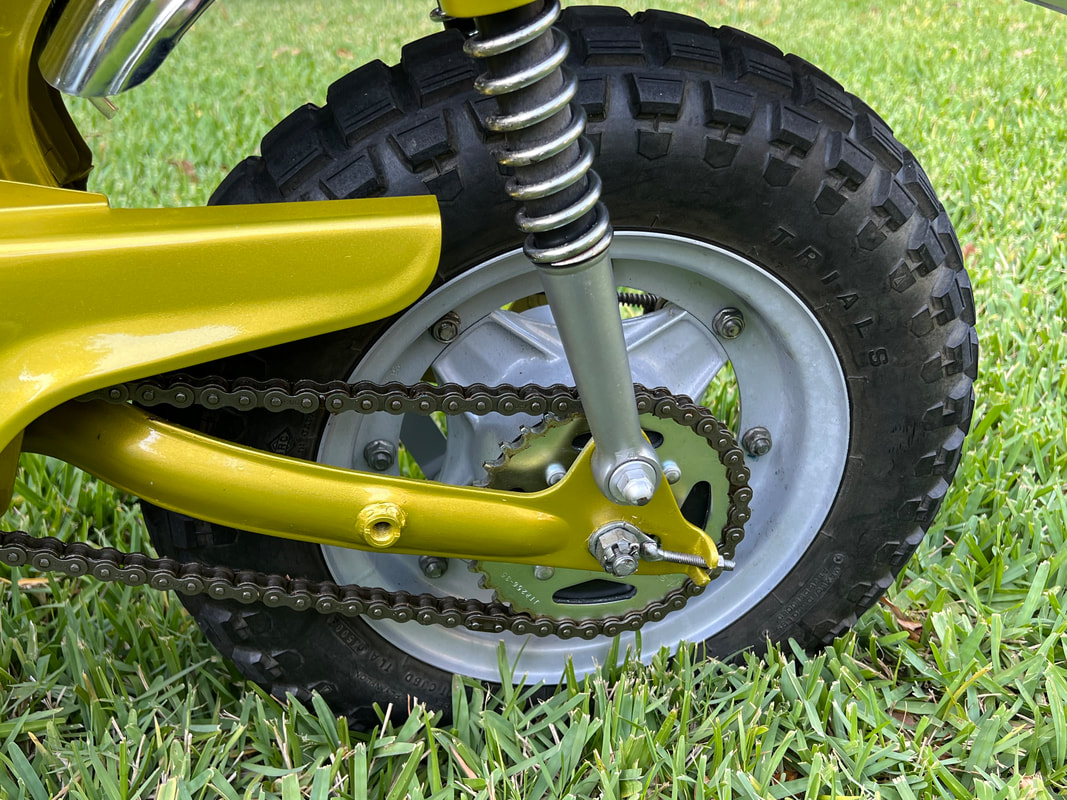
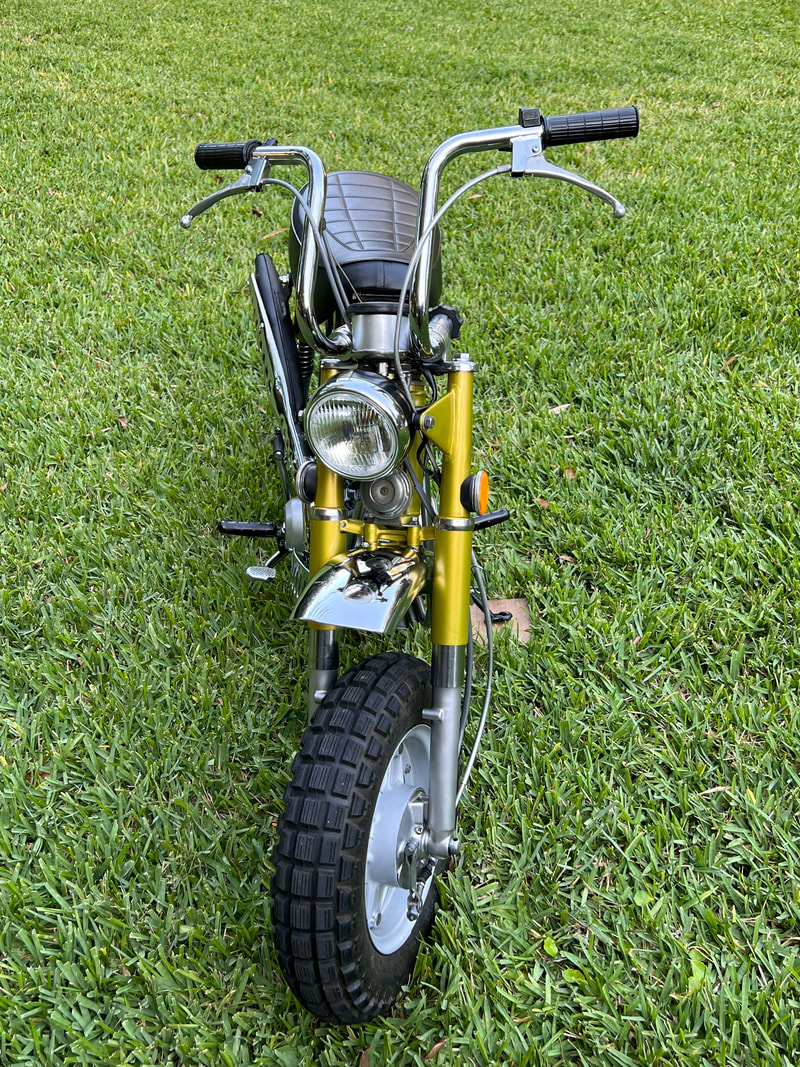
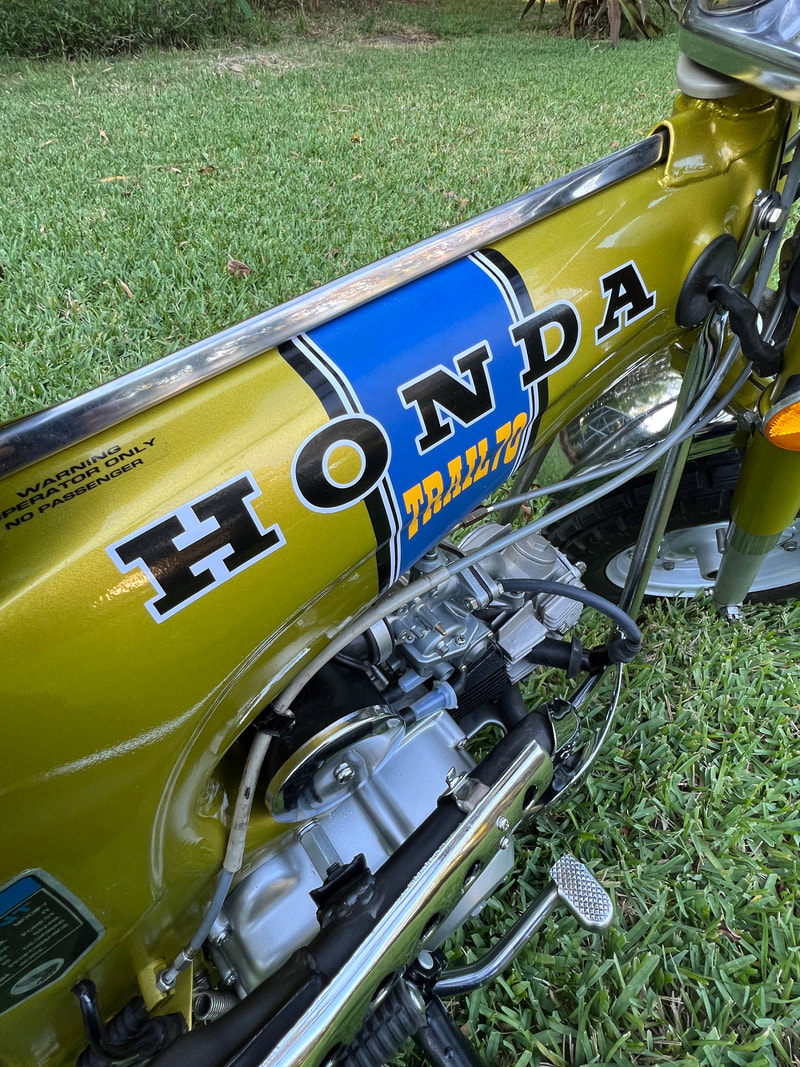
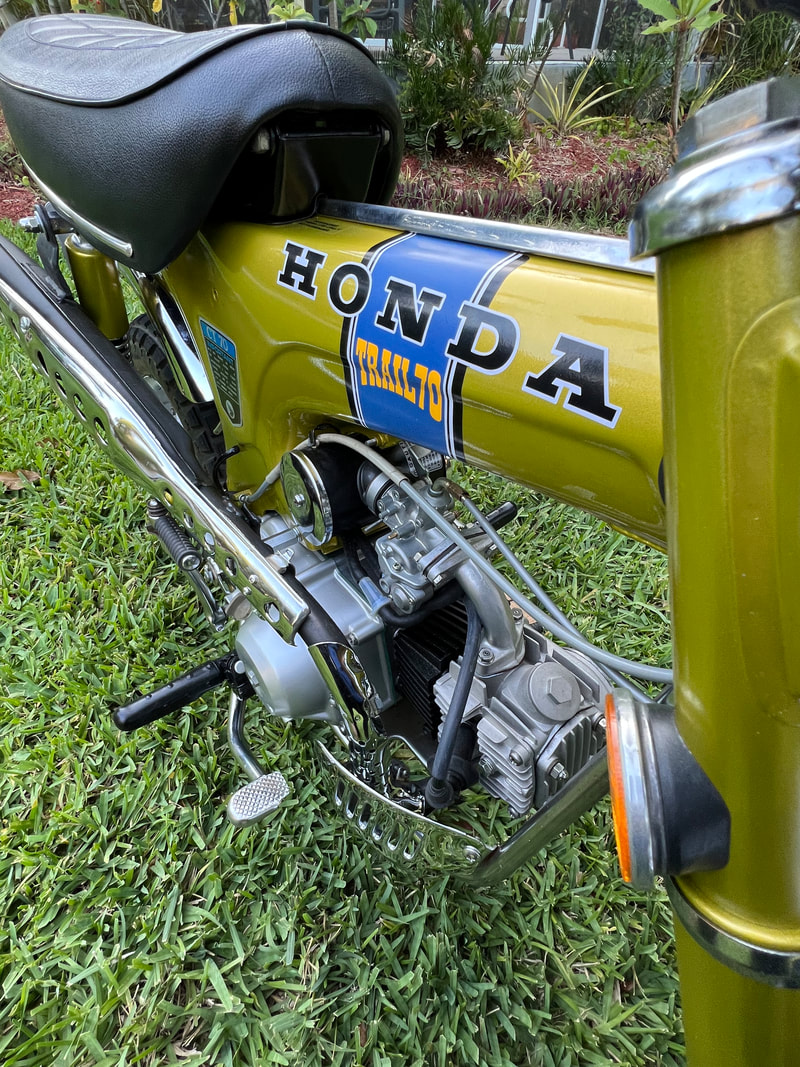
1971 Mini Trail after completion. We did not paint the wheels because the customer had already cleaned and painted them
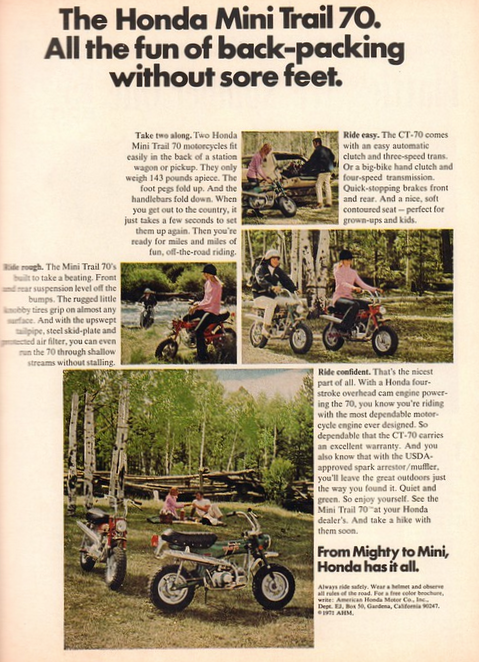
The Honda CT70 Mini Trail may just be one of the most popular and successful-selling motorcycles of all time, following closely behind the Honda Super Cub, which has sold more than 100 million of the 65cc step-through bikes in over 60 years of production. This bike was introduced in 1969, the same year as the CB750 four. I was just 12 years old then, but I was regularly riding a Yamaha DT1-250 and a sporty, little Harley 125 Rapido. My father, his brothers and their friends loved motorcycles. I could out-ride most of the adults, so that afforded me the opportunity to try out a bunch of full-sized cycles, designed more for adults than kids. By that time, I had probably ridden twenty or so motorcycles, ranging from 50cc up to 600cc. These included ill-handling, Italian scooters, European street bikes (like my father's BMW R60 I regularly borrowed without permission) and a host of popular Japanese street machines, many converted to be ridden off-road.
So, by the time I first threw a leg over a Mini Trail in seventh grade, I had already ridden some of the best performing motorcycles of the day. And, to be honest, I wasn't all that that impressed with this motorcycle-scooter blend. But I also realized the Mini Trail had it's place in the motorcycle universe. It was an ideal bike to learn on. No clutch, gentle performance, and unlike most minibikes of the time, this miniature motorcycle had a real suspension and one of the most dependable engines in motorcycling history.
It wasn't until later in life that I really appreciated the ingenuity this remarkable little piece of machinery represented. This was the VW Bug of the motorcycle world. Easy to learn, fun to own and dead reliable. An absolutely perfect blend of all the things needed to make this one of the most beloved motorcycles of all time. These days, a fully restored Mini Trail can bring more than $8K on Bring A Trailer or at a Mecum auction. Not bad for a bike that cost less than $500 on the showroom floor in 1970. Some museum-quality examples have sold for over 10k!
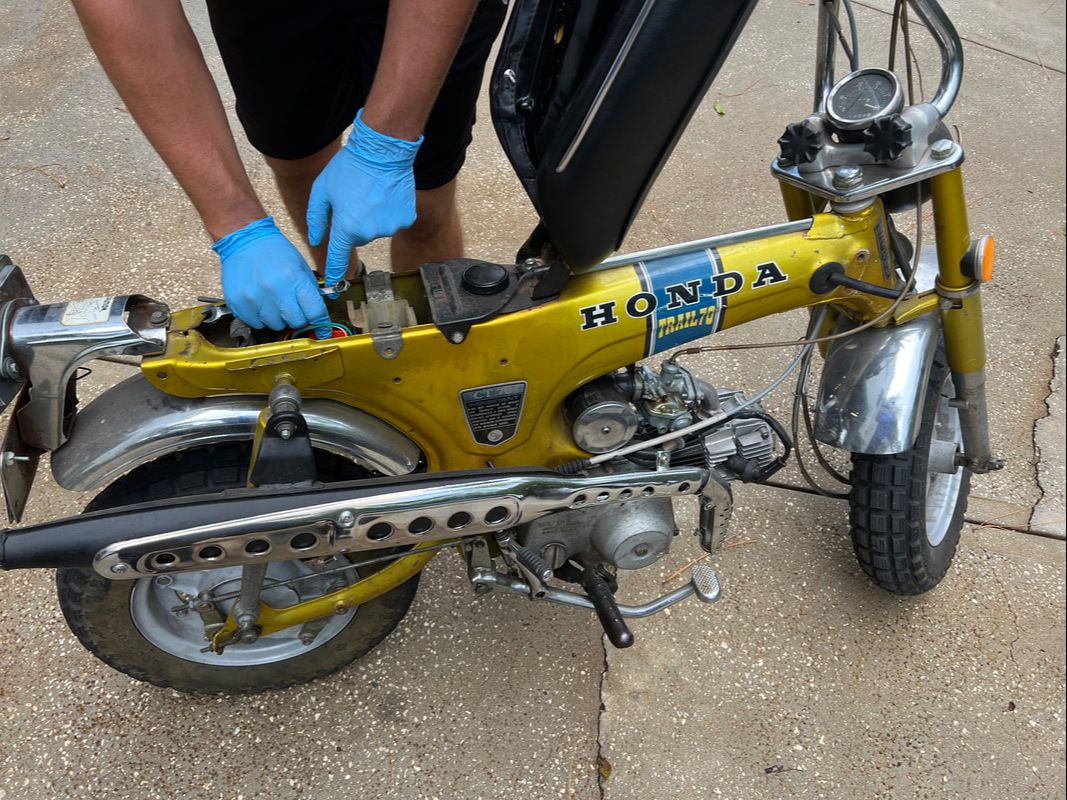
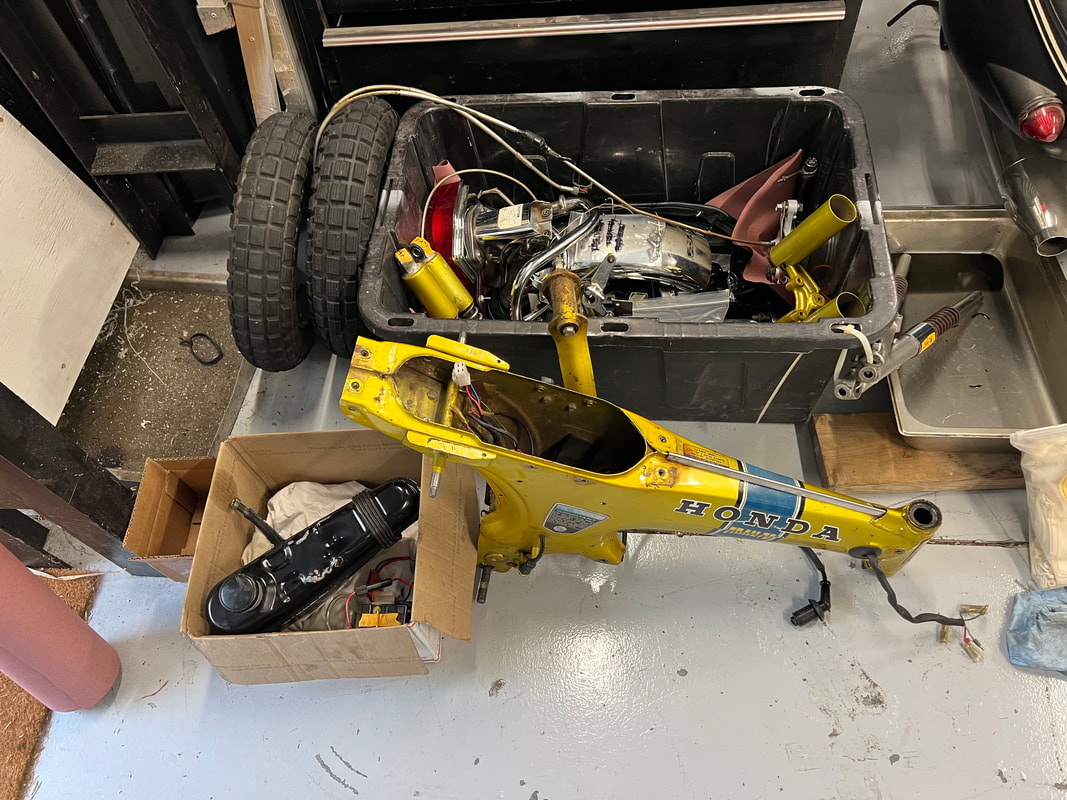
In August of 2022, Oliver and I were extremely busy at VBB with several extensive projects and we really couldn't take on another frame-off restoration. This little Honda was brought to us to resolve a few "minor" engine issues. The customer was patient, communicated frequently and agreed to acquire any parts that may be needed for the bike. So, we found a little room in the back corner of the shop, and there it sat for a couple of months before we had a chance to explore those "engine issues."
So, by the time I first threw a leg over a Mini Trail in seventh grade, I had already ridden some of the best performing motorcycles of the day. And, to be honest, I wasn't all that that impressed with this motorcycle-scooter blend. But I also realized the Mini Trail had it's place in the motorcycle universe. It was an ideal bike to learn on. No clutch, gentle performance, and unlike most minibikes of the time, this miniature motorcycle had a real suspension and one of the most dependable engines in motorcycling history.
It wasn't until later in life that I really appreciated the ingenuity this remarkable little piece of machinery represented. This was the VW Bug of the motorcycle world. Easy to learn, fun to own and dead reliable. An absolutely perfect blend of all the things needed to make this one of the most beloved motorcycles of all time. These days, a fully restored Mini Trail can bring more than $8K on Bring A Trailer or at a Mecum auction. Not bad for a bike that cost less than $500 on the showroom floor in 1970. Some museum-quality examples have sold for over 10k!
In August of 2022, Oliver and I were extremely busy at VBB with several extensive projects and we really couldn't take on another frame-off restoration. This little Honda was brought to us to resolve a few "minor" engine issues. The customer was patient, communicated frequently and agreed to acquire any parts that may be needed for the bike. So, we found a little room in the back corner of the shop, and there it sat for a couple of months before we had a chance to explore those "engine issues."
This bike was brought to us because it was unreliable - a very un-Honda-like condition. Our primary inspection found the valves and timing adjustments were off, the carb was dirty, jets were clogged and the fuel tank was rusted. The automatic clutch and the kickstart were slipping. Additionally, the battery wouldn't hold a charge and there were problems with shorts in the wiring harness. There was also a potential issue with the alternator. We made a punch list and quickly resolved this issues. The next day we were test riding the bike. The little Honda wasn't ready for delivery yet, but it was running again. Our next step was to change the oil. That's when the project went from a minor repair to a nearly full, nut/bolt restoration.
The CT70 doesn't have a replaceable oil filter. Instead, it uses a centrifugal filter. Cleaning this requires significantly more work than replacing a paper filter, so it's not uncommon to find that one of these 50-plus year old bikes may never have had a complete and proper oil change. That was the case with this bike. The oil trap was full of a thick sludge. This had already started blocking oil passages.
We were able to make it run, but quickly discovered engine issues.
|

This is some of the sludge we found in the centrifugal filter.
|
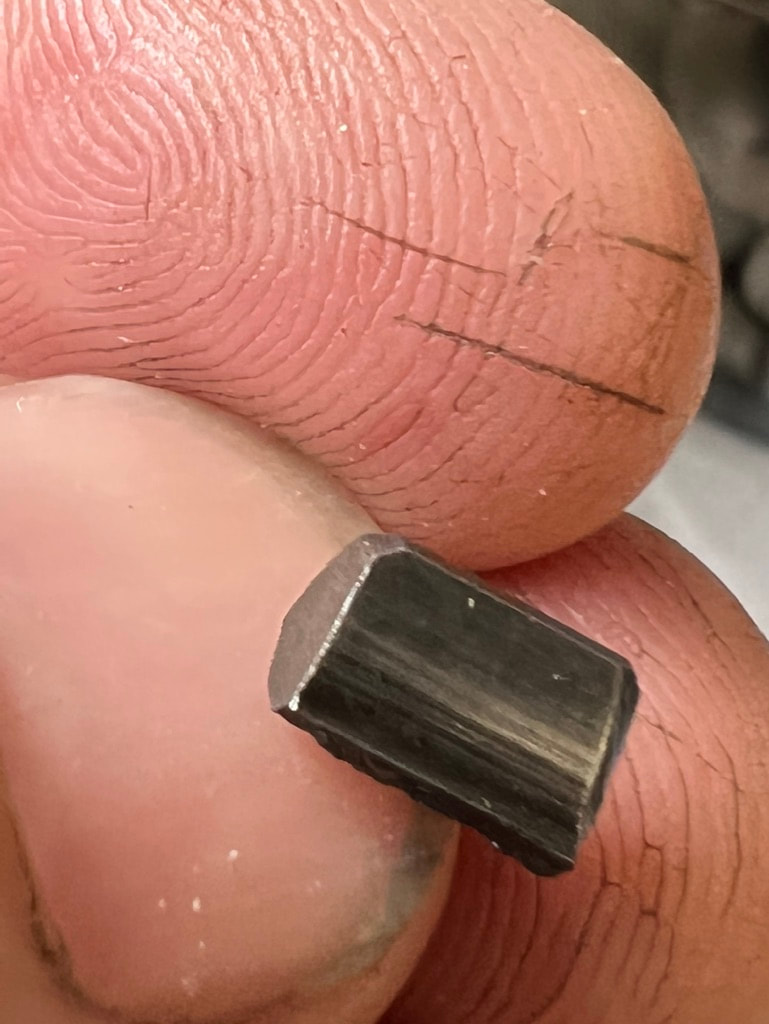
This is a piece of the starter gear. There were several bits like this in the bottom of the crankcase.
|
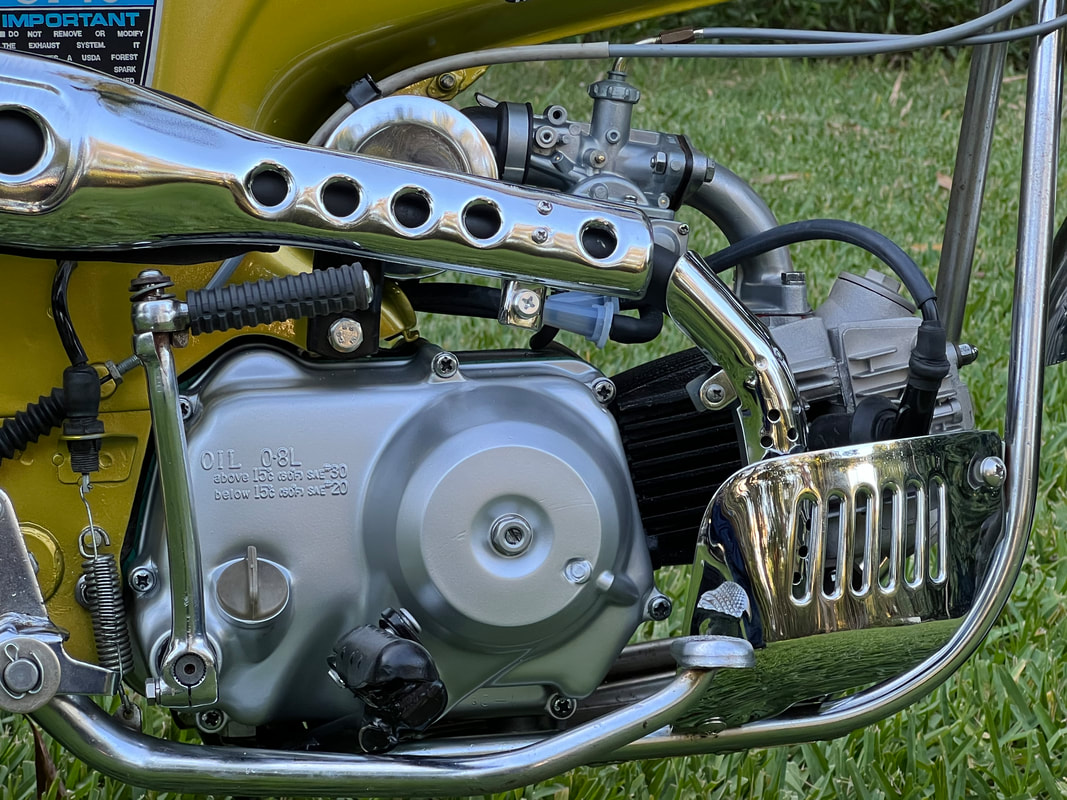
We sent pictures of our findings to the customer. To his credit, he wanted the bike right, no matter the cost. So he gave us the go-ahead on a full engine rebuild. He understood we only do things one way. We tackle engines the same way we restore motorcycles - with great care and thoroughness. Our goal was for the engine to not only look factory new, but run like it. The list of damaged parts was long and expensive. The cams were shot, as were the lifters and valves. The cylinder and piston were deeply scored. The threaded end of the crank had been stripped by a ham-handed mechanic. The starter gear was damaged. The automatic clutch was in bad shape. The list kept growing with every part we removed. Fortunately, the customer wanted the bike right. He didn't want a new LiFan CT70 clone engine (which would have been much cheaper). He wanted OEM Honda parts (where able) so he set about the task of lining up the ever-growing list of parts we needed.
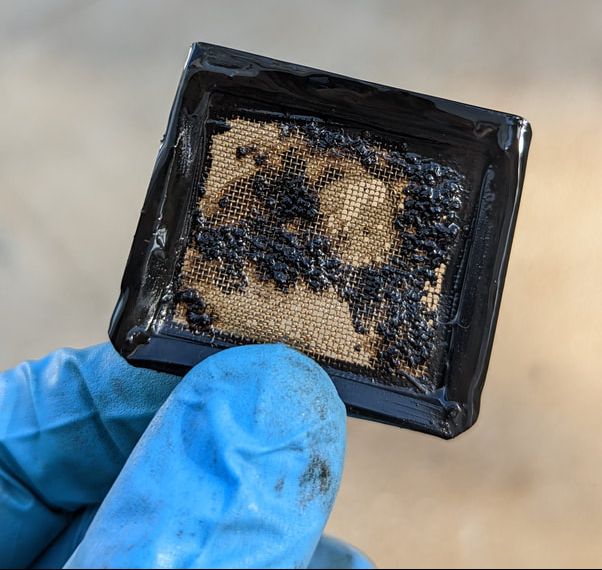
This heavily clogged oil screen was a harbinger of sludge and destruction we would find once we dissembled the engine.
|
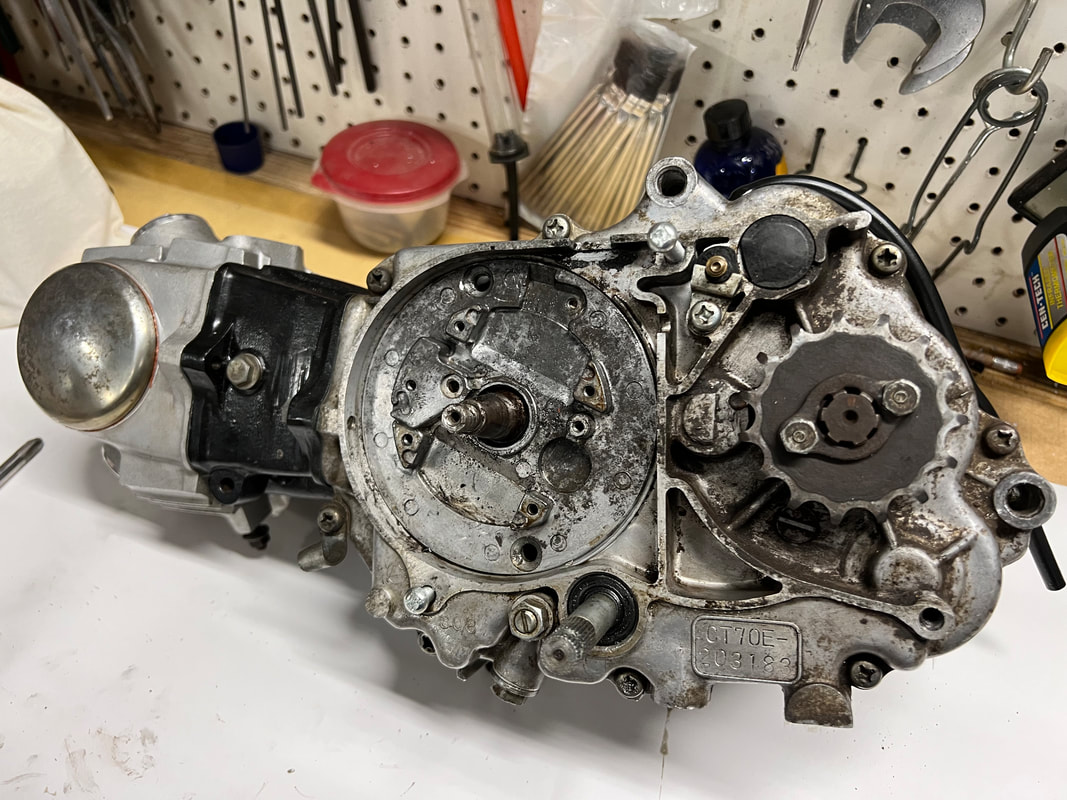
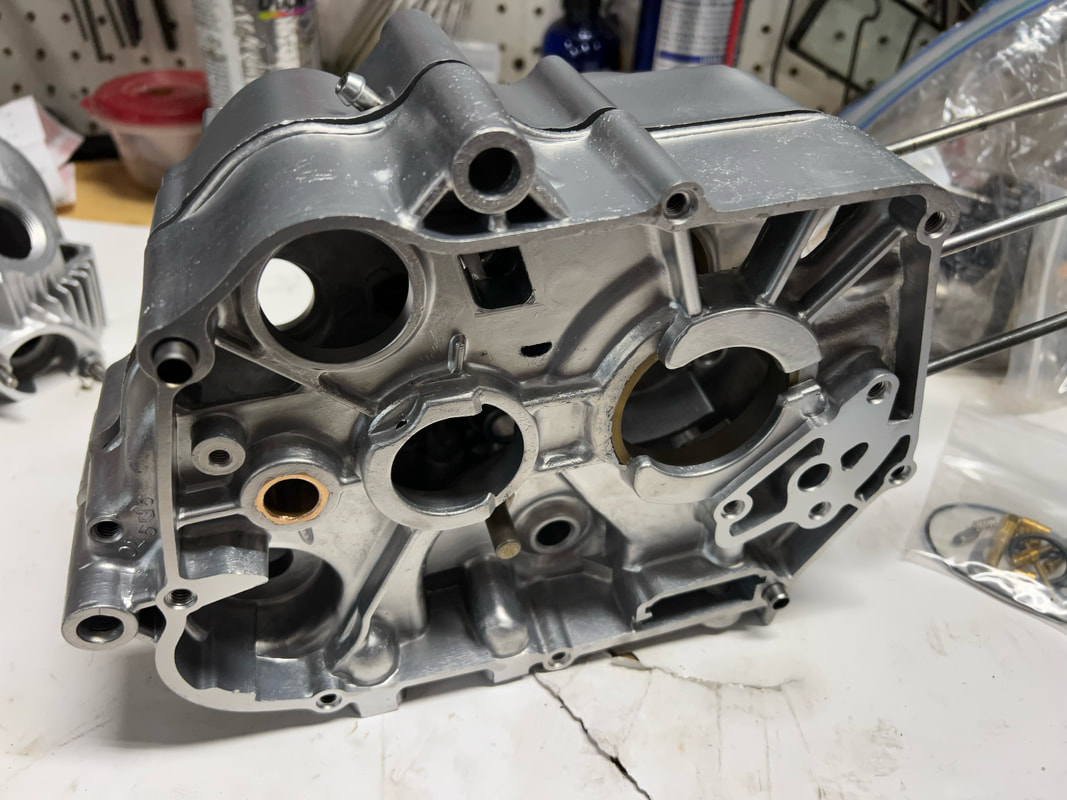
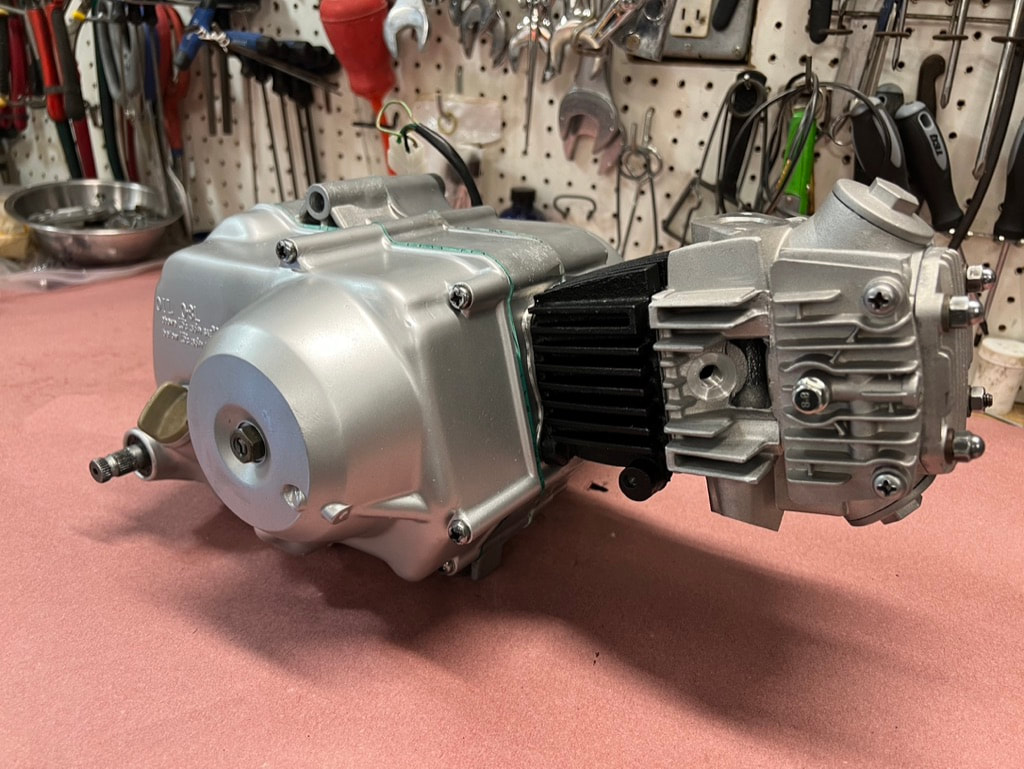
The engine at the beginning of disassembly.
|
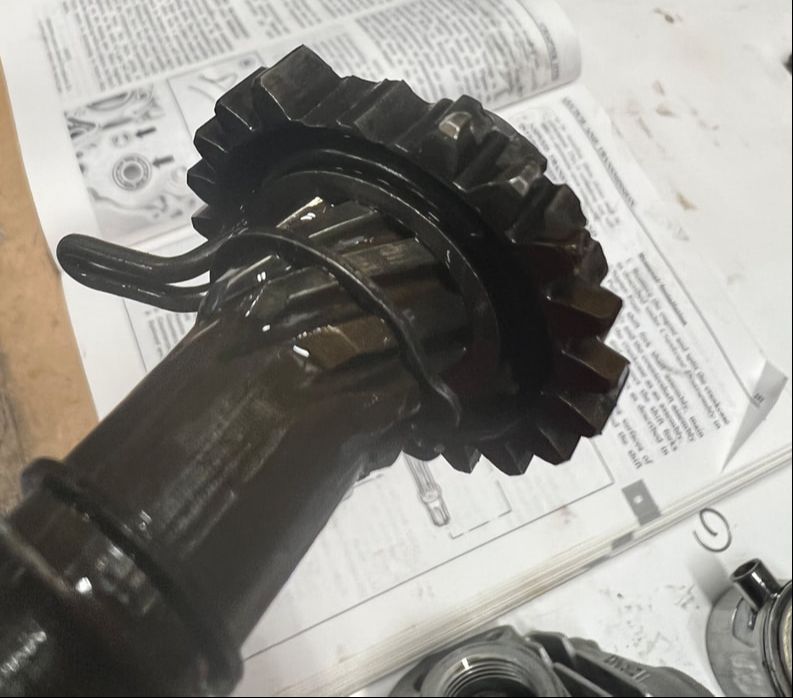
The gear teeth we found in the bottom of the crankcase were from this kickstart gear.
|

This is some of the oil sludge that coated the engine and blocked oil passages. The engine was minutes away from seizing when we took it apart.
|
All of the engine components were thoroughly cleaned and then sent to our Vixen vapor blaster. This gave us a factory new look.
|
The first assembly: The customer had a really hard time finding a crank, so he purchased a stroker crank and we installed it. Unfortunately, the crank was out of a CT90 which would have required a lot of modifications to the stator, magneto and flywheel. He ended up getting a used crank and had new bearings and a new rod installed. This was a much better solution.
|
We are obsessive when it come to cleanliness and engine assembly. This is the bottom end nearing completion.
|
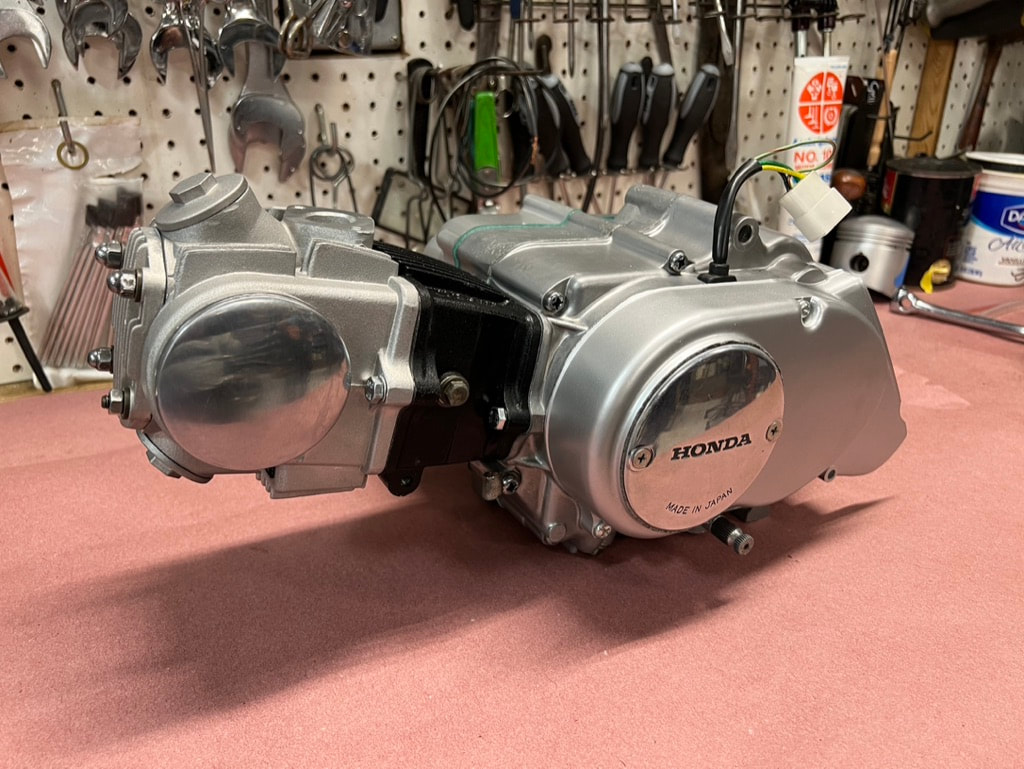
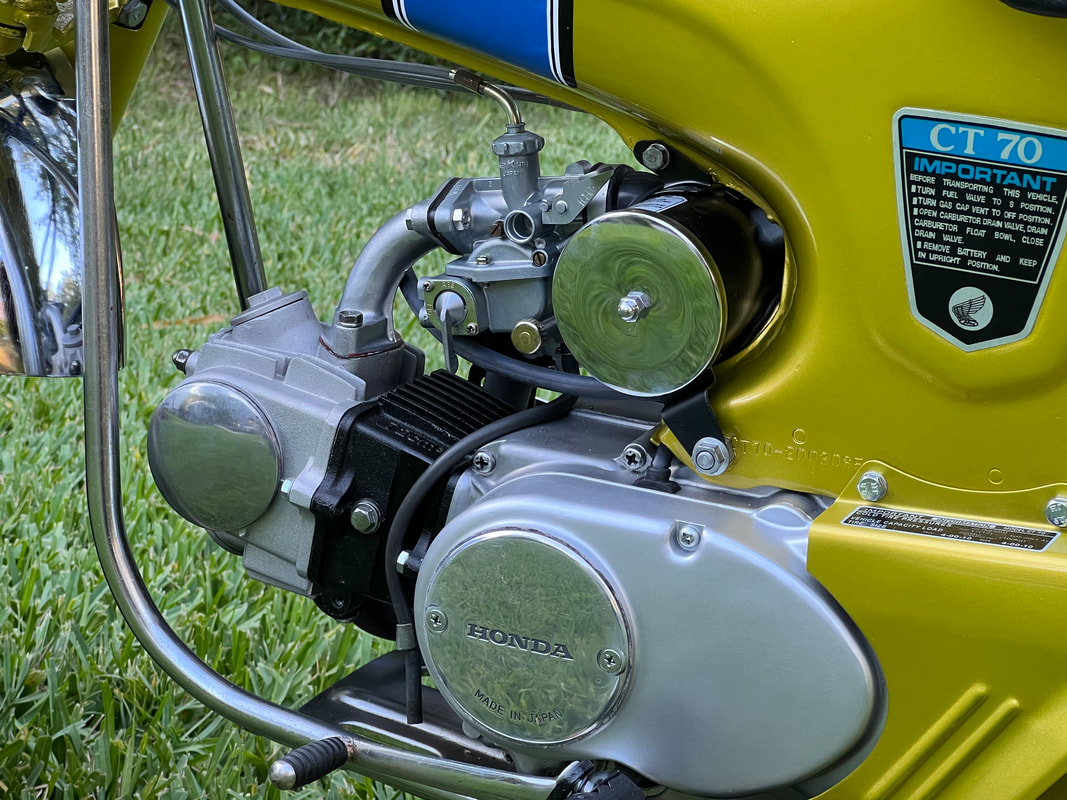
The engine with new crank, cylinder, cylinder head and clutch installed. Almost factory new!
|
Where possible, we use the same finishes that were used during the original factory assembly. In this case, the outer covers were painted with an exact match paint supplied by MarblesMotors. We also polished and painted other parts as needed.
|
The customer had a really difficult time finding a good, original crankshaft for the CT70, so he opted for a high-performance stroker crank out of Taiwan. But this crank caused more problems than it solved. It was advertised as a correct fit for a 1971 CT70, so when it arrived, we unboxed it, gave it a quick inspection and installed it. After all, it was factory new. Our mistake. For the "stroker" crank to work, we also had to find the right height cylinder and piston combination. That wasn't hard as there are a lot of performance parts made for this engine, but it was an additional expense. That wasn't the BIG PROBLEM though: Unfortunately, we didn't discover this issue until we had the engine almost completely reassembled. We discovered the crank had been advertised incorrectly. It was a stock crank out of a CT90. It looks almost identical, and while it fit in the cases (with a slight modification to the oil pump drive shaft), the end of the crank was too large for the flywheel and also a few millimeters longer, which would require installing a CT90 outer case. Doing that would completely change the look of the engine and would require several additional parts we didn't have, so this crank was not a good solution. Within a few days, the customer purchased a decent used crank and then sent it to a re-builder who replaced the old rod and bearings, and then sent it back to us. We were finally back in business and ready to finish this project. We installed the rebuilt crank and completed the engine in a few hours. After that, we put the engine back in the frame and ran some tests.
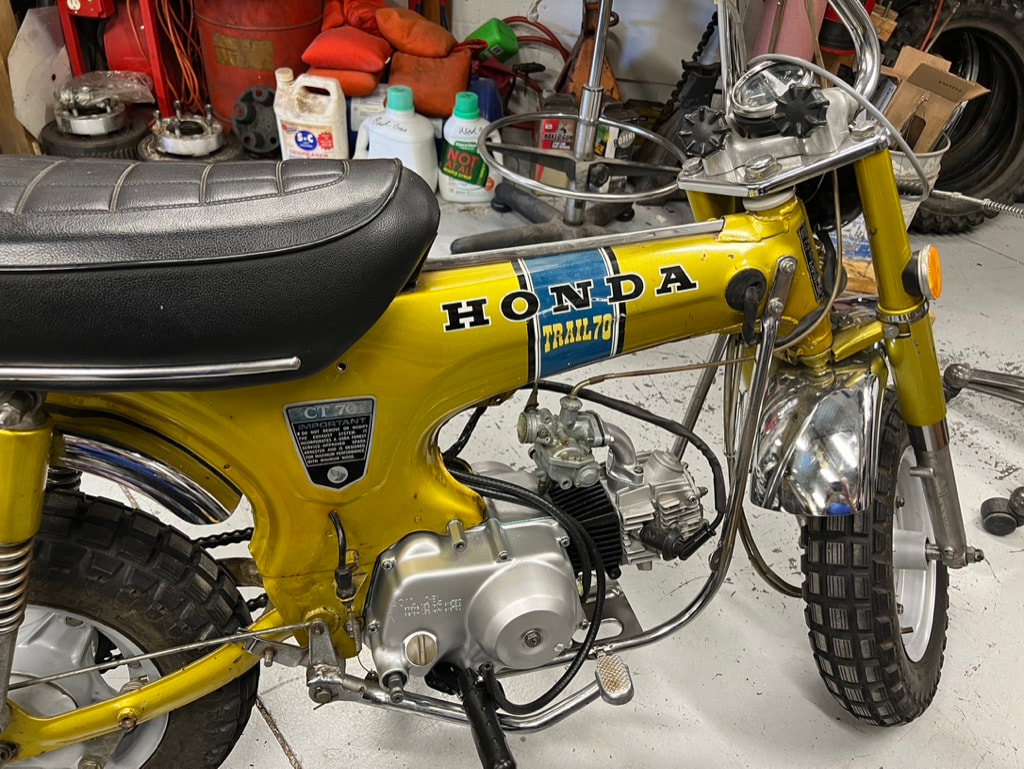
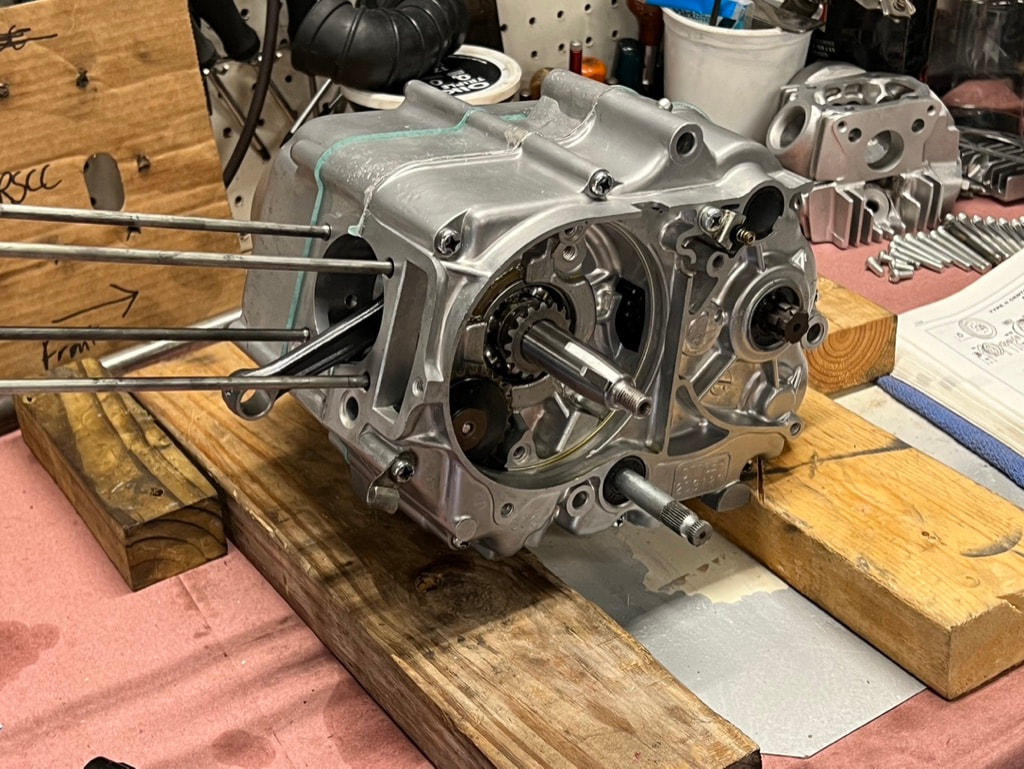
With the engine back in the frame, it was time for some testing.
|
|
After hearing the good news about how well the engine ran, the customer decided to make the rest of the bike look as good as the engine. This began a frame-off restoration of the CT70. There were some original components still in really good shape, like the seat and fenders. These were cleaned up and used as is. There were other parts, like handlebars, exhaust and speedometer that needed replacing. Every nut and bolt was removed, cleaned and brought back to original, factory-new condition. The only items that weren't touched by us were the wheels. The wheels had been previously painted by a previous owner, and while not quite the exact color, they were suitable for this project (although upon deliver, the customer decided to replace the tires and paint the wheels in the near future). While a complete restoration, this Mini Trail was restored for riding, not as a museum piece. So we had a little flexibility with the things like the wheels and fenders.
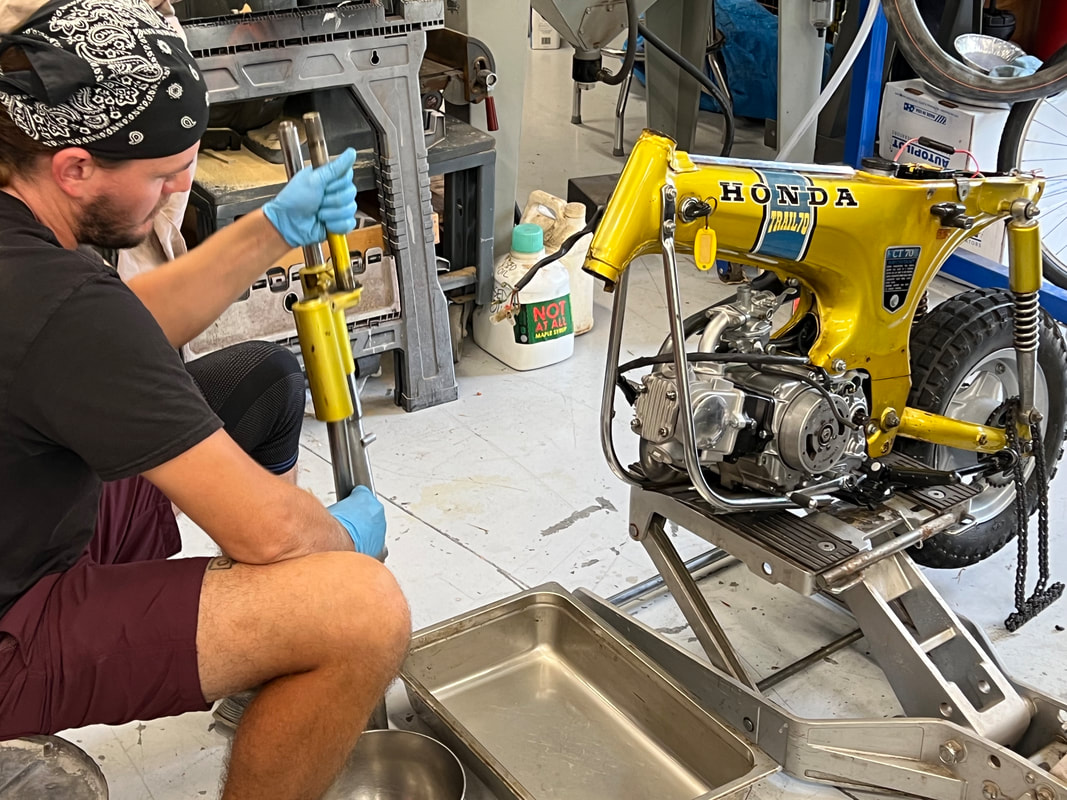
Oliver begins disassembly by removing the front forks. We replaced the seals and serviced the steering head bearings.
|
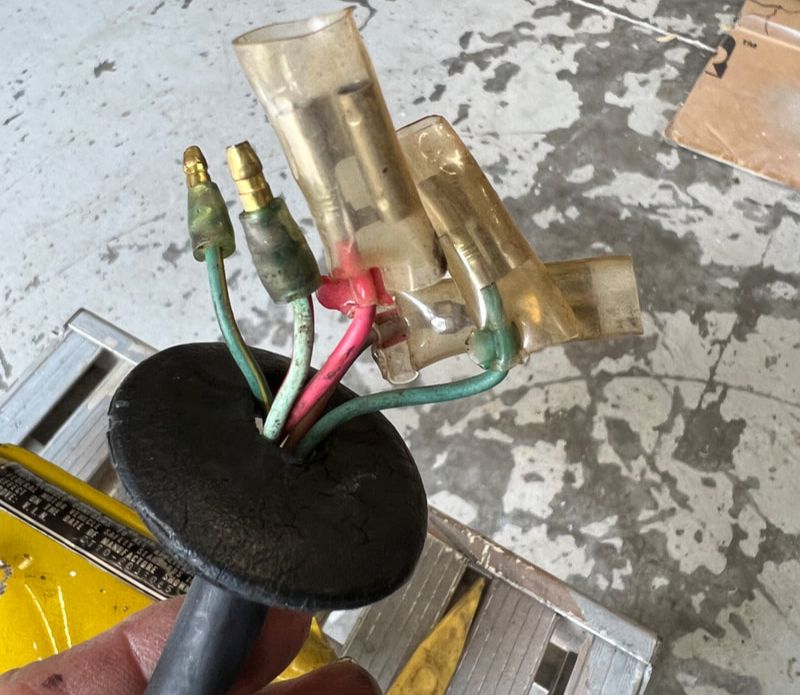
We were able to reuse the harness, but repairs were necessary.
|
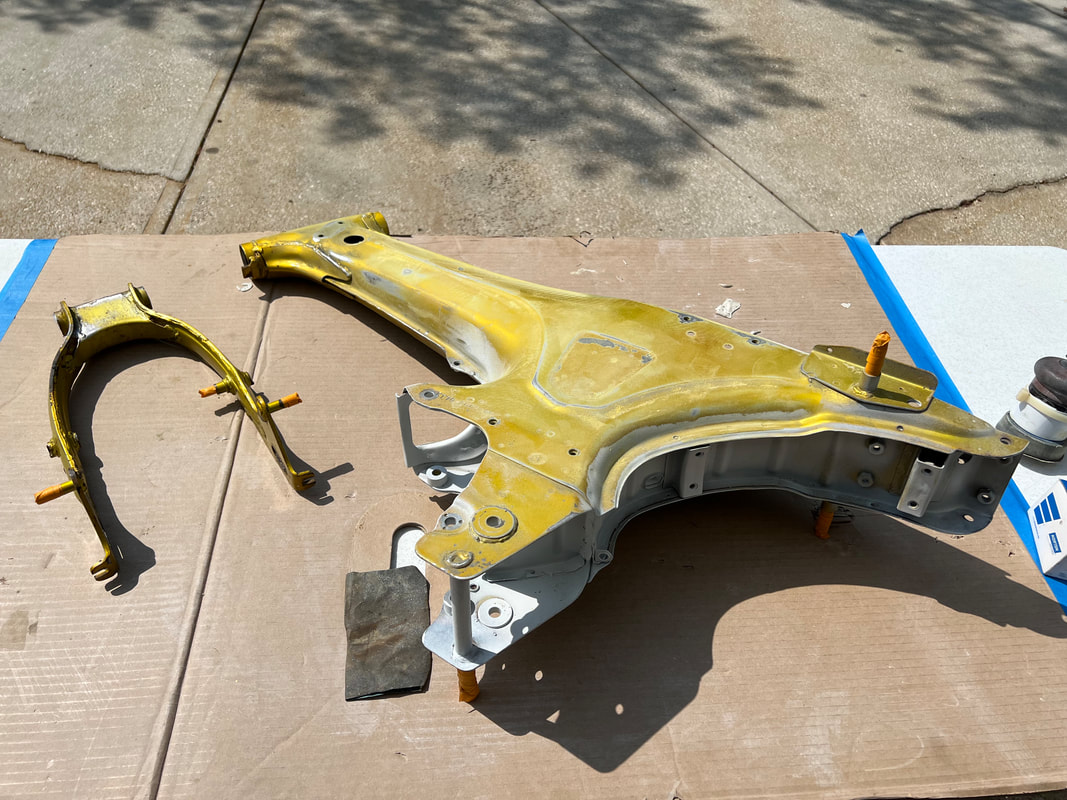
The frame completely disassembled and ready to begin prep for painting
|

This was a shock compressor I made for the CT70 shocks. These are smaller than standard motorcycle shocks and our other compressor wouldn't work with these.
|
The frame being stripped and sanded. Next step after this was a high-quality urethane primer.
|
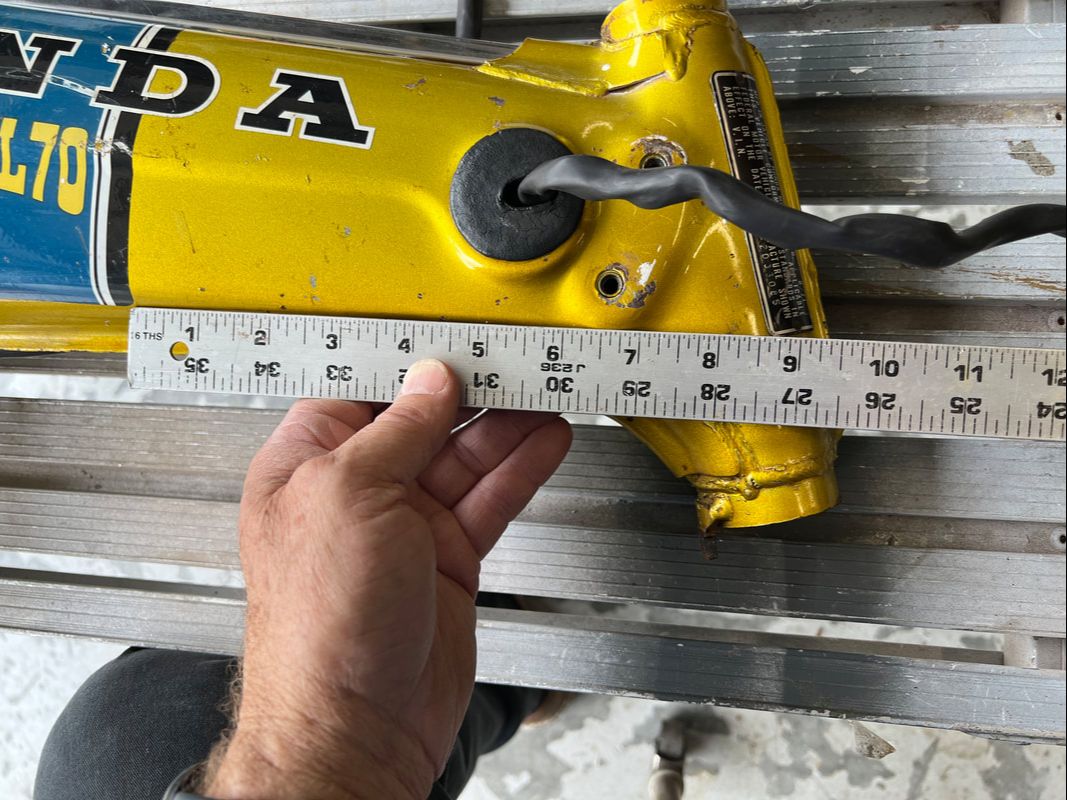
Measuring the exact location of the decals was an import step for restoration accuracy.
|
This is the frame and other painted components after our base-coat was applied. This paint was matched exactly to an area under the decal that was not faded.
|
Getting the paint right is an involved process, usually involving days of work, if not weeks. In this video we're putting on a coat of high-solids, urethane clear coat.
|
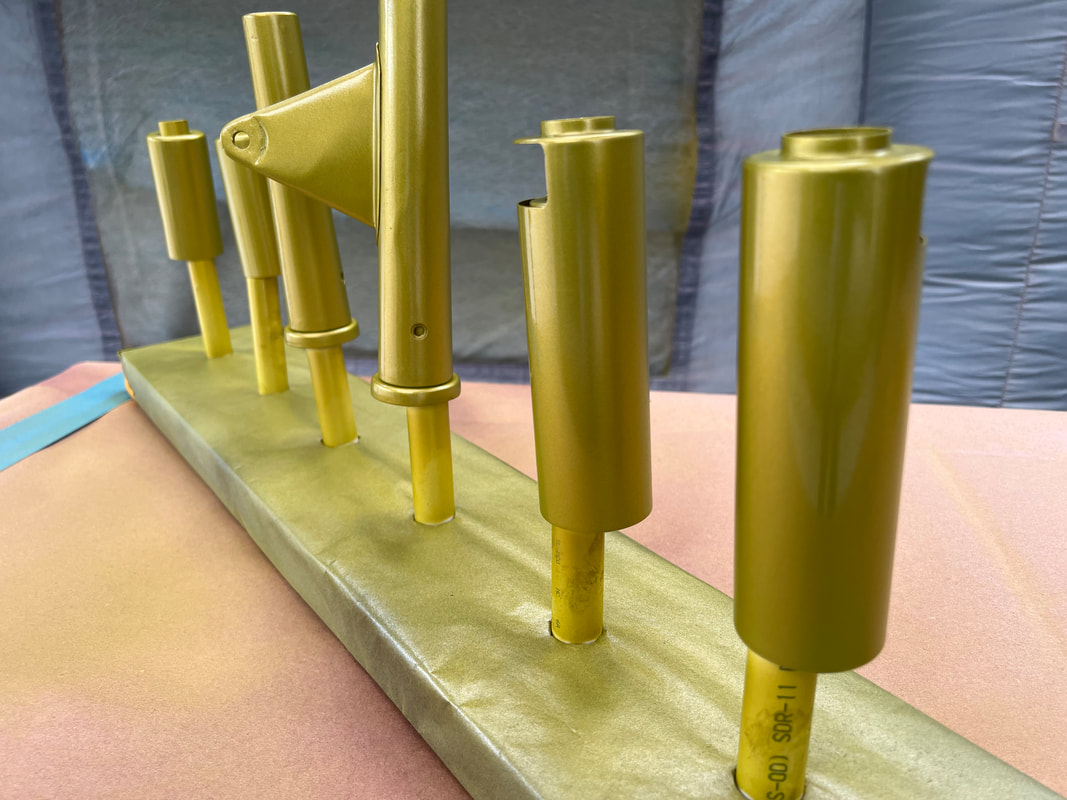
Sometimes, it's necessary for us to build custom paint stands to hold smaller parts securely in place. This allows to to have a perfect application of paint without the worry of spots being missed or parts being damaged.

The original lower side decals were printed on a thick foil. This was done to hide several spot welds in the frame where they are located. Had we used the decals as delivered, those spot welds on this bike would have been visible. So we first mounted the decal on a sheet of .032 aluminum, carefully cut them out and then glued them to the frame.
|
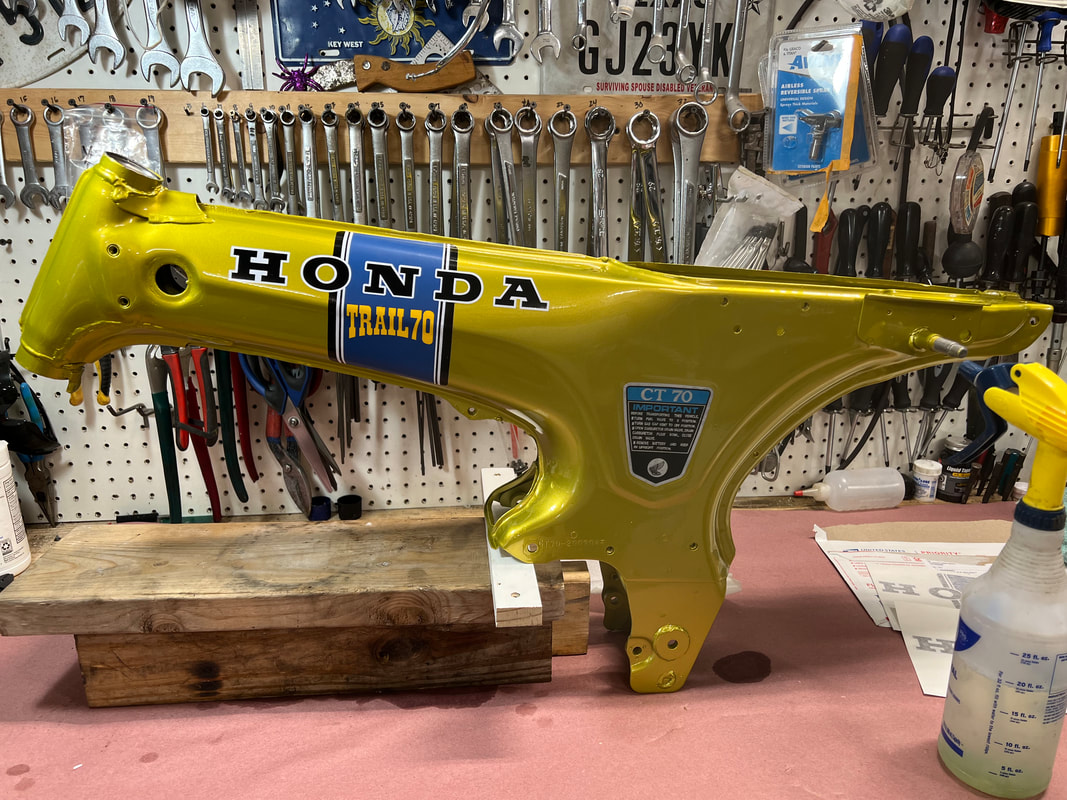
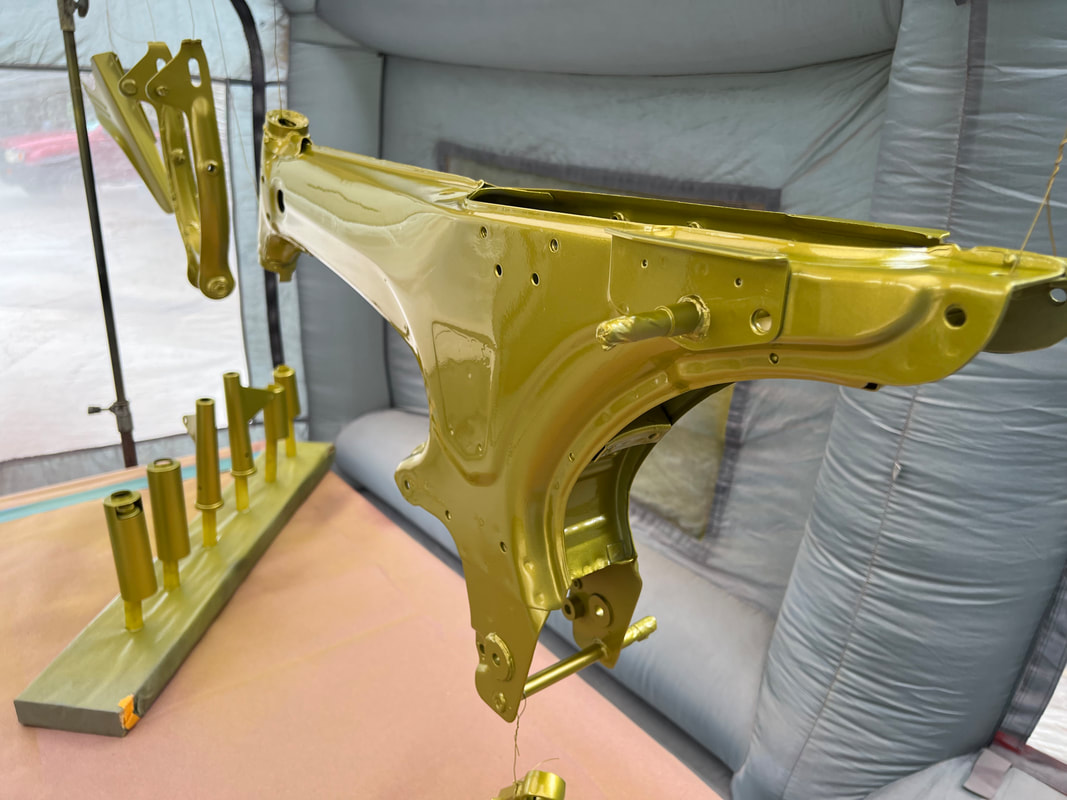
The recently painted frame with decals in the correct location.
|
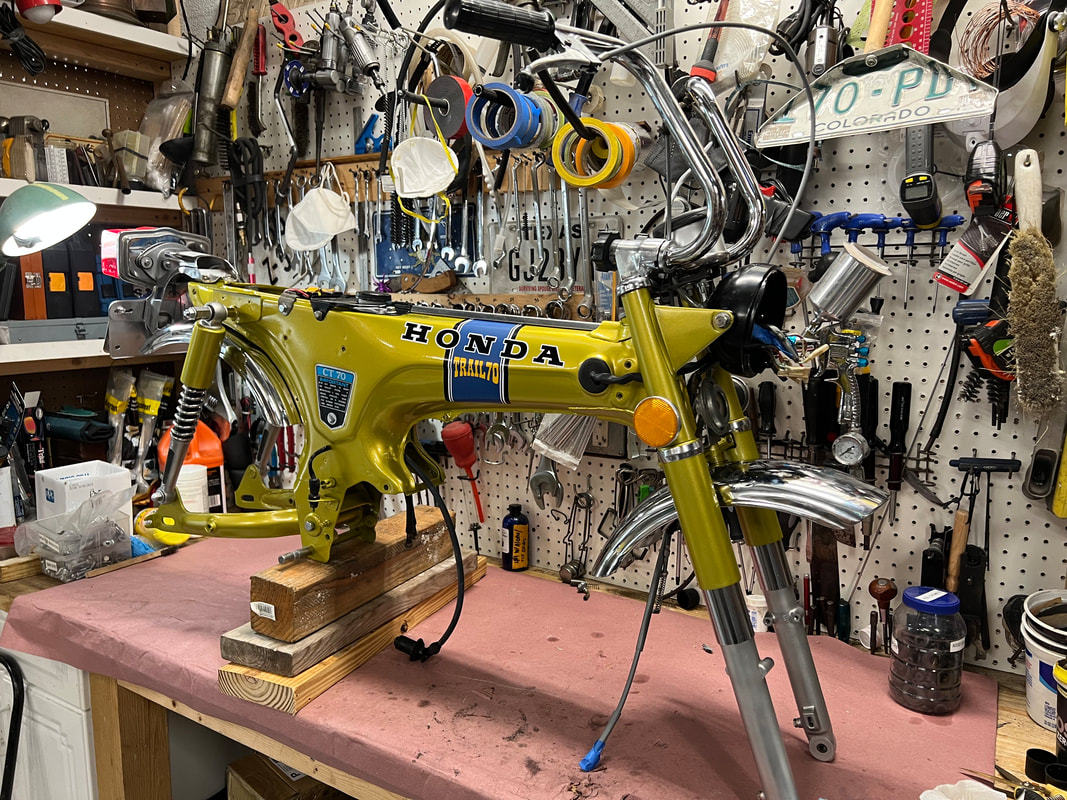
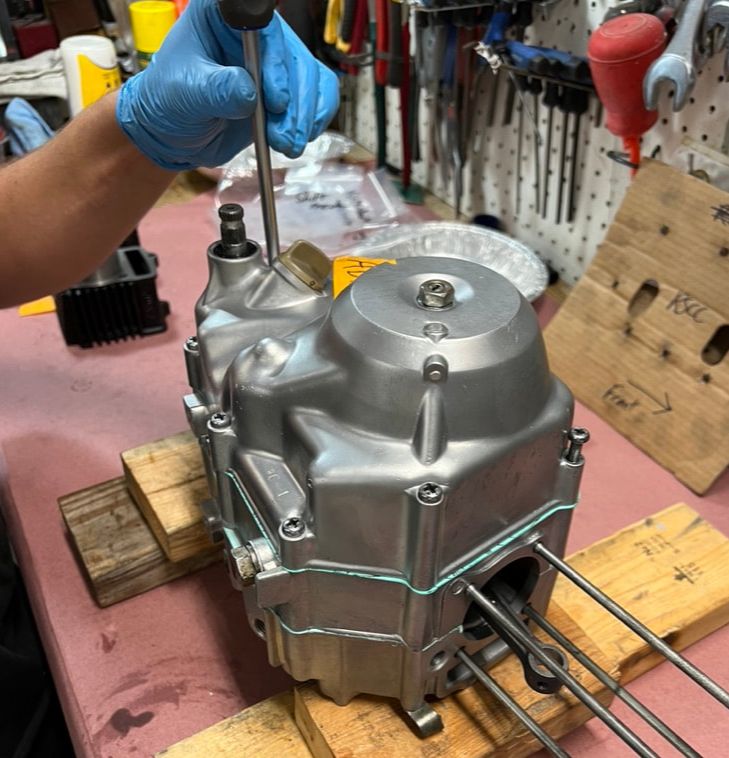
We assembled as much of the bike as possible on the bench. The small size of the Mini Trail allows us to put it up on a smaller engine bench rather than one of our lifts.
The CT70 back together and ready for some test rides. Before we ride, we carefully check for any leaks, especially fuel, correct tire pressure, chain tension, carburetor adjustment, brake adjustment and cable adjustment.
|
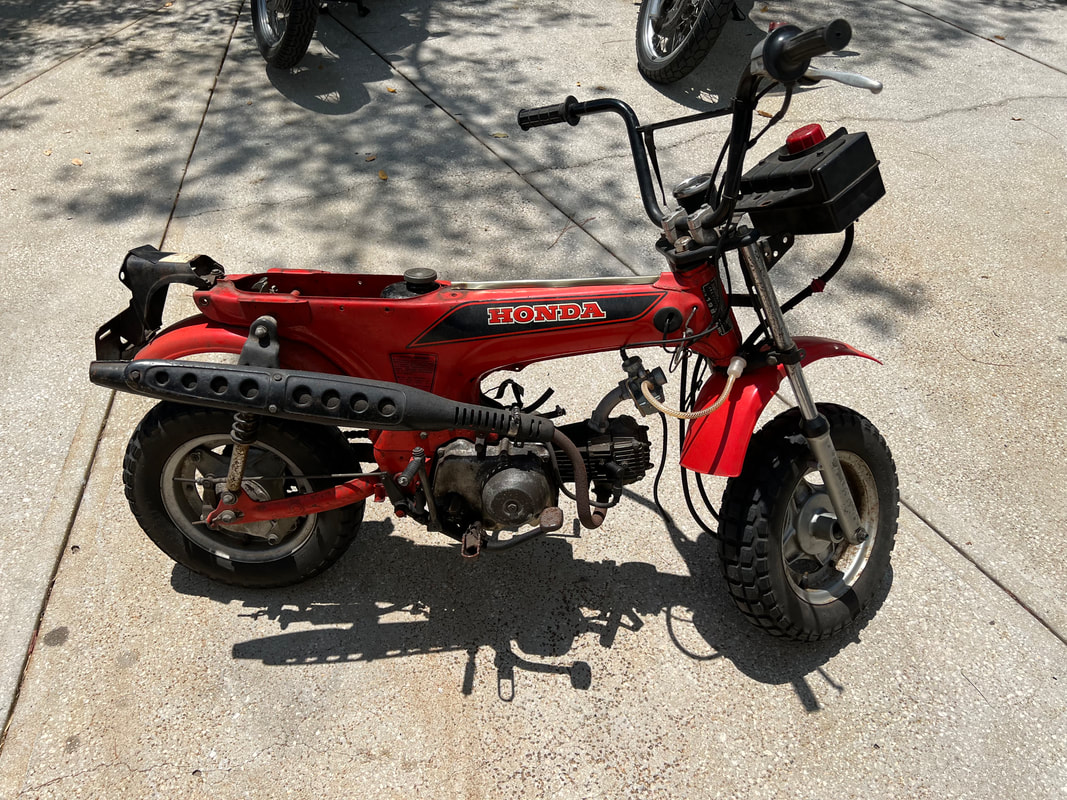
We were having so much fun with our 1971 Mini Trail project, we pulled a 1982 model out of storage and got it running too. Don't blame us for the backwoods engineering (fuel tank and reversed manifold with Mikuni carb). We fixed the original carb and now it runs great, but it's still mighty ugly! We have already begun getting the parts we need to put this one in top shape too.
|
Oliver takes a gentle ride around the block to begin the break-in of the newly rebuilt engine.
Once we had the engine sorted out and the replacement parts in, it only took a couple of weeks to complete this restoration. We are so glad the owner decided to go all in to restore this bike. When we delivered it, it looked and ran like new. It was in fact, a not just a Honda Mini Trail, but a Honda Mini Time Machine!
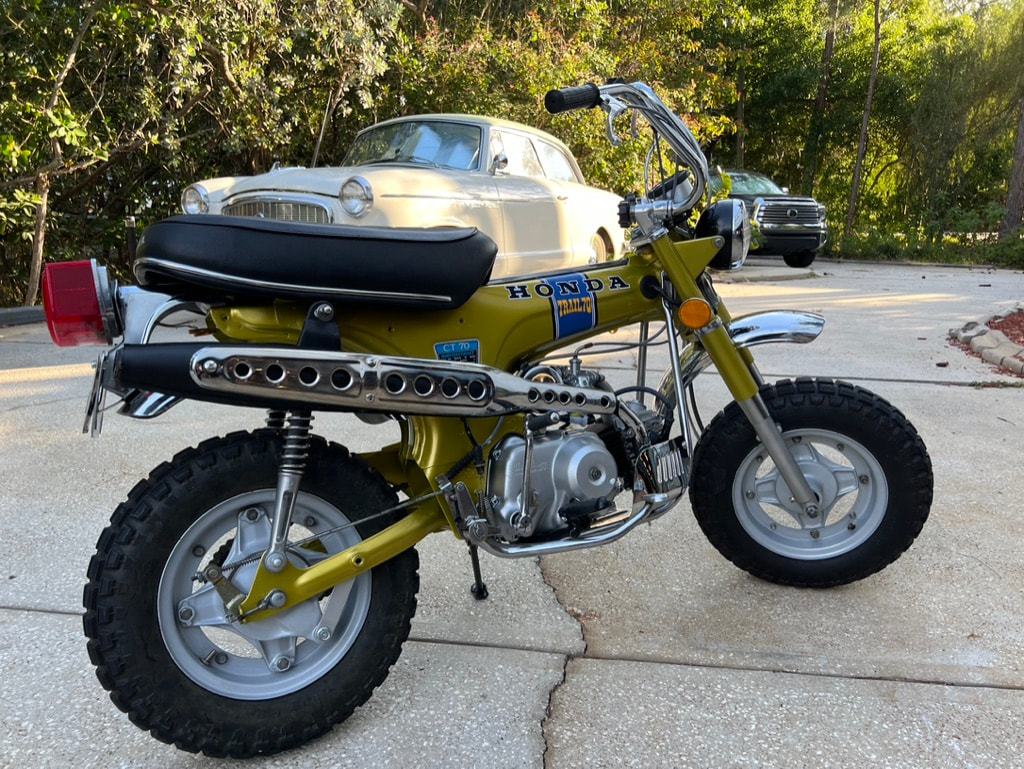
Pictures of the completed restoration
|
|
|
|
|
|
|
|
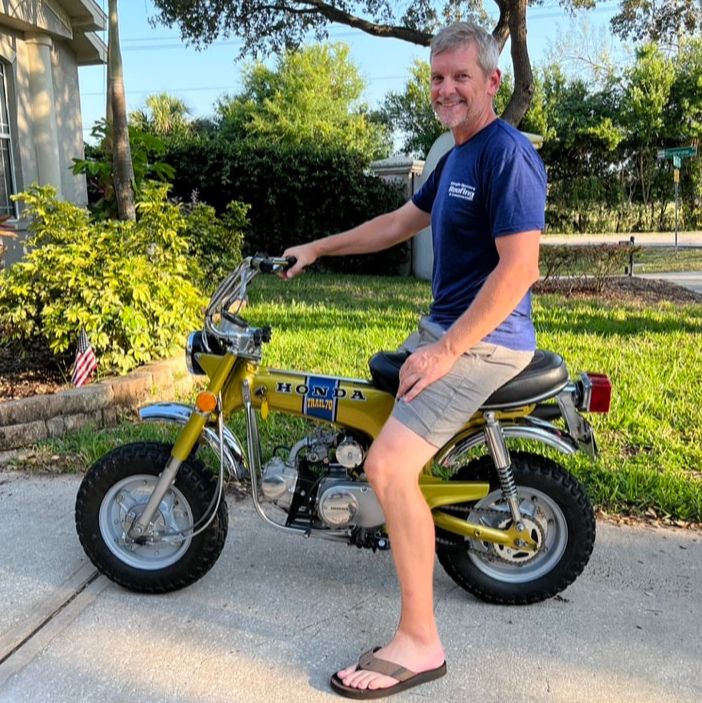
Todd, the happy owner of the CT70, is enjoying his little time machine!
|
Wrapping up our restoration.
|