Setting Float Levels on Mikuni Carburetors
When a new Mikuni carb leaves the factory, the floats are almost always set to factory specifications. Working for a Mikuni distributor, I've had the opportunity to open up and examine hundreds of brand new, fresh-out-of-the-box carbs. It is extremely rare to find a new carb not set to factory specs (or close enough to work just fine).
So why then do float issues exist? There are many possible causes. Float height is maintained by a little, adjustable tab on the float arm. It doesn't take much for that tab to be moved, which immediately changes the level of fuel in the float bowl. That tab can be relocated when disassembling the carb, or with rough handling of the float or float arm. If a carb sits for a long period of time and the fuel turns to varnish, the float can essentially be "glued" to the bottom of the float bowl. I've pulled apart many old carbs where this has happened. Of course, if that happens, there is always the potential for floats to be damaged or the tab spacing altered. Mostly, though, the tab adjustment is going to be altered by rough handling of the carb.
If your bike exhibits symptoms related to the float level being off, it's a good idea to check the measurement. These symptoms are identified in the box below:
Symptoms of a float needing adjustment:
Float too high (too much fuel):
Float too low (too little fuel):
Float too high (too much fuel):
- Starts easy but plugs are fouled
- Rich throughout RPM range
- Flooding fuel from overflow lines
- Fuel puddling beneath the bike when on side stand or center stand
Float too low (too little fuel):
- Difficulty starting the motor (plug dry) - extra vacuum is required to pull fuel up from the bowl. That vacuum doesn't exist when engine isn't running
- Entire rpm range running lean
- Engine running hot
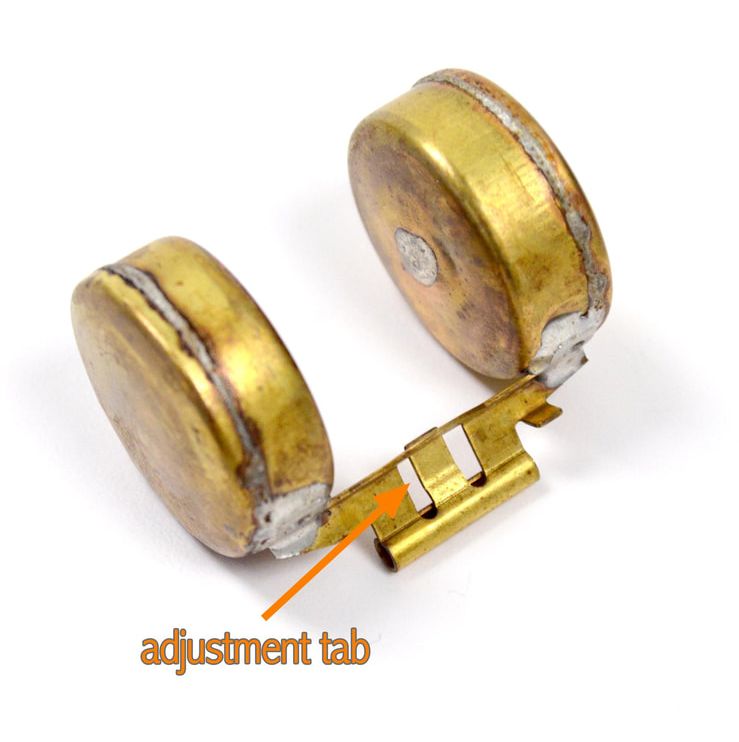
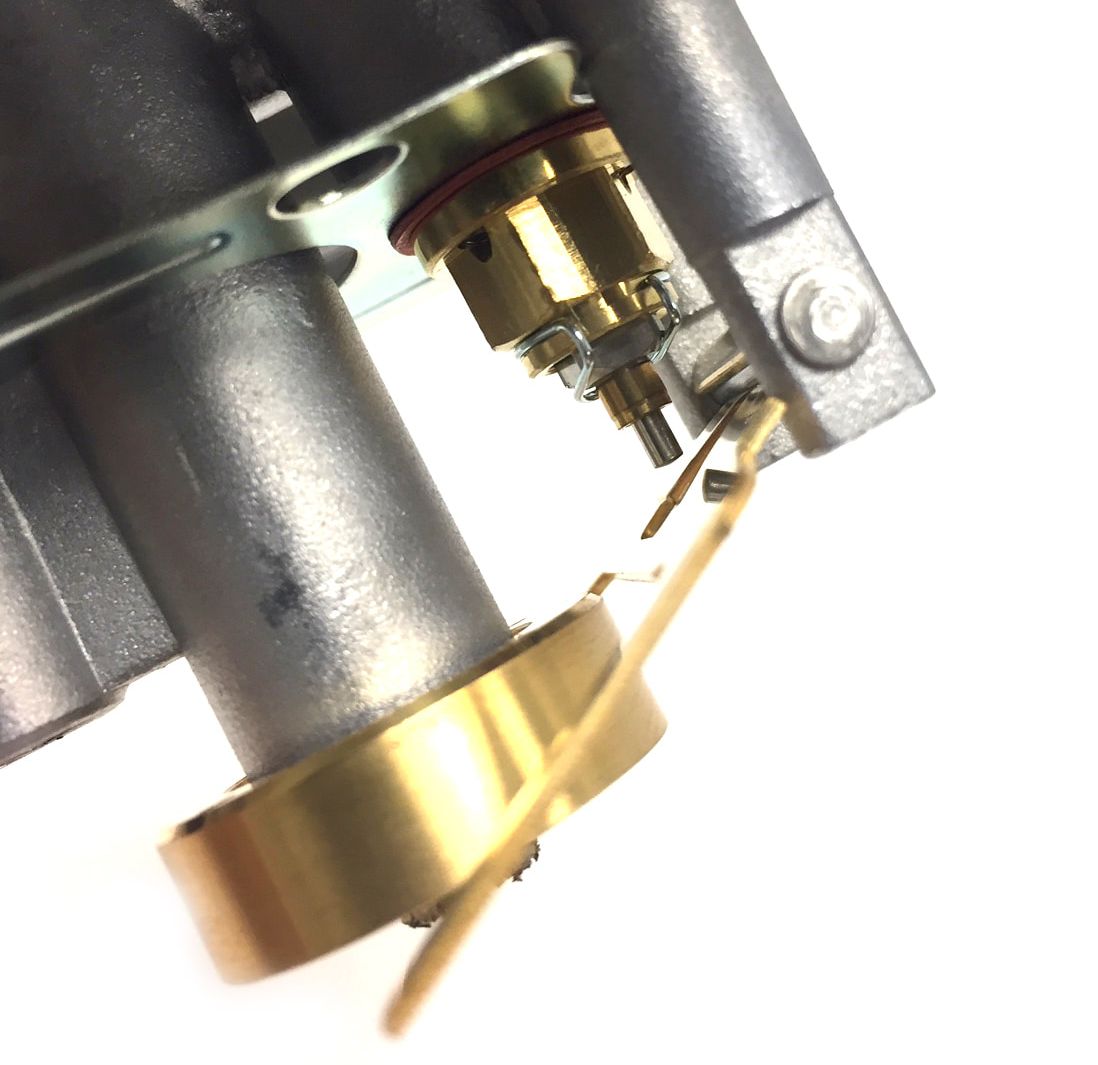
 Old-style bronze-alloy floats on a new VM18 aftermarket Mikuni
What kind of floats are on your Mikuni?
Mikuni uses several types of floats on their aftermarket and OEM carbs. Most vintage, OEM Mikuni, round-slide carbs, have a pair of bronze-alloy floats soldered to a float arm. Some of the smaller, new, aftermarket carbs, like the VM18-144, still use this type of float, but you're more likely to see floats like this on 1970's era two-strokes from Yamaha, Kawasaki and Suzuki.
On these floats, the adjustable tab is located in the center of the arm joining the floats. This tab is centered over the float needle. The tab is nothing more than three cuts in the center of the arm that resembles a three-sided rectangle (see photos below). That way, the tab can be bent without effecting the float arm. This is common to most Mikunis with float bowls.
Most new aftermarket, round-slide and as well as most of the TM flat-slide carbs have two independent floats (not connected by a float arm). These floats lift against an bronze-alloy float arm. That arm, like that the one on the connects the bronze-alloy floats, has an adjustment tab located in to middle of the arm.
The larger Mikuni flat-slide and pumper carbs (HSR, RS, HS, TM33) use two plastic floats joined by a single arm. The TMX off road carb is unique in that it uses a single float which pushes up on an arm that moves the float needle.
The Float Needle
The float needle, which moves within the seat, acts as a valve that either allows or stops the flow of fuel into the float bowl. Mikuni uses two types of needles. One needle is a corrosion-resistant steel alloy, the other has a Viton rubber coating over the tip of a steel needle. Viton is a chemical-resistant, synthetic rubber, fluoropolymer. Both do a good job of sealing. All Mikuni seats are made of a bronze alloy. On some Mikuni carbs, the seat is pressed in and not replaceable.
The float needle, which moves within the seat, acts as a valve that either allows or stops the flow of fuel into the float bowl. Mikuni uses two types of needles. One needle is a corrosion-resistant steel alloy, the other has a Viton rubber coating over the tip of a steel needle. Viton is a chemical-resistant, synthetic rubber, fluoropolymer. Both do a good job of sealing. All Mikuni seats are made of a bronze alloy. On some Mikuni carbs, the seat is pressed in and not replaceable.
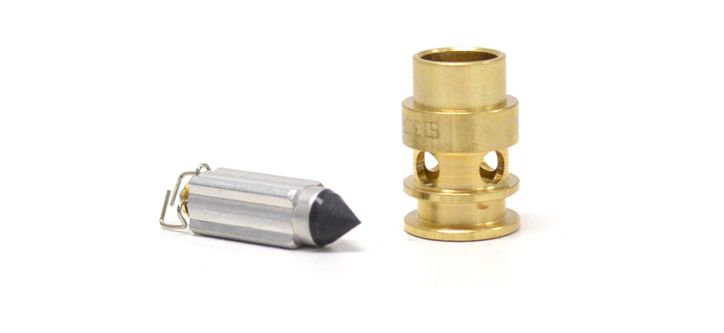
This is a Viton-coated needle
|
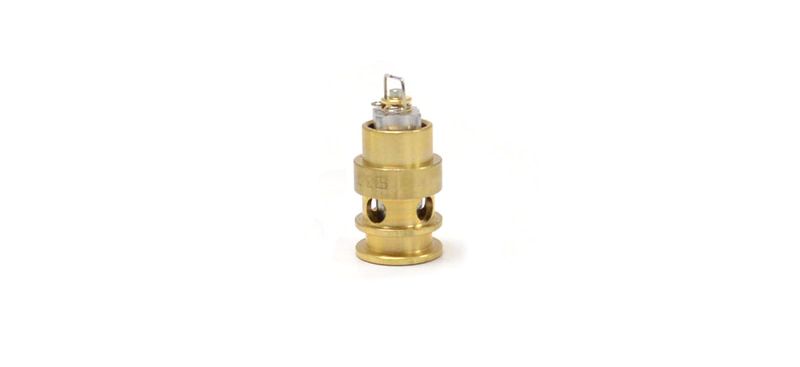
This is the needle inserted in the seat.
|
 The tab can clearly be seen in the middle of the float arm
Adjusting the float level
Floats attached to the float arm:
If the floats are attached to the arm, you'll want to hold the carb on its side to measure the floats (pictured below). Before measuring, make sure the adjustment tab is just barely making contact with the float needle. If you were to hold the carb upside down, the weight of the floats could push against the float needle and give you an incorrect measurement.
First, measure the distance between the top of the gasket surface to the bottom of the float (see image below). There are specialized Mikuni float gauges, but an inexpensive pocket rule is much less expensive (less than $3.00) and works on just about any motorcycle carburetor, not just a few. The Empire Pocket Rule can be purchased online. You can also find them at home improvement or hardware stores like Home Depot or Ace Hardware.
If adjustment is needed, do so very carefully and make very small adjustments. A word of caution: floats are fragile and easily damaged. Be very careful when adjusting the float. Use care when grasping the float and pay attention to how much pressure you exert on the float while adjusting it. If you put the carb down on a bench without the float bowl attached, be sure the carb isn't resting on the floats. It's a good idea to make sure nothing ever touches the floats. Resting the float against an object can cause damage as well as take it out of adjustment. A one millimeter adjustment can have an effect on the fuel/air mixture, so make small, precise movements of the tab. The best tools for moving the tab are a tiny pair of needle nose pliers, hemostats (like those used by physicians and hobbyists) or a micro-screwdriver. These tools can be purchased online or through retail stores like Harbor Freight Tools, Home Depot or Lowes.

The Empire Pocket Rule is perfect for measuring floats and it's really inexpensive!

When floats are attached to each other, measure from the bottom of the float to the base of the float bowl gasket surface
|
The adjustment tab can be clearly seen in this photo
|
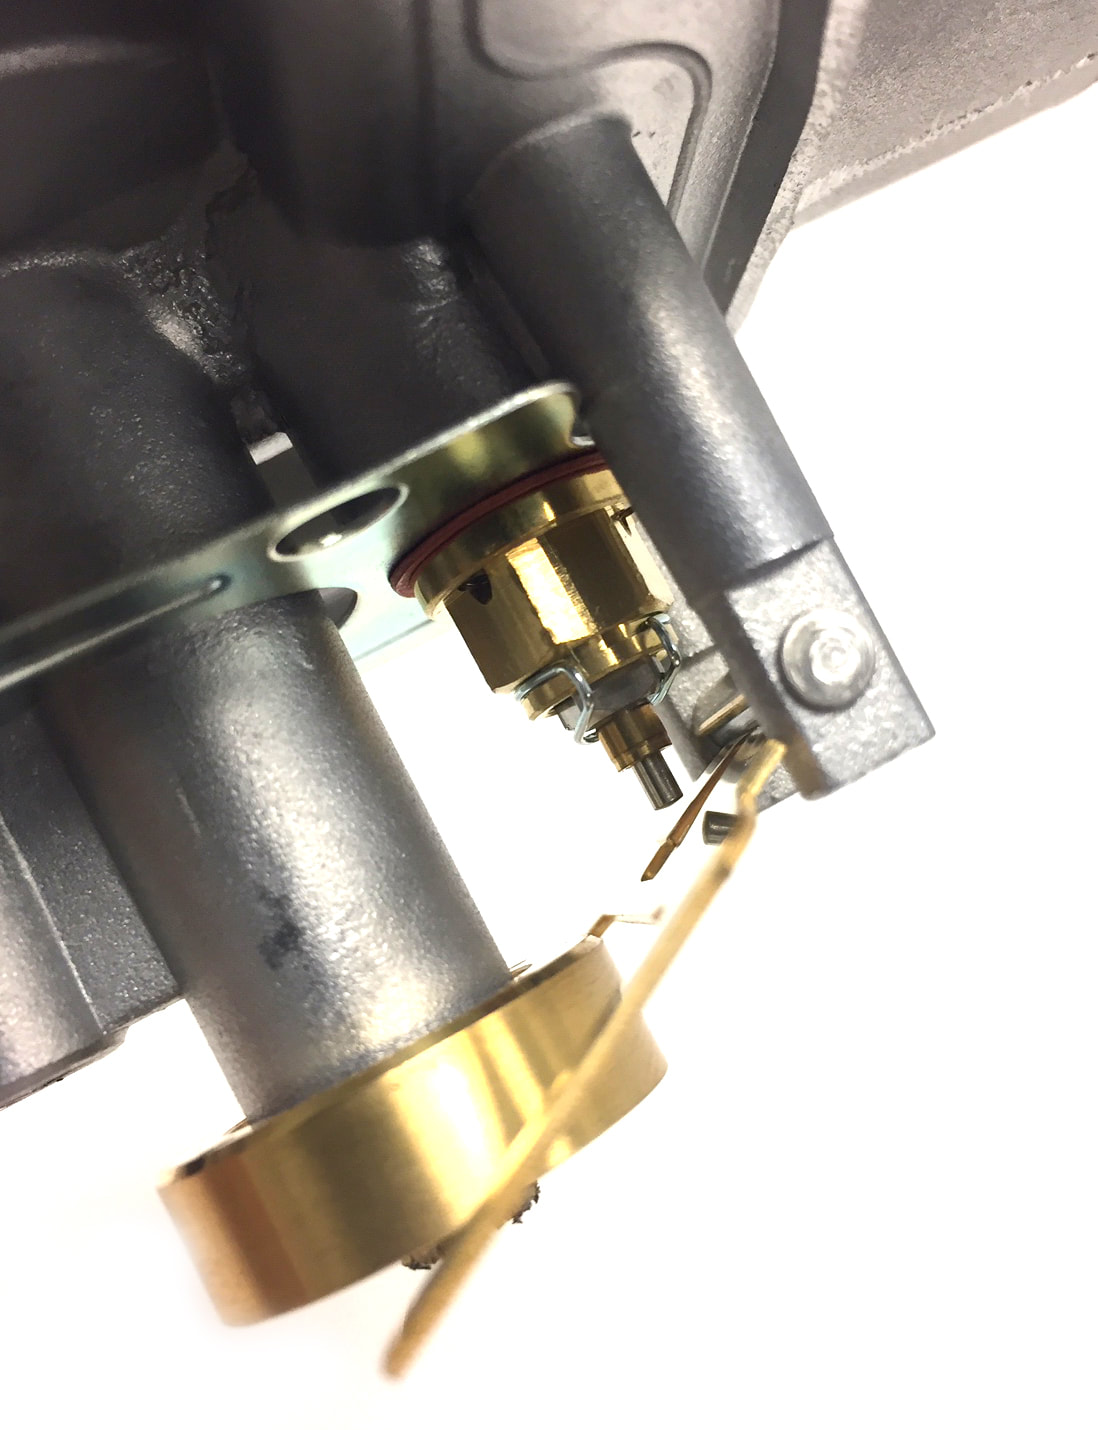
 In this picture you can get a clear picture of the relationship of the float arm to the float needle
Floats independent of the float arm:
The process of measuring floats, not attached to the float arm, is nearly identical to the process of adjusting floats that are attached. Instead of measuring from the gasket base to the bottom of the float, you'll measure from the gasket base to the top of the float arm. As with floats that are attached, it is important to measure the float with the carburetor on its side. Again, the reason for this is to eliminate any possibility of a maladjustment due to pressure being put on the needle valve by the float arm.
The process of adjustment is also similar to that of the attached floats as well. By bending the tab as little as one millimeter up or down, you can either increase or decrease the level of fuel in the float bowl. As stated before, it is critical that adjustments are made in tiny increments and with care.

When measuring, make sure the float arm is just barely making contact with the float needle.
|

The tab on the float arm should always be adjusted with great care
|
