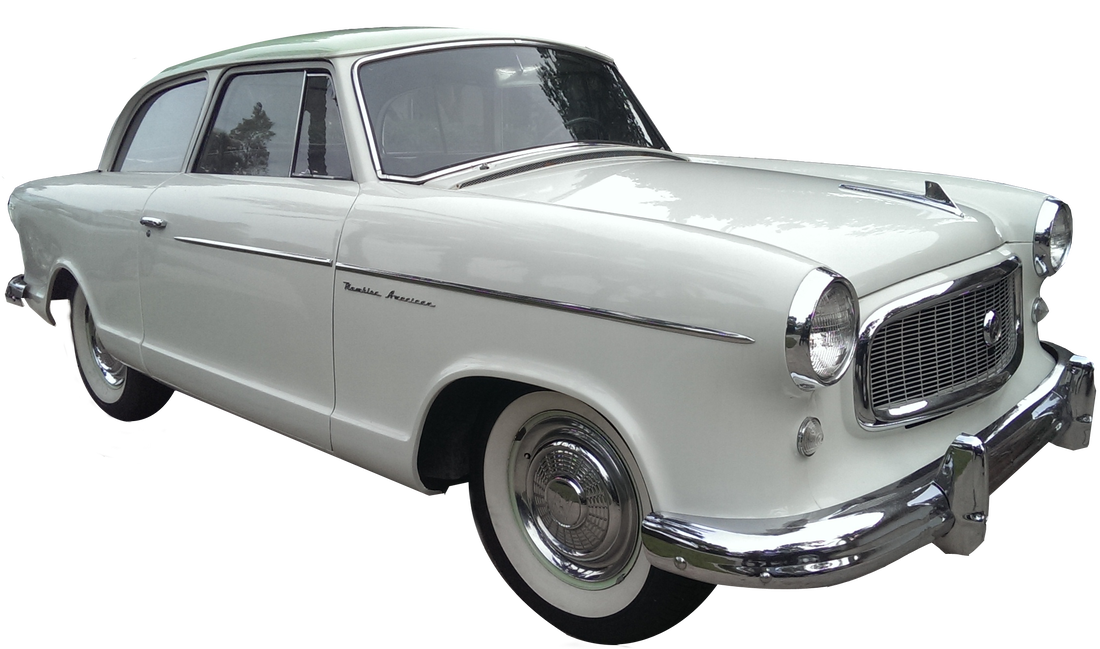
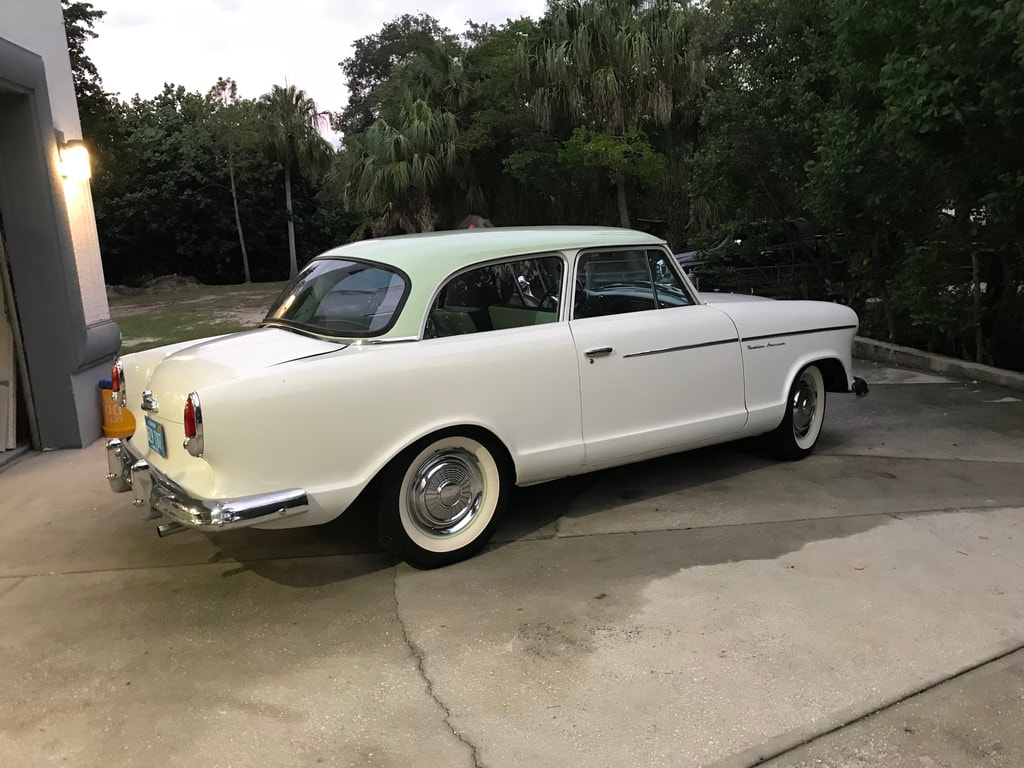
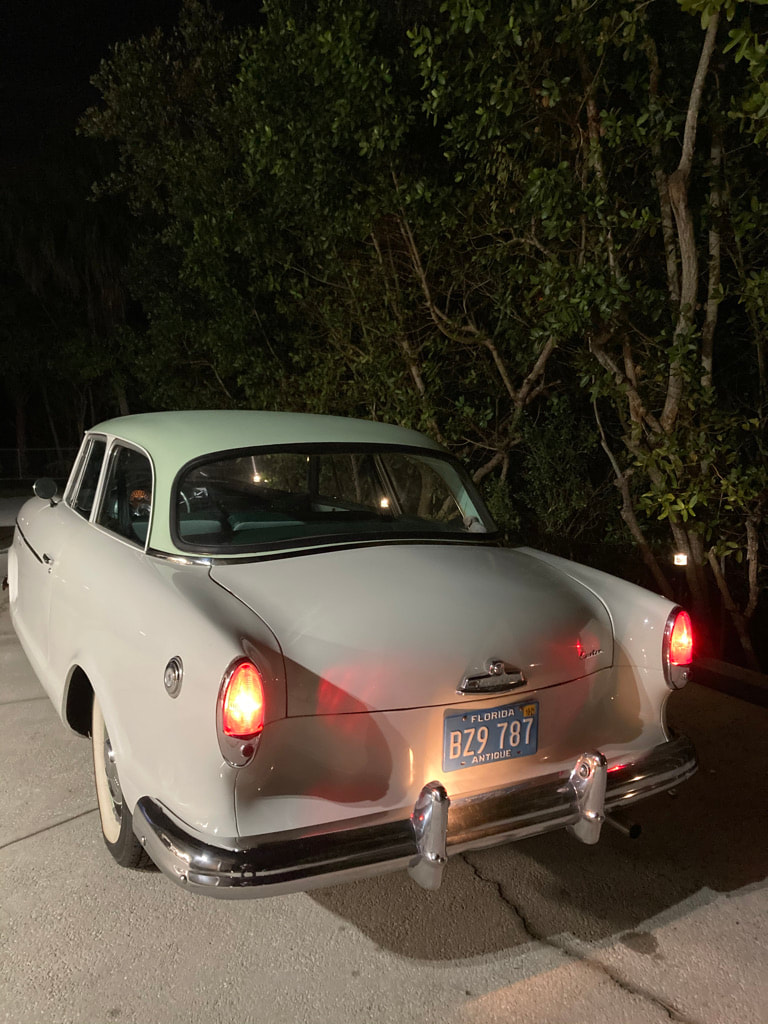
1960 Rambler American Custom
Sometime during the late 1980s, my father picked up two old Ramblers and had them towed to his warehouses. I think I said this before somewhere on this site, Dad was a hoarder. He grew up during the depression loving cars and motorcycles, but never had a nickle to rub together. So he taught himself how to fix things and trade up. He spent a lifetime doing just that, and by the time he died, he an amassed an incredible collection of old cars, motorcycles as well as antiques of every description. He also amassed two large warehouses full of junk - things like broken office chairs, bundles of wire, broken window frames and doors, stacks of old worn out tires and dozens of bicycles pulled from our nearby police department's dumpster. Dad believed everything had a purpose and could be fixed. And until he could get to it, he stored his dumpster, garage and barn finds in one of three warehouses. By the way, a warehouse is the perfect place for a hoarder to indulge their inner hoarder. Unfortunately, he never spent a whole lot of time fixing, mostly collecting. I've finished about a dozen or so of his projects, but that was just a dip in the bucket, and I have a lot of projects I've collected on my own that are still in need of completion.
Unfortunately, after he became seriously ill, no one in my family wanted to, or was capable of cleaning out Dad's warehouse. As a kid, I was his gofer. Some of my earliest memories are of finding tools for him, helping dig old cars out of barns, and walking through junk shops with him in search of "treasures." Not all of the time I spent with Dad was fun, but over the years, I became pretty good at spotting and restoring my own treasures. With Dad's (and Mom's) helpI also learned a lot about all sorts of antiques. So, when he died, I was certainly best suited amongst the surviving family members to clean out Dad's properties. It wasn't something I was looking forward to, but it did ease the burden on my stepmother and siblings. I spent the better part of three years tackling this massive undertaking.
One of the few people who assisted me during this time was my oldest son, Ricky (still sorry Bud). He was about 14 or 15 when I began this foolhardy venture. We spent every weekend digging through piles of stuff and making trips to the dump and recycling yards. We shared a sense of exploration and adventure, and at times, digging through mounds of junk could be fun. Occasionally, you move a hunk of carpet or a box of moldy magazines to find a gem - like brass headlamps for a car from the teens, or a rear wheel off a 1920's-era Indian. We averaged a good find about about every couple of weeks and that was very fuel we needed to keep us going. My wife and Ricky's younger brother helped too when they could. My youngest son did a good job of sorting nuts and bolts (a great task for a first grader) and my wife had picked up the slack at home with me being absent so much.
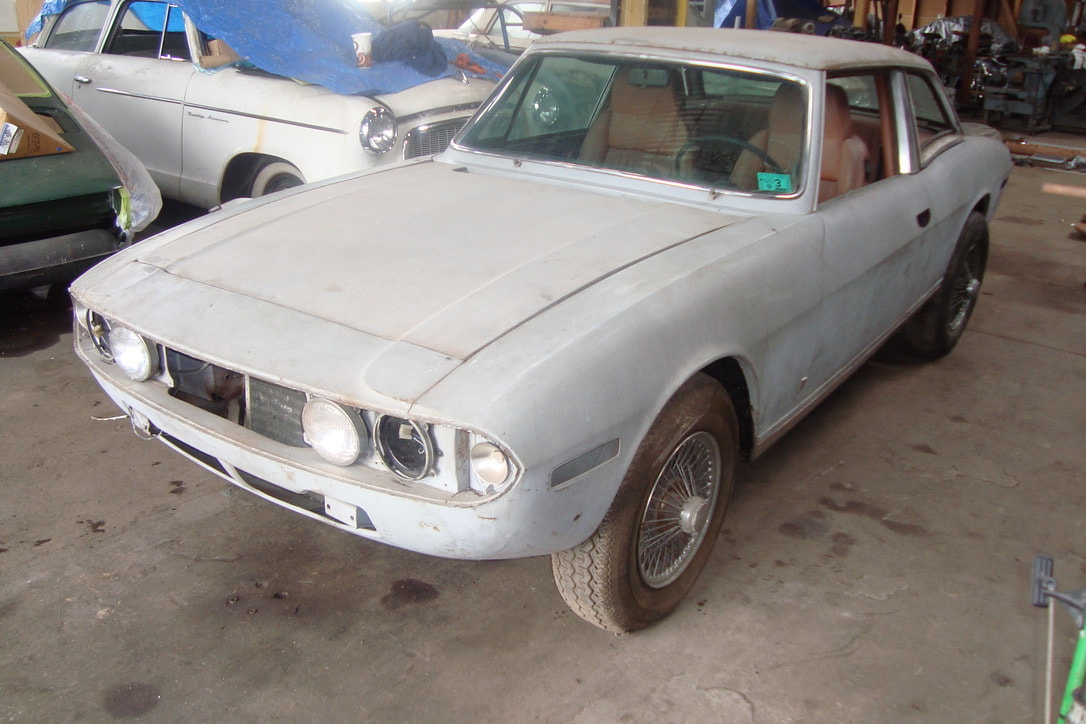
This is the earliest photo I can locate of the Rambler. It's hiding under the blue tarp behind the Triumph Stag.
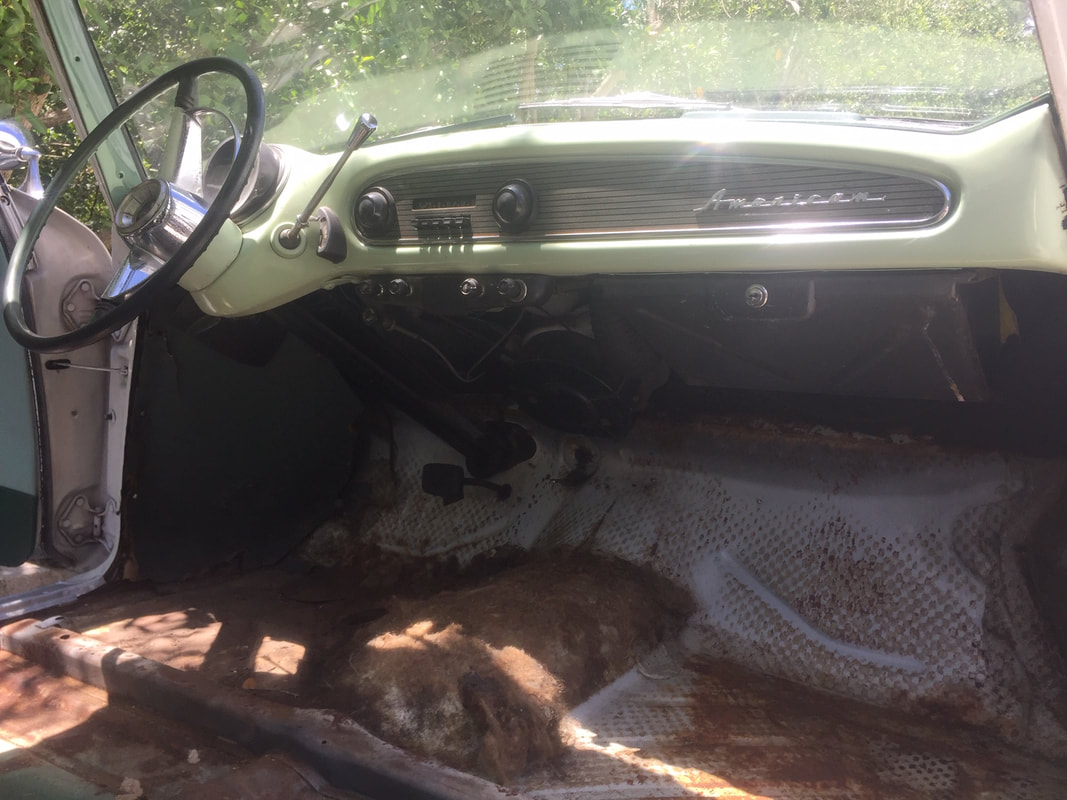
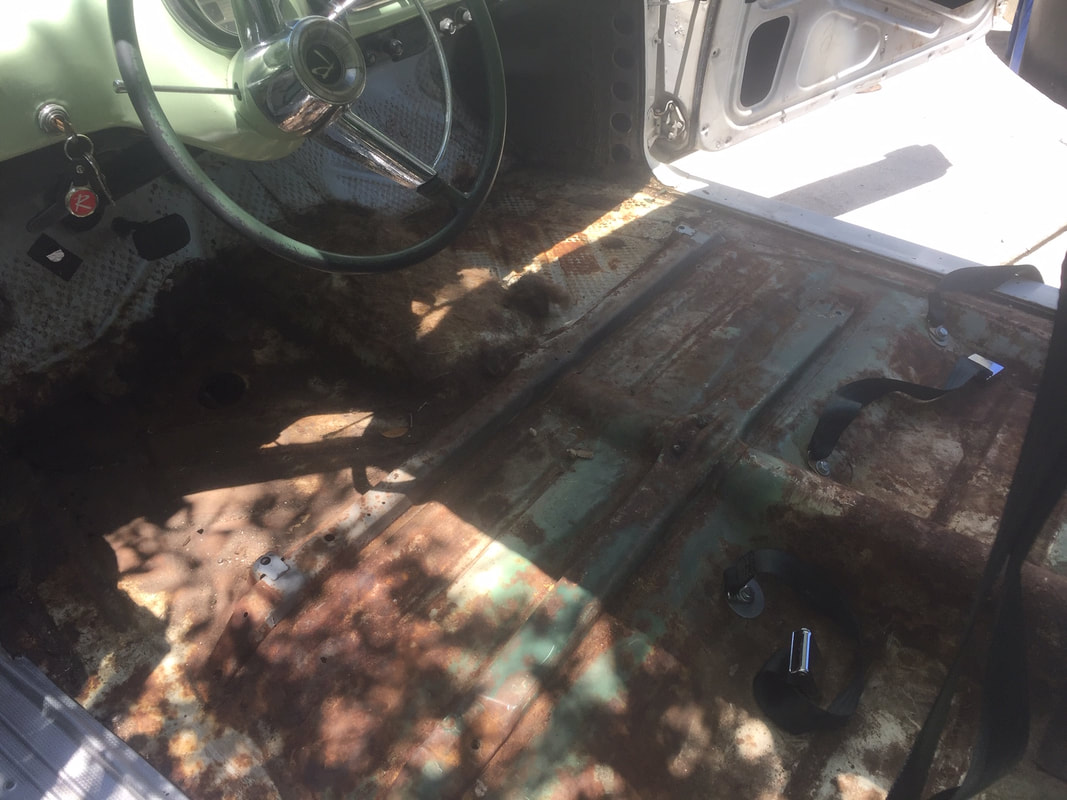
The Rambler seen above was one of those many treasures we stumbled upon in the dark recesses of the warehouse. This car was completely original and untouched since it was last driven in 1978. It was stored in the back of a warehouses that had no windows and almost no lights. We found the car buried under boxes of car parts and a few rolls of old, roach-filled carpets. The body was very straight, the chrome excellent for its age and it was 100 percent complete, except for a missing windshield and front passenger window. On hot summer weekend, Ricky and I decided to see if we could get it running. We had hopes of driving it out of the warehouse instead of pushing and towing it. We popped the hood and found the engine intact. There was no water in the radiator, but as a plus, there was also no water in the oil - promising. Amazingly, the carb and gas tank didn't didn't have that all-to-familiar odor of nasty, gas turned varnish. In fact, both carb and gas tank were bone dry. We put air in the flattened, 1960-era white sidewalls tires and they stayed up.
We had been starting (or attempting to start) a host of old cars, so we always kept a strong battery and fresh gas on hand. We kept fuel in a new, 6-gallon tank like those used with outboard boat engines. In case you were wondering, yes, we found the gas tank in Dad's warehouse. It was probably about 15 years old and new, in the box. We installed the battery and hooked the extended fuel line to the carb, set the tank on the roof of the rambler (gravity feed) and hand-primed fuel into the carb.
We had been starting (or attempting to start) a host of old cars, so we always kept a strong battery and fresh gas on hand. We kept fuel in a new, 6-gallon tank like those used with outboard boat engines. In case you were wondering, yes, we found the gas tank in Dad's warehouse. It was probably about 15 years old and new, in the box. We installed the battery and hooked the extended fuel line to the carb, set the tank on the roof of the rambler (gravity feed) and hand-primed fuel into the carb.

Above: This is what the engine looked like after a good cleaning and new oil filter. Right: This is the engine after restoration. Still sporting the original top radiator hose and missing the battery clamp, but otherwise a pretty nice change.
 The Rambler right after Jim finished the paint. The windshield and bumpers are still off the car.
The old Holley, single-barrel carb leaked a bit from the dry, old gaskets, but when Ricky turned the key, the engine quickly fired to life and settled into a decent idle - no ticking, no knocking, or any other nasty sounds. So you may be wondering why was the car was parked so many years ago. Well, a bad fuel pump diaphragm might have been the last straw, but there were several other additional issues that would have certainly caused a breakdown sooner or later. These included, radiator, brakes and a noisy rear end - not to mention broken windshield and window. It's not unrealistic to think that Dad probably bought this car for $100. He really knew how to pick 'em!
By the time we had the Rambler running, I was growing weary of working on old cars. I wanted to get back to working on my own projects. But Ricky immediately fell in love with the Rambler. He really wanted it for his first car. He promised to buy all the parts and do all the work needed to get it going. He had busted his butt, almost every weekend for the better part of a year, working in this filthy warehouse. So I talked to my stepmother and she agreed that we could give Ricky the Rambler. After the initial engine run, we determined we needed a new water pump and hoses, a new fuel pump, and a rebuilt carb. The radiator would need to be cored and the complete brake service on all wheels as well as a new master cylinder. And that was just to just to make it road-worthy, not necessarily dependable or safe. With all the work on the warehouse, It took a few moths for us to get it running and driving down the alley behind the warehouse. My business parter Jim, who, at that time, owned a body shop, wanted Dad's other Rambler to build a vintage street rod. It was a 1959, 4-Door American but it was missing a windshield (I grabbed it for this car). So, I let Jim tow away the other Rambler in lieu of a future paint job on Ricky's car. Everything seemed to be going well, but a few weeks later, the bottom would drop out of the project for Ricky.
By the time we had the Rambler running, I was growing weary of working on old cars. I wanted to get back to working on my own projects. But Ricky immediately fell in love with the Rambler. He really wanted it for his first car. He promised to buy all the parts and do all the work needed to get it going. He had busted his butt, almost every weekend for the better part of a year, working in this filthy warehouse. So I talked to my stepmother and she agreed that we could give Ricky the Rambler. After the initial engine run, we determined we needed a new water pump and hoses, a new fuel pump, and a rebuilt carb. The radiator would need to be cored and the complete brake service on all wheels as well as a new master cylinder. And that was just to just to make it road-worthy, not necessarily dependable or safe. With all the work on the warehouse, It took a few moths for us to get it running and driving down the alley behind the warehouse. My business parter Jim, who, at that time, owned a body shop, wanted Dad's other Rambler to build a vintage street rod. It was a 1959, 4-Door American but it was missing a windshield (I grabbed it for this car). So, I let Jim tow away the other Rambler in lieu of a future paint job on Ricky's car. Everything seemed to be going well, but a few weeks later, the bottom would drop out of the project for Ricky.
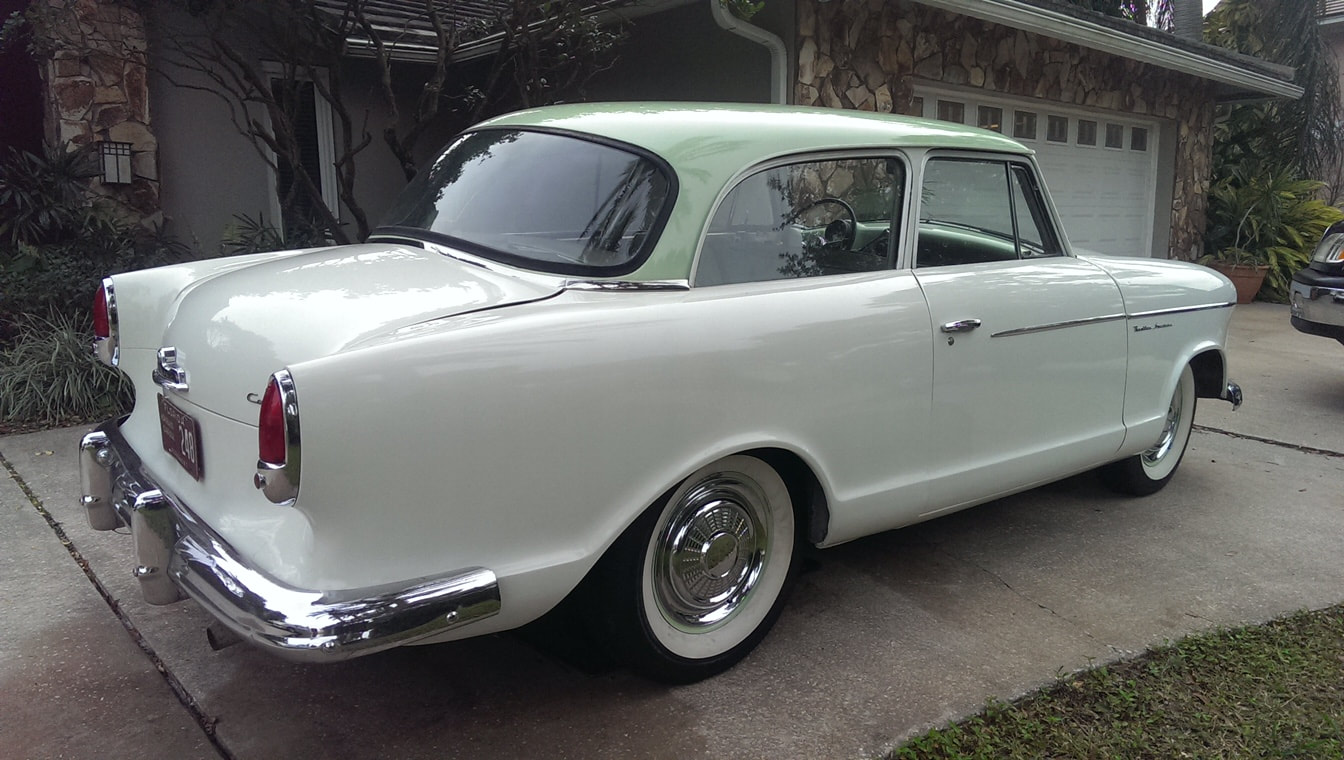
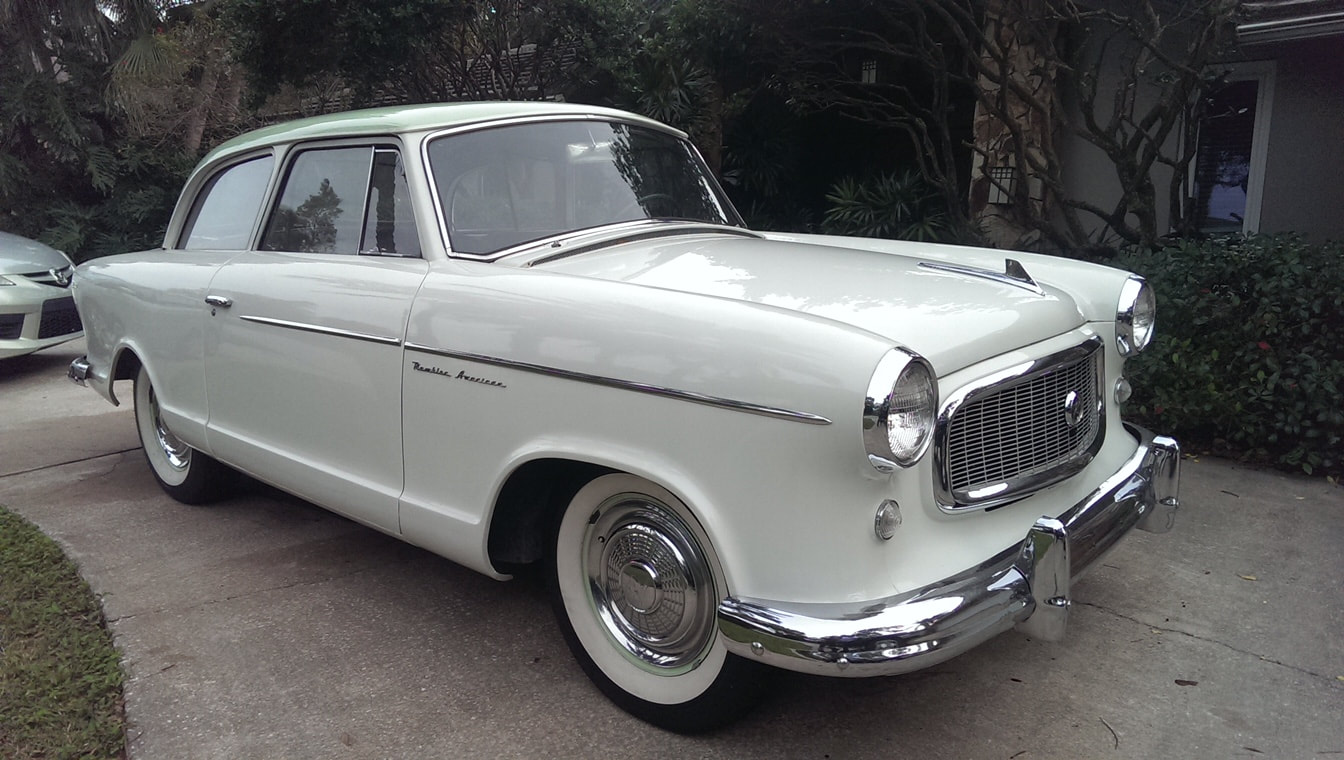 The Rambler looked great in the driveway. All that chrome is original. But the tranny leaked, the rear end whined and the brakes were worthless.
As soon as we got the car rolling past 10 mph on first drive down the block, the rear end started whining. The pinion and shaft bearings had rusted up and needed immediate replacement. It's not an easy job on a '60 Rambler and we found out it requires a special tool to remove the pinion from the case and to split the housing. The transmission also poured out fluid about as fast as we poured it in, due to dry and crumbling seals. To pour salt into Ricky's wounds, we couldn't find the title in the piles of paperwork Dad left behind. We could get one, but it was going to cost at least $350 and require a lot of legwork and paperwork we didn't yet have. The final, and by far, largest nail in the coffin, we discovered no one would insure a teenager in an antique car (for anything close to an affordable). For Ricky, the project was kaput, but, after all the work we done together on the car, I began to develop a bit of a soft spot for the Rambler too. I decided to do the heavy lifting (and spending) necessary to get the car on the road while Ricky went off to college. I reimbursed Ricky for the parts he bought for the car and gave him a nice bonus for working so hard in the warehouse. I also agreed that when I sold the car, I would give him a portion of the sale. And, over the years, he's been able to drive the car a bit under my insurance, so he's happy I am finishing the car and never sold it.
It has taken nearly ten years, but I'm finally getting close to wrapping up the Rambler project. It's not a perfect frame-off or 100-point restoration, not by any means. It's more of a thorough, mechanical renovation to build a safe, dependable, 60-year old driver. We've also done a lot to make the car comfortable and look good too. Unfortunately, I was not able to approach this project in the way I usually do -- that is to make the vehicle mechanically sound first, and then sort out the cosmetic challenges. I did it, as my father would say, "bassackwards."
It has taken nearly ten years, but I'm finally getting close to wrapping up the Rambler project. It's not a perfect frame-off or 100-point restoration, not by any means. It's more of a thorough, mechanical renovation to build a safe, dependable, 60-year old driver. We've also done a lot to make the car comfortable and look good too. Unfortunately, I was not able to approach this project in the way I usually do -- that is to make the vehicle mechanically sound first, and then sort out the cosmetic challenges. I did it, as my father would say, "bassackwards."
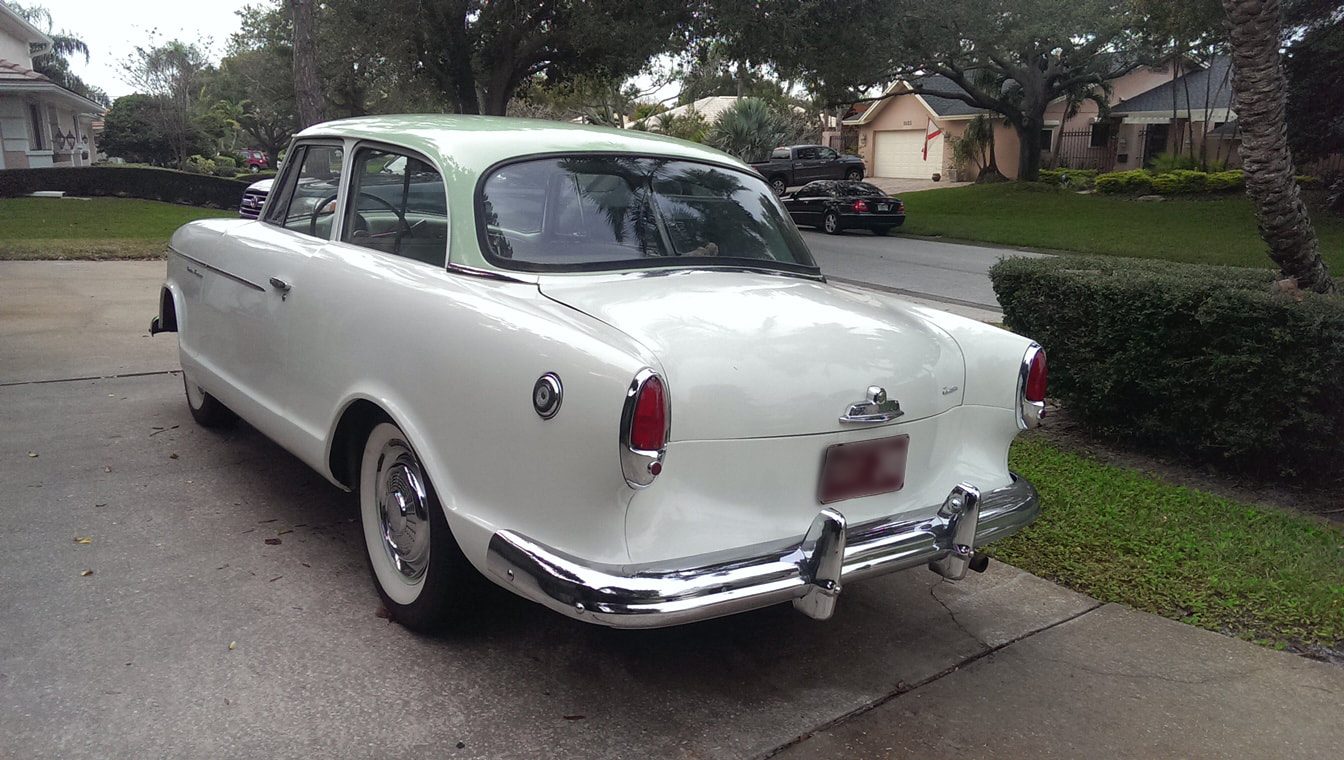 Jim's paint looks great from any angle.
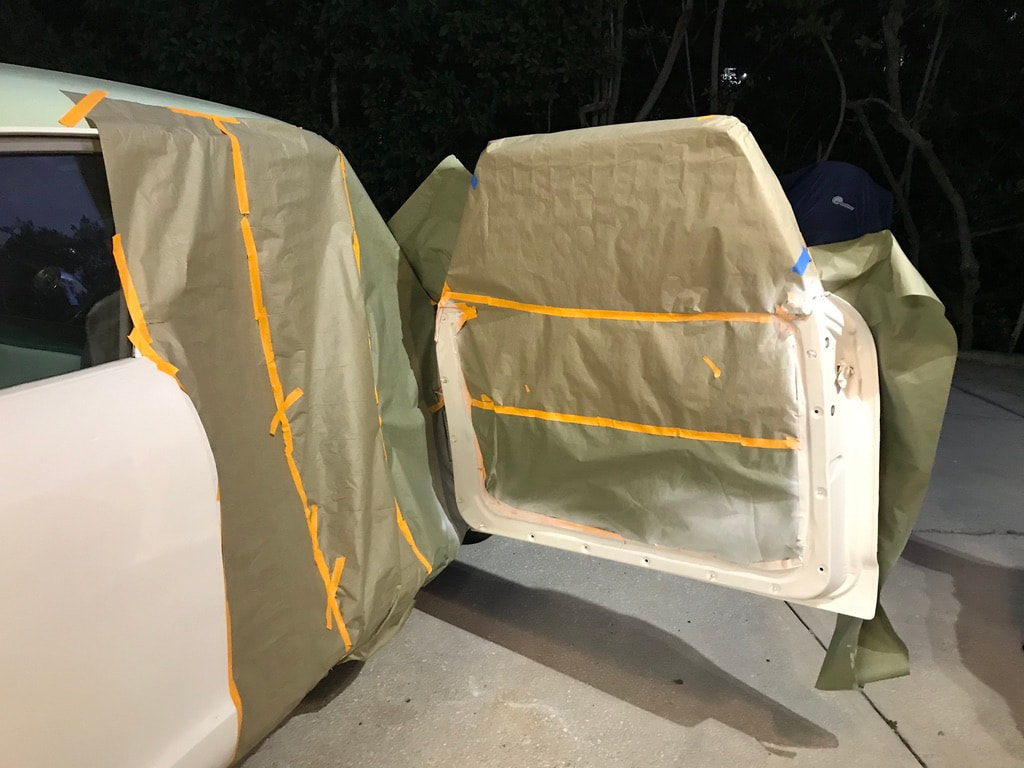
Shortly after Jim towed away the 4-door, he was offered a management position at a big shop and was closing done his body shop. He needed me to get the Rambler over to him quickly so he could paint it before his closed the doors on his shop for good. A serious tip of the hat to my friend Jim: most people in this position would have apologized and reneged on the trade deal, but not Jim. He worked as quickly and as long as possible with a looming deadline nearing every day. I wasn't just my car he had to finish, there were several other restoration projects. I never thought he would have enough time to get it done, but about three weeks after I dropped it off, we were loading a beautifully painted car back on my trailer. Jim also did this knowing he would not have time for to work on the Rambler I traded him. Now that's integrity! With the paint complete, I had the additional challenge of fixing everything else without scratching or damaging Jim's nice paint job.
Across town, one of my dad's friends ran a garage specializing in vintage Mercedes Benz. Seldon was nearing retirement. His shop has been around for about 40 years (that I know of) and he had a host of loyal customers who were going to be sad when he retired. One day while talking to Seldon about my Dad's failing health, I mentioned the Rambler project. It was then I found out this superb mechanic began his mechanical career working at a Rambler dealership. Not only did he know this particular Rambler like the back of his hand, he also still had the special tool needed to rebuild the rear end. So, I pulled the tranny and rear end and dropped it off to him for rebuilding.
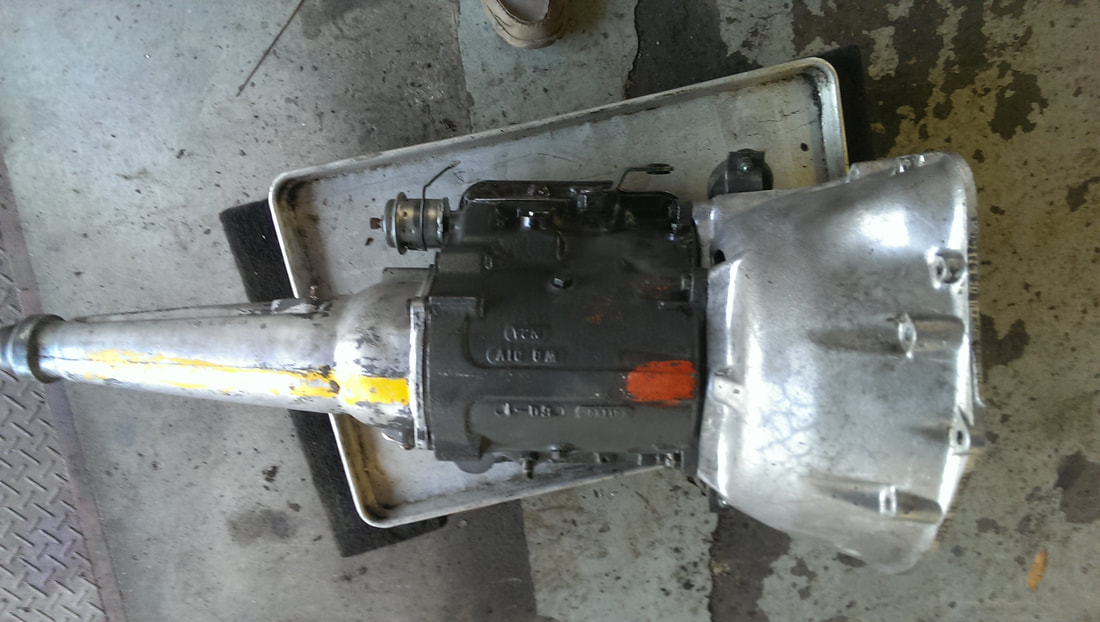
The tranny after the initial rebuild. The pan was warped and there were some bad gaskets, so it developed leaks a few months after we installed it.
|

The kickdown solenoid, also known as the vacuum modulator was a constant source of leaks until we found a replacement
|
Meanwhile, I polished all the original chrome, and bought five new, very expensive white-wall tires from Coker tire. Everybody tried to talk me out of it, but I knew the tires would make the car and I was absolutely right. It is just not the same car without those tires. I know because I put a couple of old black-wall tires on one side when the old while walls gave up the ghost. The side without whitewalls was dull - even with the nice paint job.
|
After a couple weeks, Seldon had the tranny and rear end finished, so I spent a weekend putting them back in the Rambler with the help of another old buddy. It's one of those jobs that is easier with two folks. We spent another weekend on the brakes.
With the new tires, the new tranny and quieter rear end, the car was a blast to drive around - even with a ripped-up, trashy interior. I don't know why, but I soon found out that people just love this car - especially women. Maybe it's the color. My wife didn't believe me until women on consecutive drives stopped us to comment on the car. |
I really think the whitewalls make the car. At first, I had a lot of people say it wasn't worth it. Now, they all agree it was!
|
We also started having fun driving the car around on holidays, stopping by car shows and weekend drives to the beach. One Christmas, the Rambler shard the stage with a stuffed Santa as a prop in our award-winning, last-minute Christmas display. By now, our family was now getting attached to this old car.
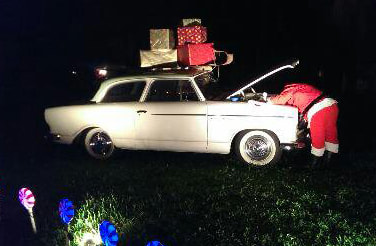 Our award-winning Christmas display with a stuffed Santa working under the hood of the Rambler
At the time, we didn't have any room in our garage for the Rambler. It was filled with my tools and motorcycles. So the Rambler lived outside. We kept it covered and washed it frequently. But, we lived on the water, and after a year or so, some tiny rust spots began appearing around the front fender and around the windshield. The lifter seals were old and oil began collecting in the engine. So much so, that if we didn't start the car for a couple of weeks, it looked like a 1960's mosquito truck spewing out pesticide. And unfortunately, a gasket failed in the tranny, so it was beginning to leak again, just not as bad as before. I was still driving the car every once in a while, but these issues were beginning to really bug me. During this time, we were in the process of selling the house we had lived in for nearly 20 years. For those that have done that, you know it's a time-stealing job. So, the Rambler project was shelved again for several months until we had a contract on the house. While waiting for our old house to sell, we bought a really cool foreclosure home that also needed a ton of work. It had one huge advantage over our old home - a giant garage which had plenty of room for my projects and the Rambler. With all this work on the old and new home, I was beginning to think I was never going to complete the Rambler. I even considered selling it. I kept the battery charged and drove it around at least once a month, but it was glaringly obvious, the car would need a lot more work once I got the project going again.
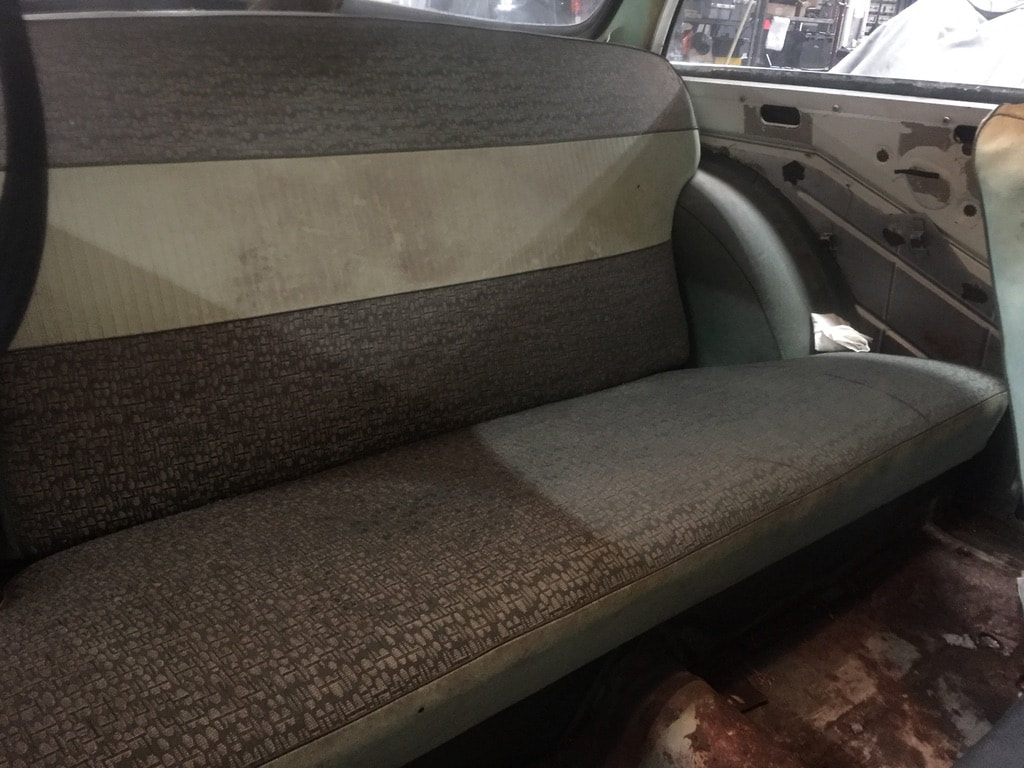
The rear seat of the Rambler still have the cool, reptile pattern on the seats.
|
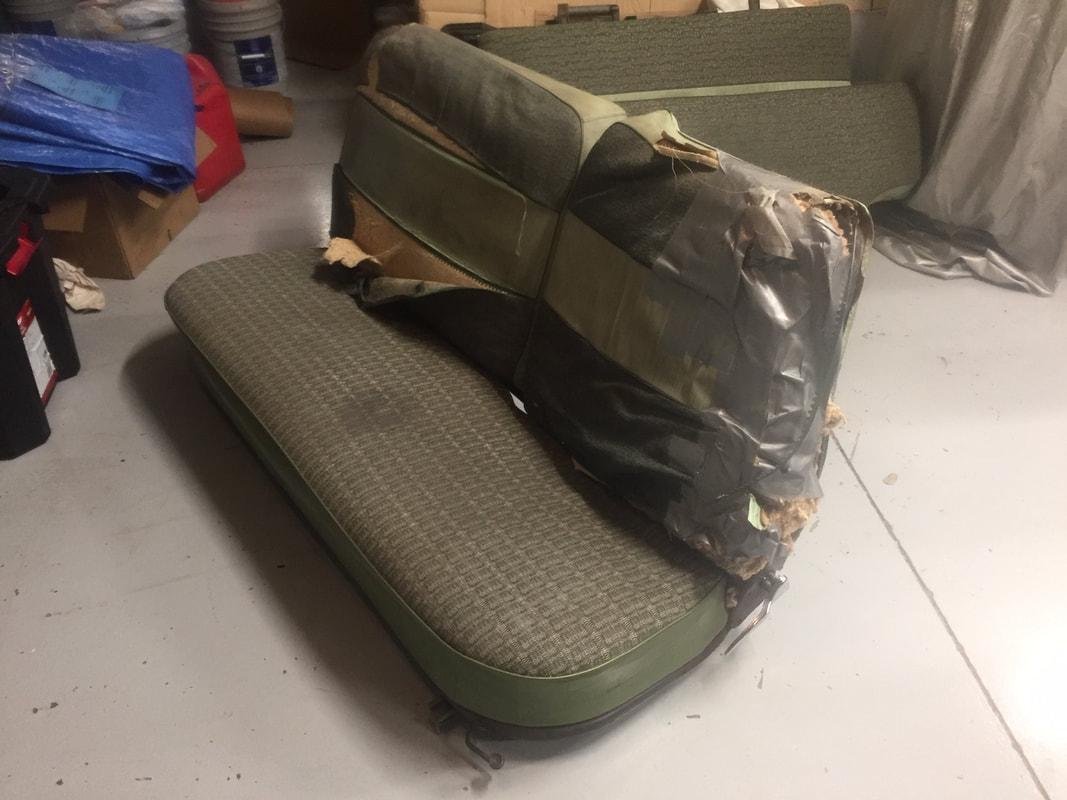
The original faux alligator print was okay on the back seat and maybe even usable, but the front seat was a mashup of several repair jobs. I couldn't find matching materials, so I went in a different direction
|
Shortly after we sold the house, I decided to get to the project into high gear. We had a little extra cash, so I started buying NOS parts for the front end (when I could find them), gasket sets and looking for the right materials to reupholster the interior.
My wife and I liked the look of the original back seat - it was still intact and after a good cleaning, we were able to easily match the colors. I knew a guy who was a really talented upholster and he had made several motorcycle seats for my antique bikes. Unfortunately, after dropping by his shop one day, I found he had a terrible accident and was no longer able to work. I learned his brother, also a talented upholster, was finishing up some projects for him, so I gave his brother a call.
My wife and I liked the look of the original back seat - it was still intact and after a good cleaning, we were able to easily match the colors. I knew a guy who was a really talented upholster and he had made several motorcycle seats for my antique bikes. Unfortunately, after dropping by his shop one day, I found he had a terrible accident and was no longer able to work. I learned his brother, also a talented upholster, was finishing up some projects for him, so I gave his brother a call.
Johnny, is a very talented man with a sewing machine and scissors. He's artistically gifted and has a penchant for doing things right. But his kind of expertise and quality come at a price. His work is reasonably priced, but not inexpensive by any means. The interior was our biggest investment in the car. Johnny deals with a lot of demanding customers who own antique and exotic cars. He's in constant demand and has a months-long waiting list. I wanted him to do the work so I asked him to call if he had an opening. A few weeks later, a job canceled and he called. Once again, I was working backwards. The engine, transmission and suspension had yet to be rebuilt. The interior is normally the last element of a restoration I tackle. It makes sense, because you don't want to be getting in and out of the car when you're dirty from working on an old engine. But sometimes, you've got to get work done when you can. And that was the case with this talented upholster. I needed to get him working on this while he had an opening.
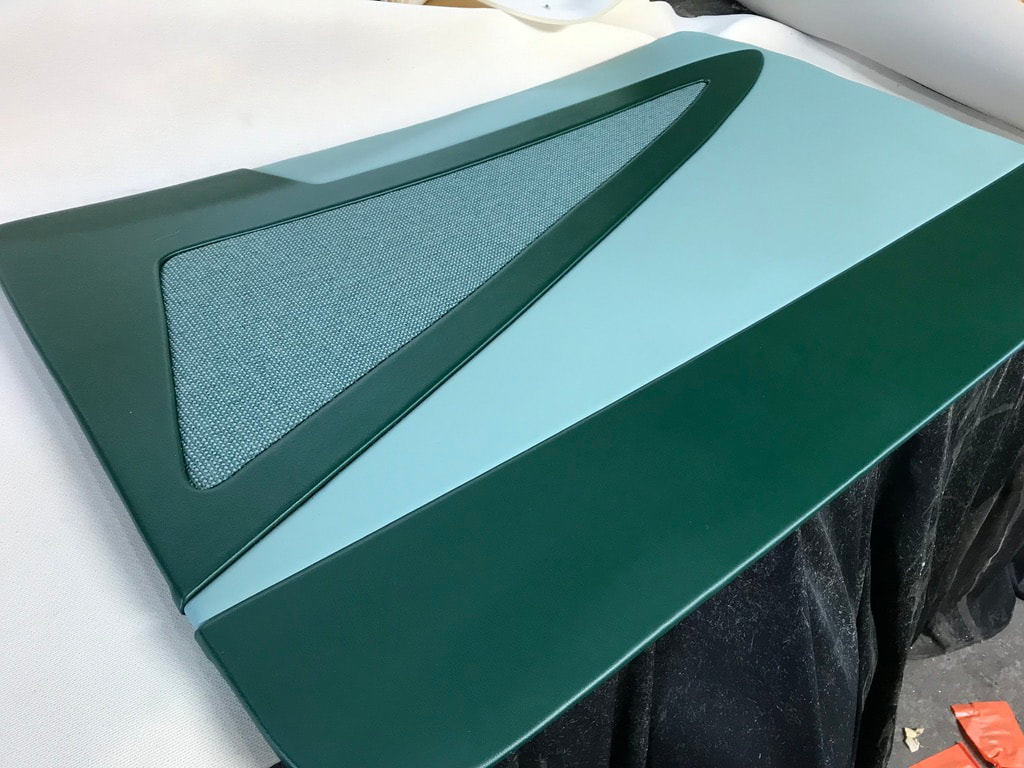
When it became apparent the original materials were not going to be available, we took another tack, attempting to create a classic 1960's design with modern materials. I laid out a design for the seats on Photoshop. Johnny took my idea for the seats and incorporated it into the side panels. The new panels share a similar took with the old panels, but have more dept than the original pressed panels. This also caused some issues when I went to mount them on the doors, but it was worth the hassle.
Below are photos of the process:
Below are photos of the process:
Interior work
On the floor, a hairy jute (carpet padding) absorbed moisture and over the years melded with the rust to create a giant mess.
|
The floorboard required a lot of work. Wire brushing, grinding, acid treating and a coat of POR 15.
|
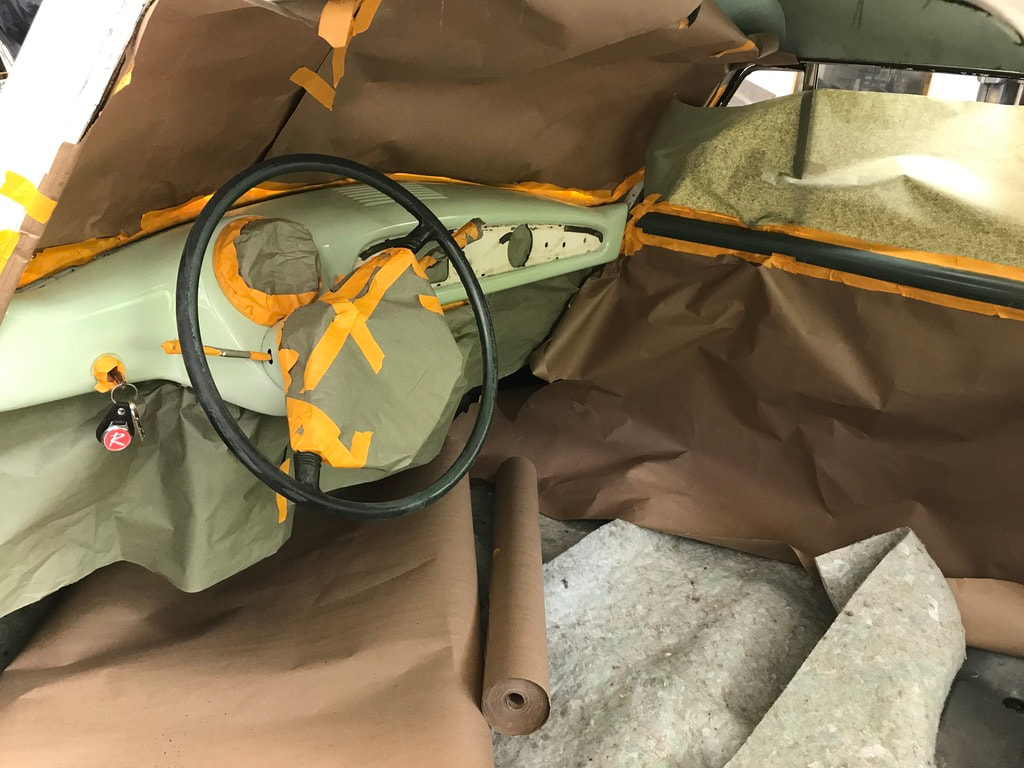
The dash and steering wheel being prepped for paint. Why not pull off the wheel? We tried with multiple wheel pullers. Best to paint it in place than ruin it. On the right, the finished, darker color that matched the seat trim. The light color on the dash was not an original color. Some of the pictures are a little skewed, but they're all I have.
|
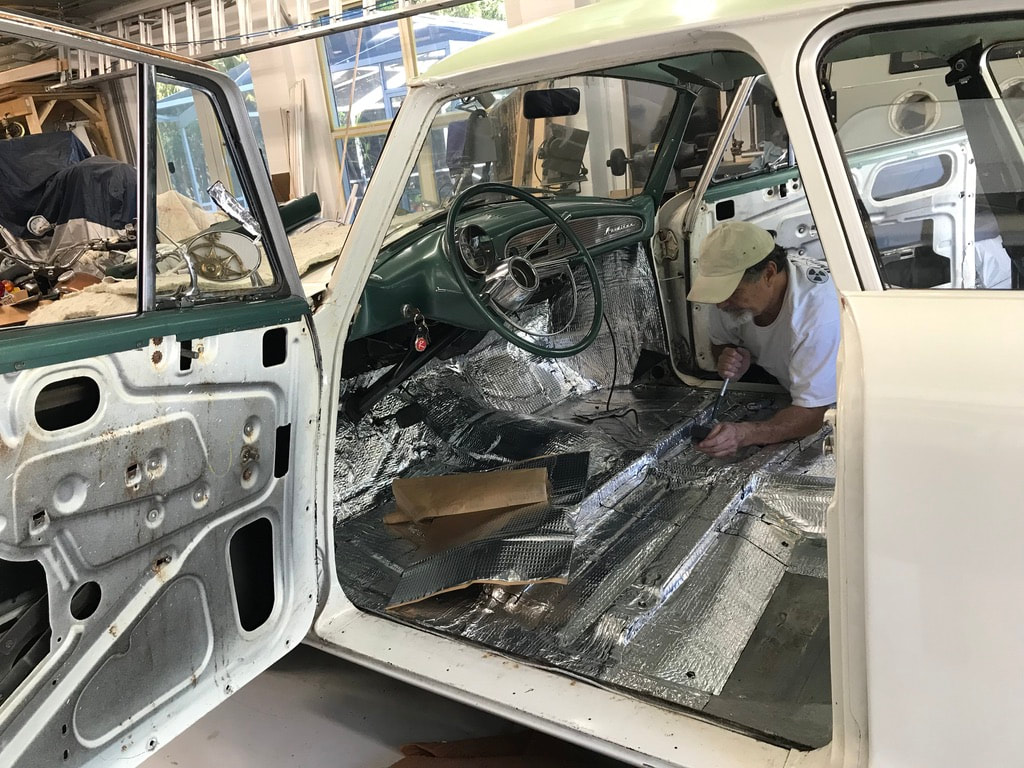
Me installing the sound proofing.
|
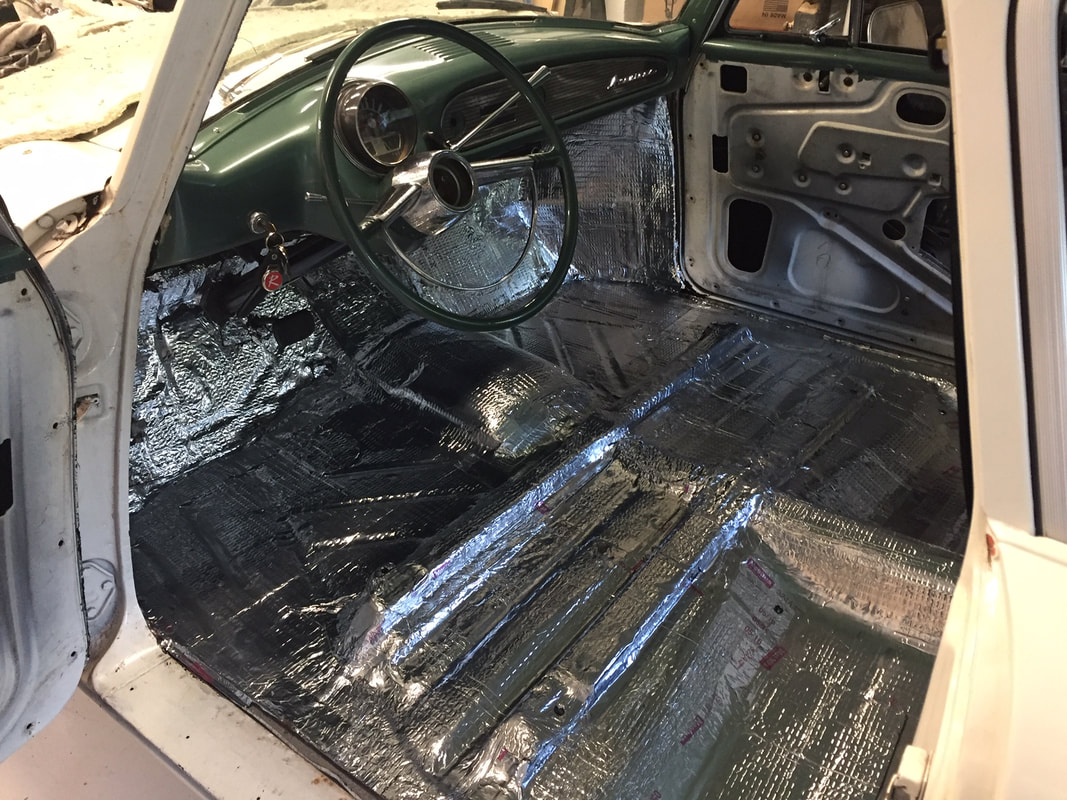
The soundproofing done in the doors, firewall and floorboards
|
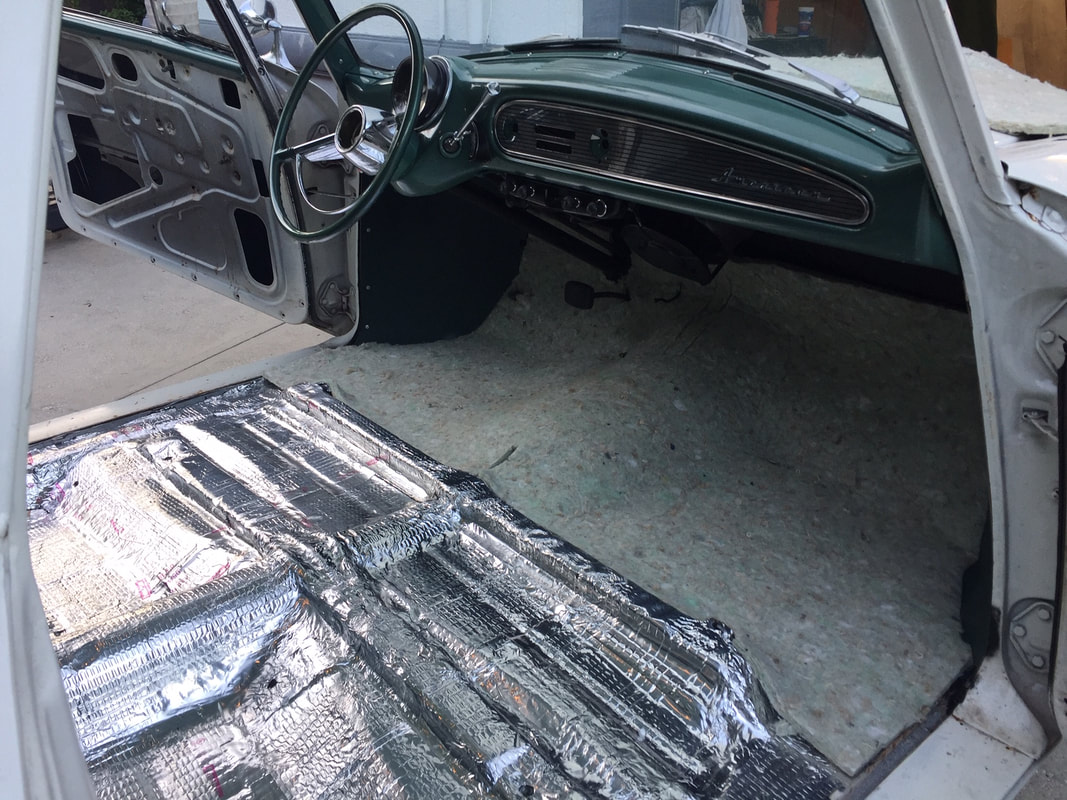
Paint on the dash and trim complete. The jute going in before the carpets
|

Worn out and ready for a break. My wife grabbed a shot of me after a long night working on the under-seat sound proofing and installing the rear door panels.
|
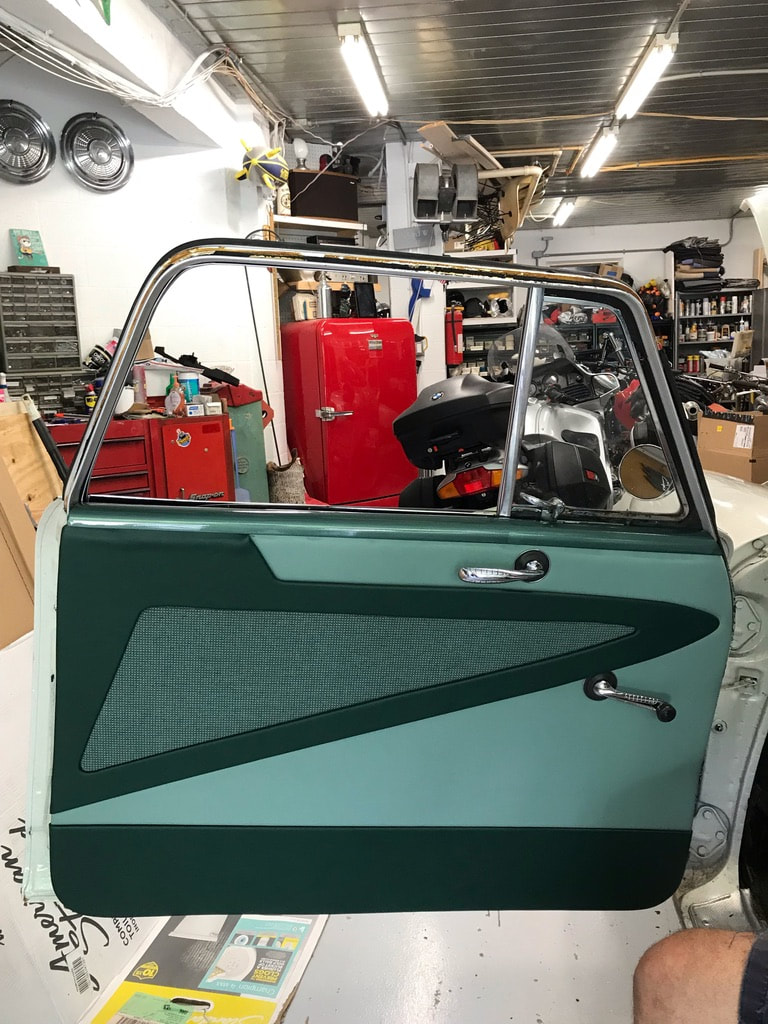
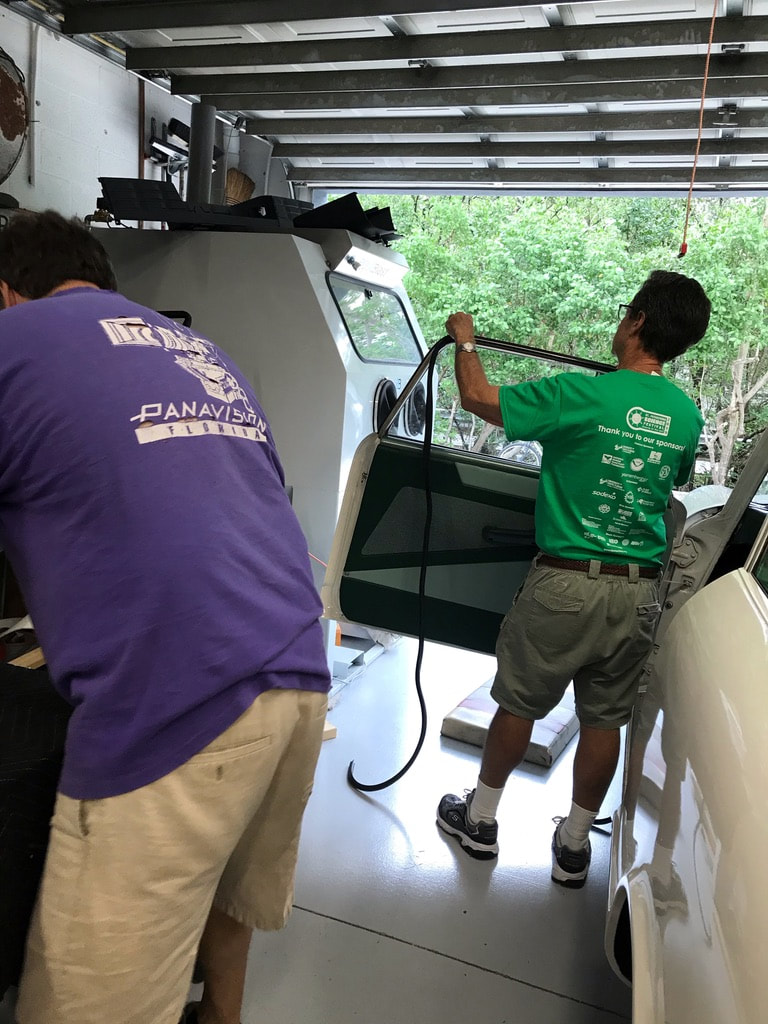
Progress doesn't always move forward. Before I could get the door panels in place, I had to first replace the worn out and rotten window trim and felt. But some of the bolts wouldn't budge, so I had to heat them to get them off. Because of that, I had to repaint the door jam.
|
The right front door panel ready for installation. It has the look of the original panel, but thicker and better made. Unfortunately, the panels were too thick at the top to fit under the metal trim, so so foam had to be trimmed off, but it wouldn't be seen once installed. On the right, the you can see the carpet being installed.
|

|
|
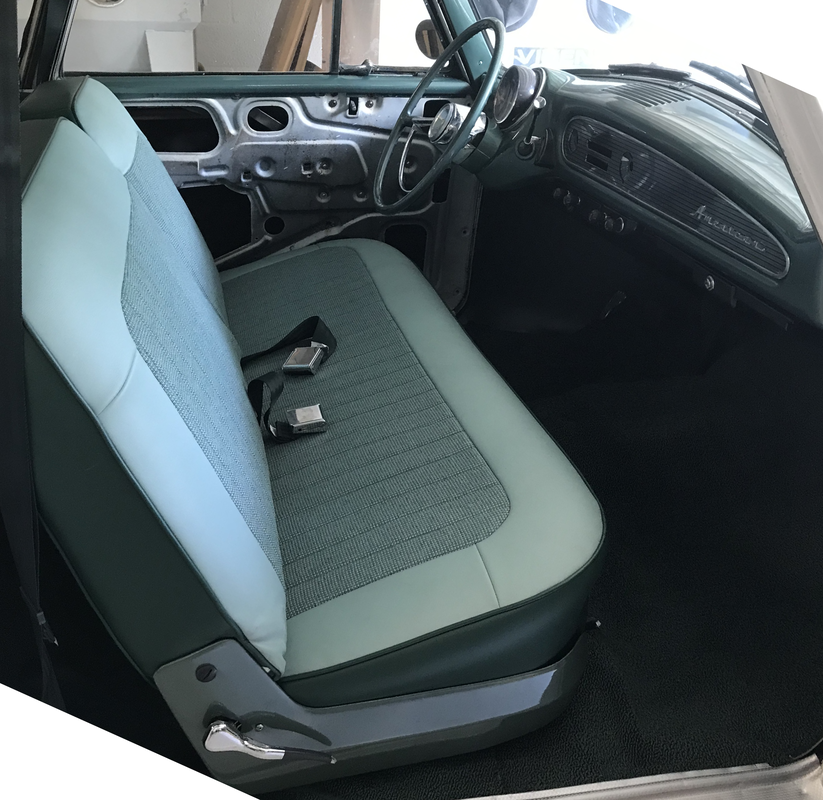
Left: The new seats are cushy and comfortable. We've been on on the road for a couple hours at a time with no complaints. Right : Progress being made. Door panels in. Still a lot of detail work to do.
|
My buddy Dave (in green) and I tackle new door seals. You can see in the photo on the right, my other buddy laying on the floor.
|
|
Back to the engine, transmission and chassis work...
Stepping back a little with this story, I knew it would a few weeks before seats and door panels were finished. So we moved ahead with the front end, engine, driveshaft and tranny hoping to get everything done before the interior parts were complete.
Even though the engine ran good and the gearbox was working okay, the leaks from these components on my new epoxy covered garage floor were driving me crazy. I knew the interior was going to look great soon and I wanted to complete the car's mechanical needs quickly, so I did something I had rarely done before: I hired someone to do the work. I first turned to Mike Moench, owner of JB Import Automotive. He is the best mechanic and fabricator I know. We've known each other since with we were teenagers rebuilding motorcycles. Mike's mechanical expertise far exceeds my own. He is always busy working on some of the most beautiful cars I've ever seen - like Rolls Royce and Bentley custom-coach vehicles from the 1920s and more modern cars, like the renowned Gull Wing Mercedes or rare Ferraris. Mike was too busy to help, but he recommended his best mechanic, Dave Graves. Dave likes to stay busy and doesn't mind working on the weekends. Like Mike, Dave is a master diagnostician and mechanic. He can work on just about everything and really likes a challenge. I knew there would be challenges with the Rambler - there were many components, like the transmission, he'd never seen before. But Dave is an intellectually curious individual. He studies old manuals and publications and figures things out the old fashioned way - using his brain. An amazing thing about Dave, he is as meticulous as he is fast - a rare combination and one reason he is a sought-after mechanic. Dave knew I'd be assisting with the work too, so we made plans to get together over the weekends for the next month or so. I had complete confidence in Dave and I knew I'd be driving a quite, leak-free car soon. It would be worth every penny for the time he saved me.
Even though the engine ran good and the gearbox was working okay, the leaks from these components on my new epoxy covered garage floor were driving me crazy. I knew the interior was going to look great soon and I wanted to complete the car's mechanical needs quickly, so I did something I had rarely done before: I hired someone to do the work. I first turned to Mike Moench, owner of JB Import Automotive. He is the best mechanic and fabricator I know. We've known each other since with we were teenagers rebuilding motorcycles. Mike's mechanical expertise far exceeds my own. He is always busy working on some of the most beautiful cars I've ever seen - like Rolls Royce and Bentley custom-coach vehicles from the 1920s and more modern cars, like the renowned Gull Wing Mercedes or rare Ferraris. Mike was too busy to help, but he recommended his best mechanic, Dave Graves. Dave likes to stay busy and doesn't mind working on the weekends. Like Mike, Dave is a master diagnostician and mechanic. He can work on just about everything and really likes a challenge. I knew there would be challenges with the Rambler - there were many components, like the transmission, he'd never seen before. But Dave is an intellectually curious individual. He studies old manuals and publications and figures things out the old fashioned way - using his brain. An amazing thing about Dave, he is as meticulous as he is fast - a rare combination and one reason he is a sought-after mechanic. Dave knew I'd be assisting with the work too, so we made plans to get together over the weekends for the next month or so. I had complete confidence in Dave and I knew I'd be driving a quite, leak-free car soon. It would be worth every penny for the time he saved me.
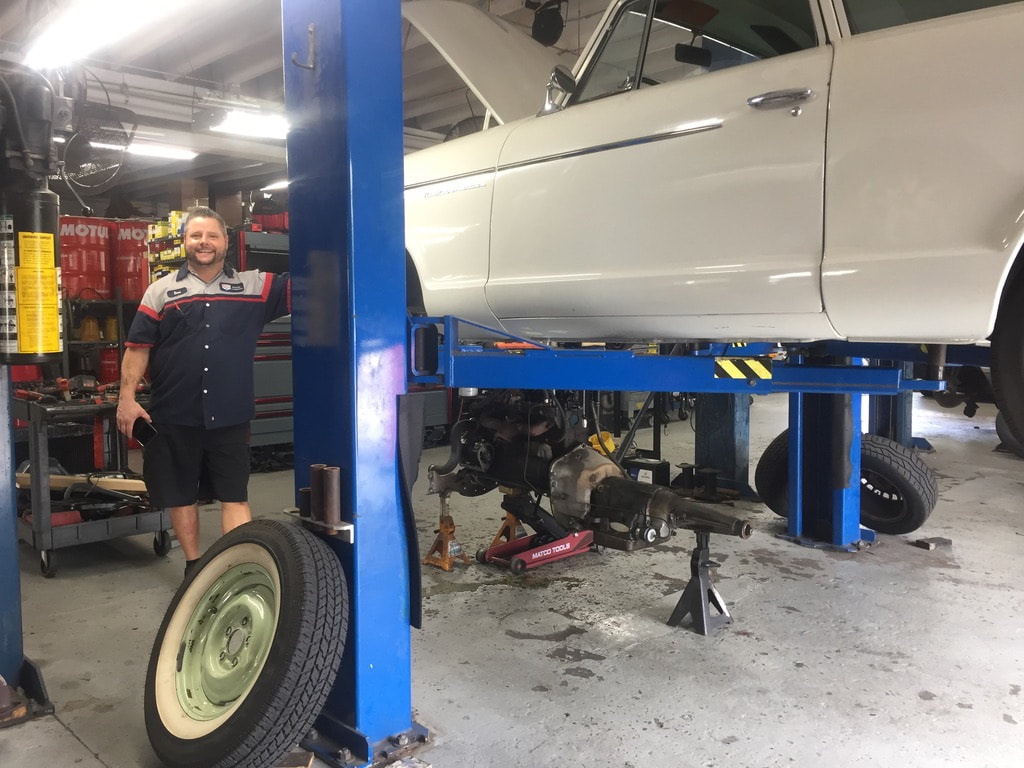
Ace mechanic, Dave Graves after pulling the engine out of the Rambler. Notice how clean Dave is after this messy job. That's the mark of a real pro!

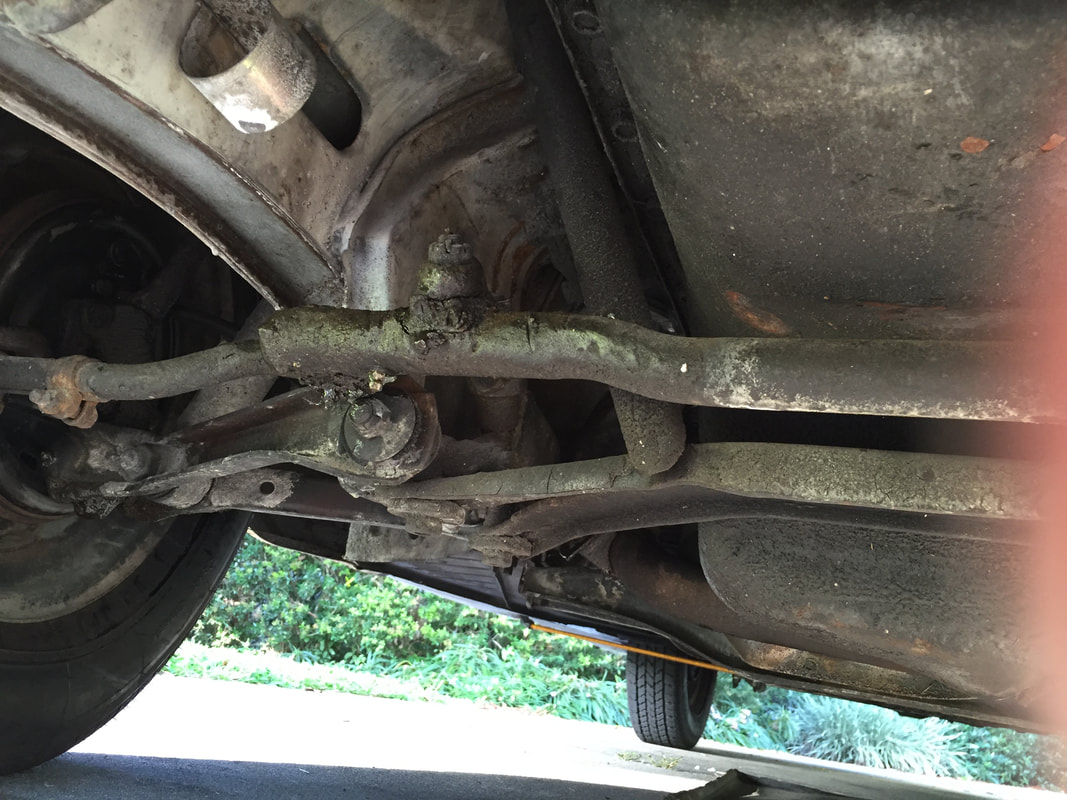
Before we got going, I had one edict for Dave. I told him I wanted to drive this car on the highway at highway speeds - at least 70 mph and it had to be safe for me and my family. That meant there would be no rattles, no shakes, no pulling or sloppiness in the steering wheel, no smells, no peculiar noises. I wanted a show-room-new-feeling 1960s automobile (which is a hell of a lot different than a modern car). To be somewhat safe (cars from the early 1960s are not what I'd call safe to drive at high speeds), I had to completely refurbish the front end as well as every part of the drive train, suspension and brakes. Nothing was untouched. The Rambler American was an advanced car for its time. It had a unibody frame and independent struts in the front. That being said, some of the parts for this car were hard to find, but after a bit of looking, I was able to find NOS bushings for the control arms, new tie rod ends, as well NOS upper and lower trunnions for both sides.
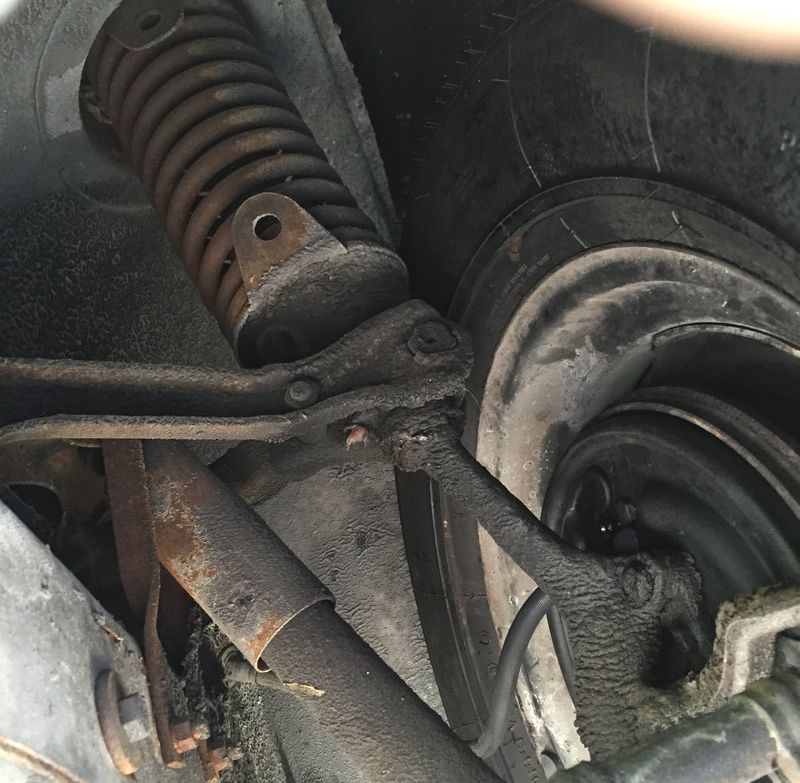
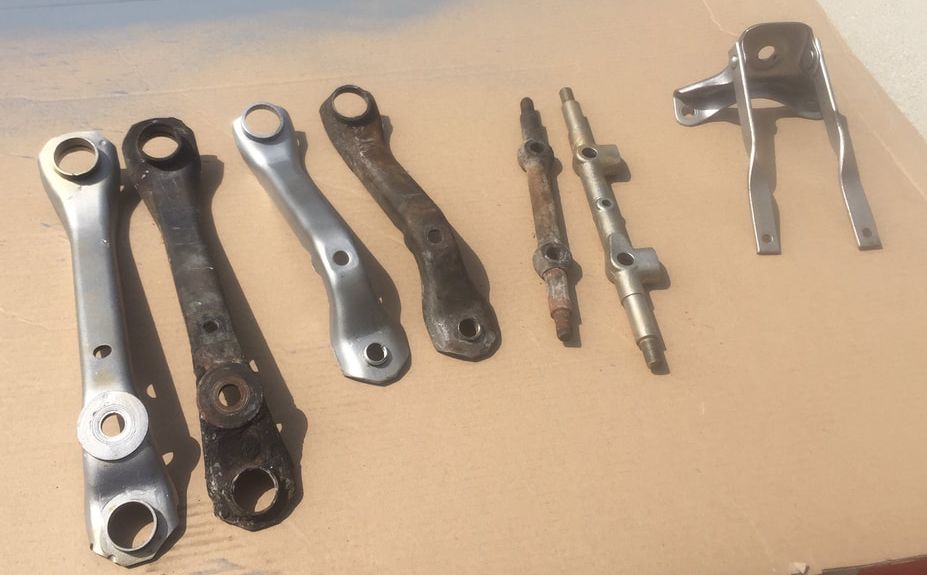
One Saturday morning, Dave and I started early and completely disassembled the front end. It was a worn out, greasy mess, coated with years of road grime and oil. We found every single bushing, every piece of rubber, and several major components completely worn out.
One Saturday morning, Dave and I started early and completely disassembled the front end. It was a worn out, greasy mess, coated with years of road grime and oil. We found every single bushing, every piece of rubber, and several major components completely worn out.
Years of road grime and tar didn't help the rebuilding process. We had to fabricate a tool to compress the strut spring.
|
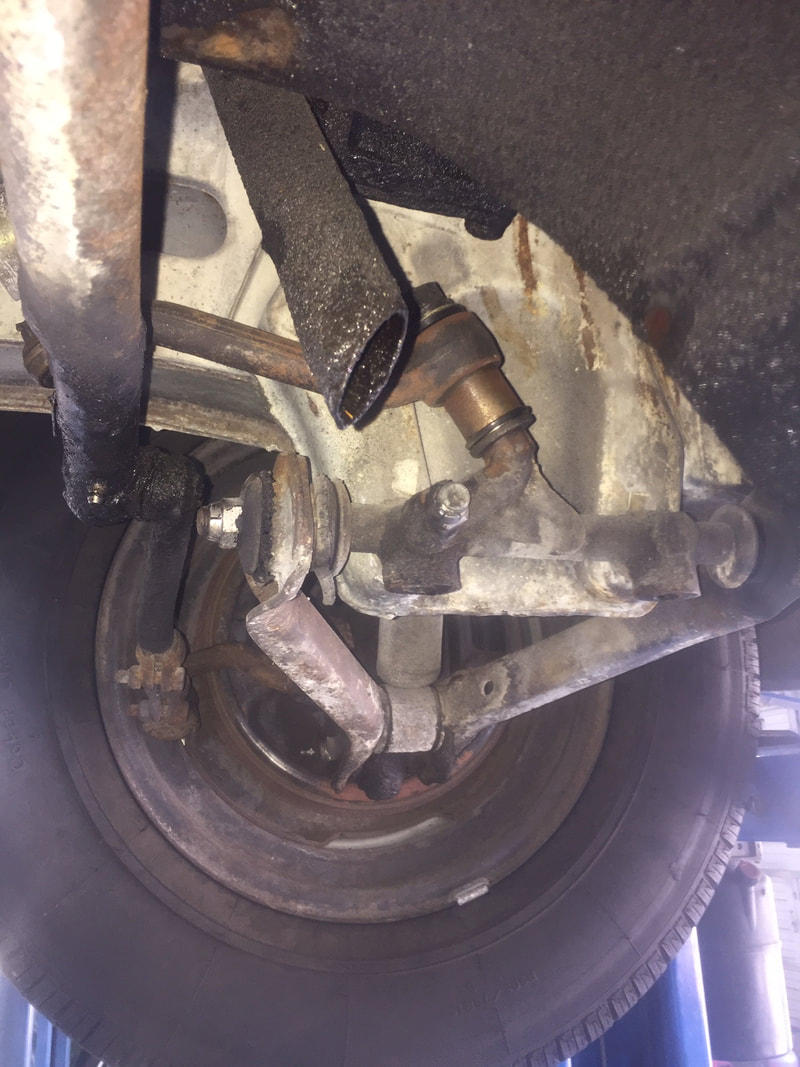
There wasn't much about the front suspension that was easy. All the components were really worn and hard to disassemble.
|
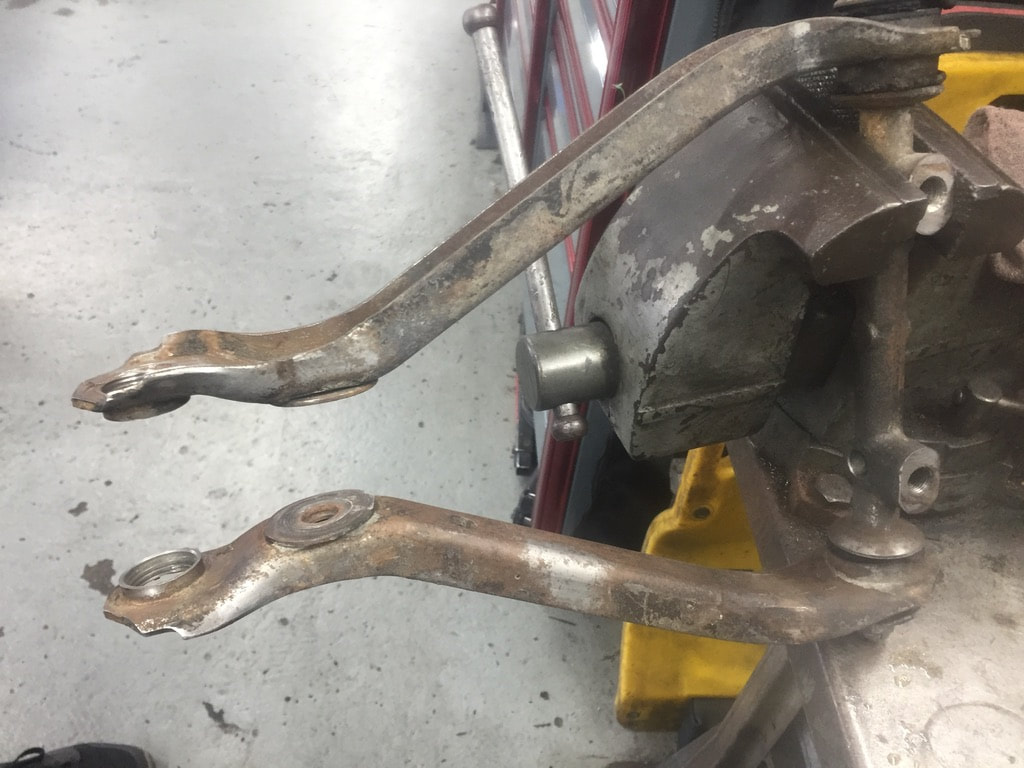
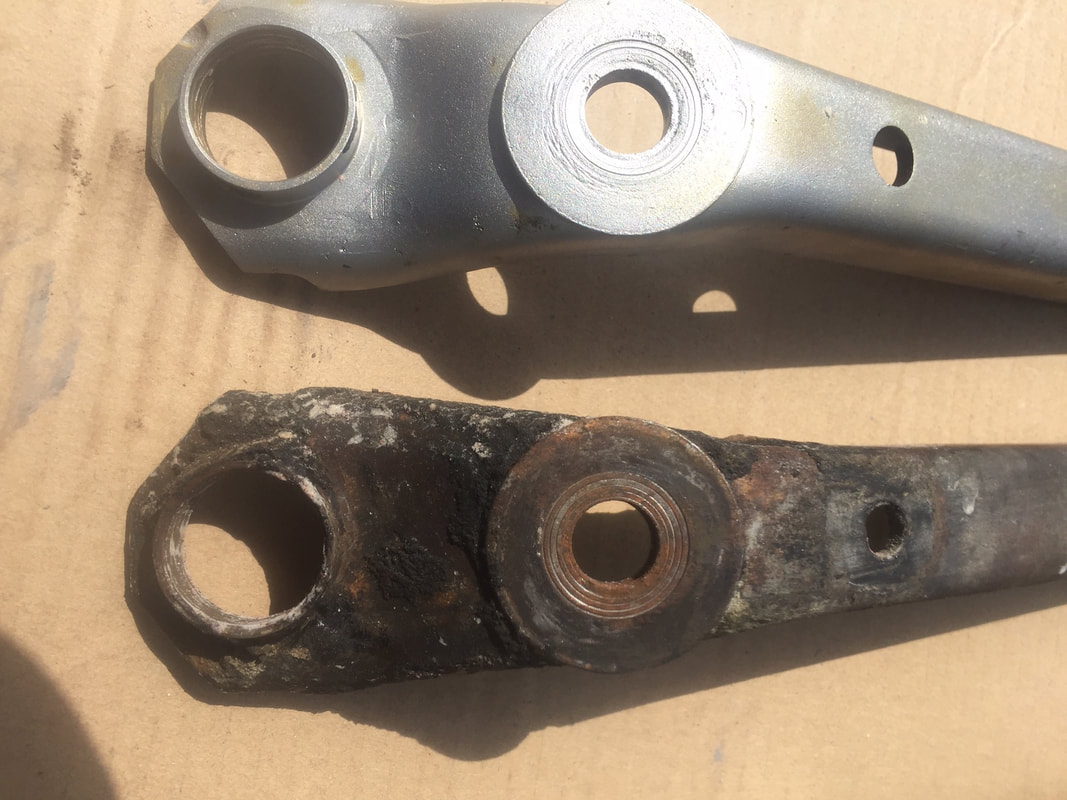
LEFT: Disassembling the control arms on the work bench. RIGHT: Prior to rebuilding, the control arm can be seen in place on the car.
|
|
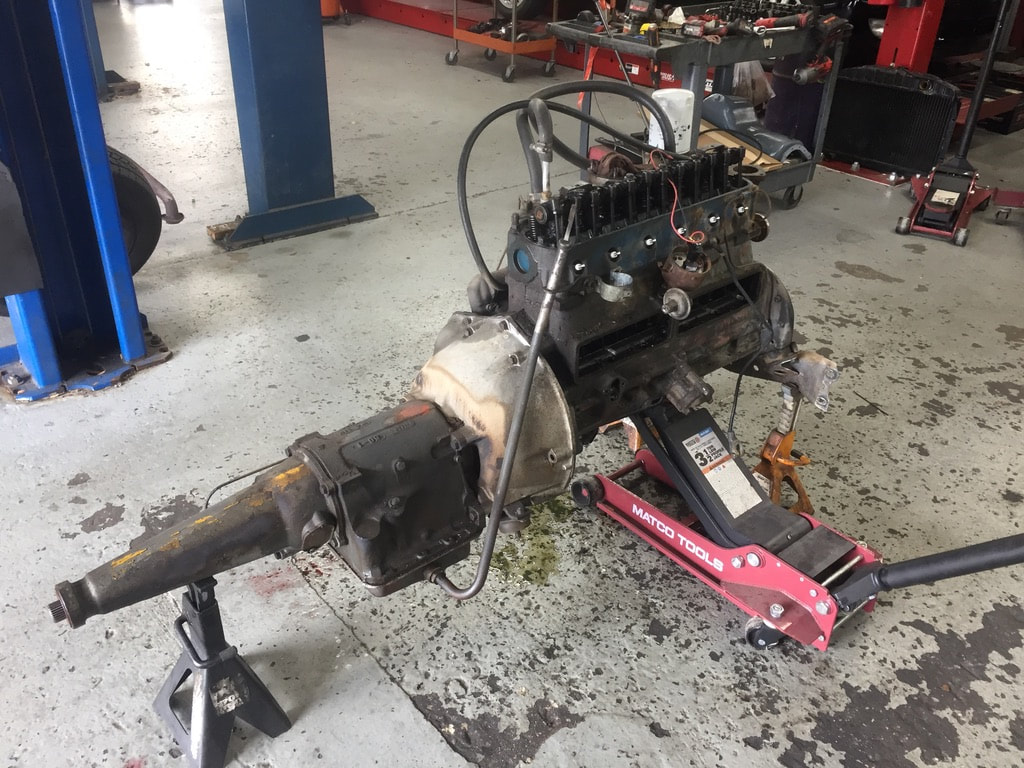
The Rambler engine and tranny on the ground.
This car only had about 65,000 original miles on it,but back in the sixties, 50,000 miles was often the lifespan of many automobiles. On Sunday, I tackled cleaning and painting the parts. Owning a Vixen Wet Blaster made life a lot easier. Over the next week or so, I hustled to find replacement components and then painted all the parts we reused. It took us a couple of weekends, and we had to fabricate some tools, but when finished the front end looked and worked like a factory-new Rambler. Dave put the car on an alignment rack and an hour later, we took it for a spin. It tracked perfectly straight down the road - hands off the wheel.
With the front end complete, we next tackled the leaking engine and tranny. I really hadn't planed on rebuilding the engine or gearbox. I was primarily interested in replacing the old gaskets to fix leaks, cleaning up grease and painting the components. I didn't want to put a lot of effort into rebuilding the engine at this time. I planned to do that in my garage in the next year. But Dave convinced me that if we were pulling the tranny, we might as well pull the engine. And if we were going to pull the engine, it wouldn't take that much longer to rebuild it. I took his advice and I'm glad I did.
The weekend Dave wrapped up the engine I was out of town. So another friend, Don Caesar, helped Dave set the engine into the Rambler. I'll be paying back that favor later this year by helping Don with his vintage Moto Guzzi. It's so wonderful to have friends who are willing to step up and lend a hand when you need it. And I always remember to pay back their kindness.
When I got back from being away for the weekend, I dropped in at Mike's shop and saw the Rambler in one of Dave's bays. When Dave saw me walking up to the car, he quickly reached in the driver's window and turned the ignition key. The Rambler sprang to life. It purred like new car. We took it for a spin around the block. It felt like driving a new piece of history.
Kudos to Dave! He did a fantastic job and was committed to getting the job right. I know I wasn't the easiest customer. I double checked everything and asked a lot of questions. But now, I readily admit, I don't know I could have done this without him. At least not this quickly.
Photos above and below: wet blasted parts vs the original parts
|
The block and cylinder head look mighty nice after blasting and painting. It may not have looked this good new!
|
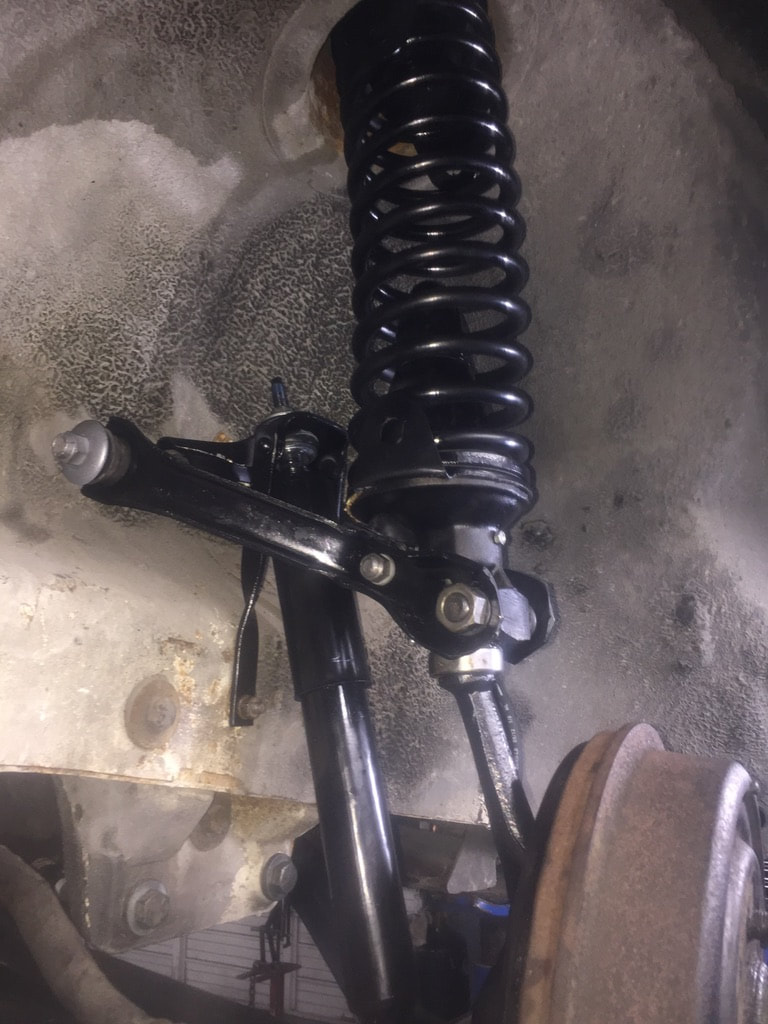
The rebuilt front right strut on the Rambler. A very modern design for 1960.
|
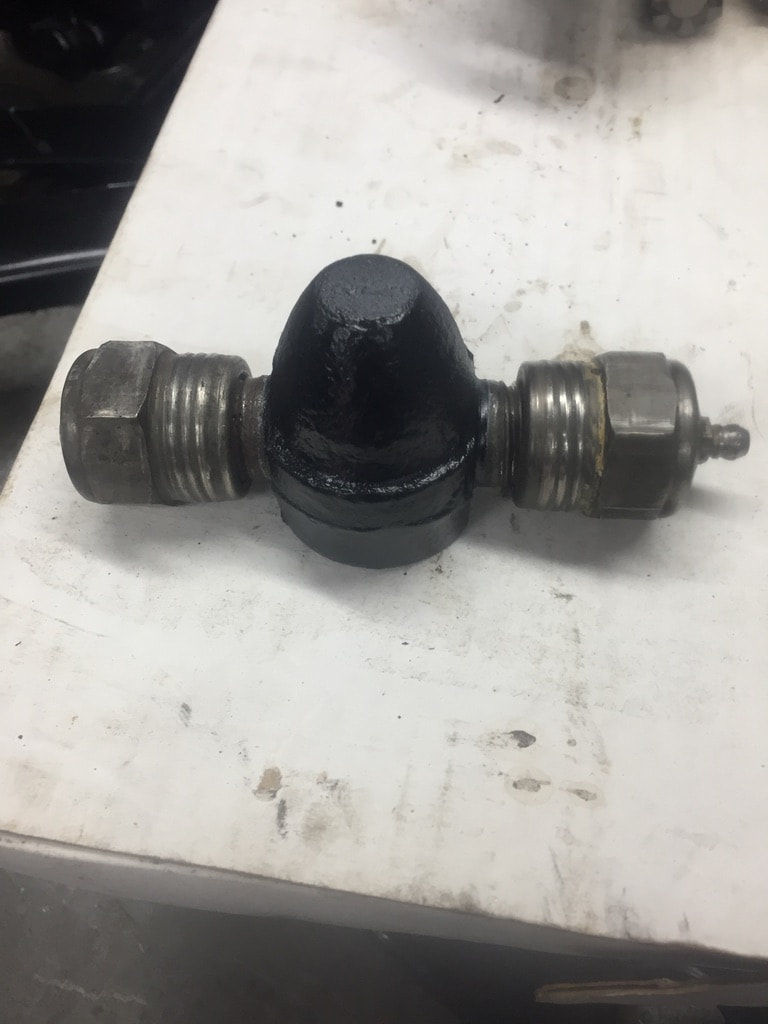
A rebuilt trunnion. A very hard part to find for this car.
|
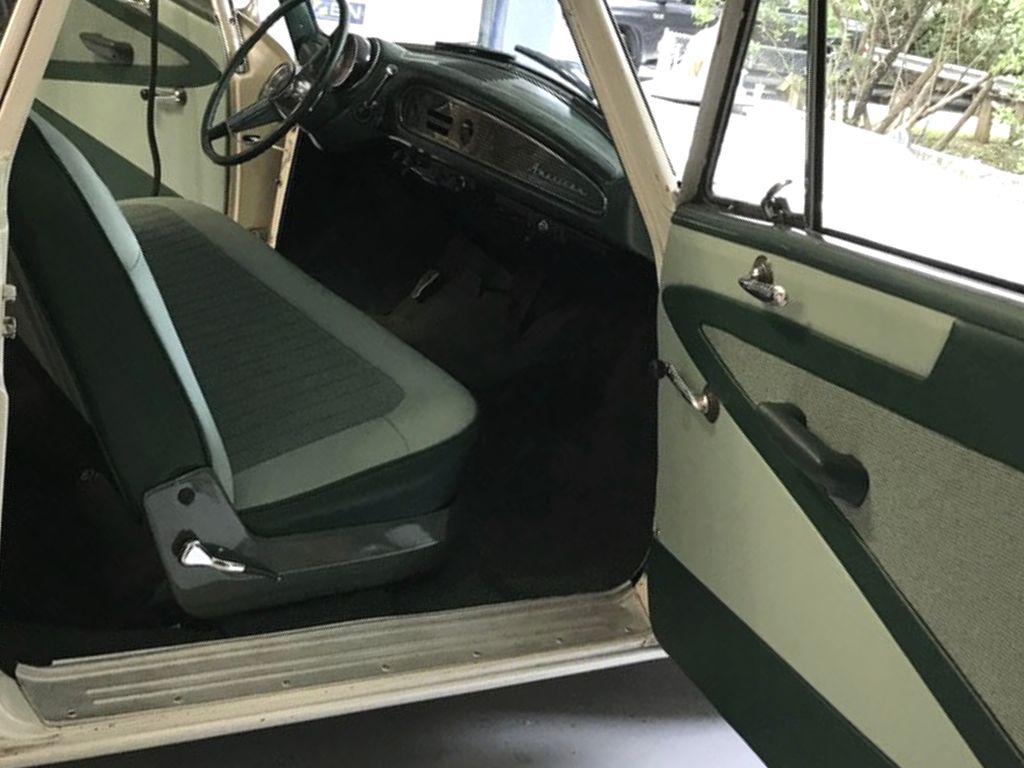
With the car running great, I turned my attention to finishing up the interior. Johnny had finished the seats and door panels so I needed to get to work on the nasty-looking seat pan. After much wire brush cleaning, I sealed and painted the floor. I decided it was also a good time to repaint the dash and steering wheel to better match the interior. I also repainted all the metal interior trim pieces as well.
I gave the epoxy-based paint on the seat pan a few days to cure, then I installed a foil-covered, mastic-based soundproofing. I also covered the inside of the doors and trunk. I did this to help deaden the sound of what was a really noisy old car. With the sound proofing installed, I fitted new carpets and matching seat belts. I am so happy I spent the time and money to put that sound-deadening material in the Rambler. What a difference it made. This car is now really quite rolling down the interstate at 70mph. It's not Lexus or Lincoln-quality sound proofing, but for a 1960 automobile, it's really quiet.
I gave the epoxy-based paint on the seat pan a few days to cure, then I installed a foil-covered, mastic-based soundproofing. I also covered the inside of the doors and trunk. I did this to help deaden the sound of what was a really noisy old car. With the sound proofing installed, I fitted new carpets and matching seat belts. I am so happy I spent the time and money to put that sound-deadening material in the Rambler. What a difference it made. This car is now really quite rolling down the interstate at 70mph. It's not Lexus or Lincoln-quality sound proofing, but for a 1960 automobile, it's really quiet.
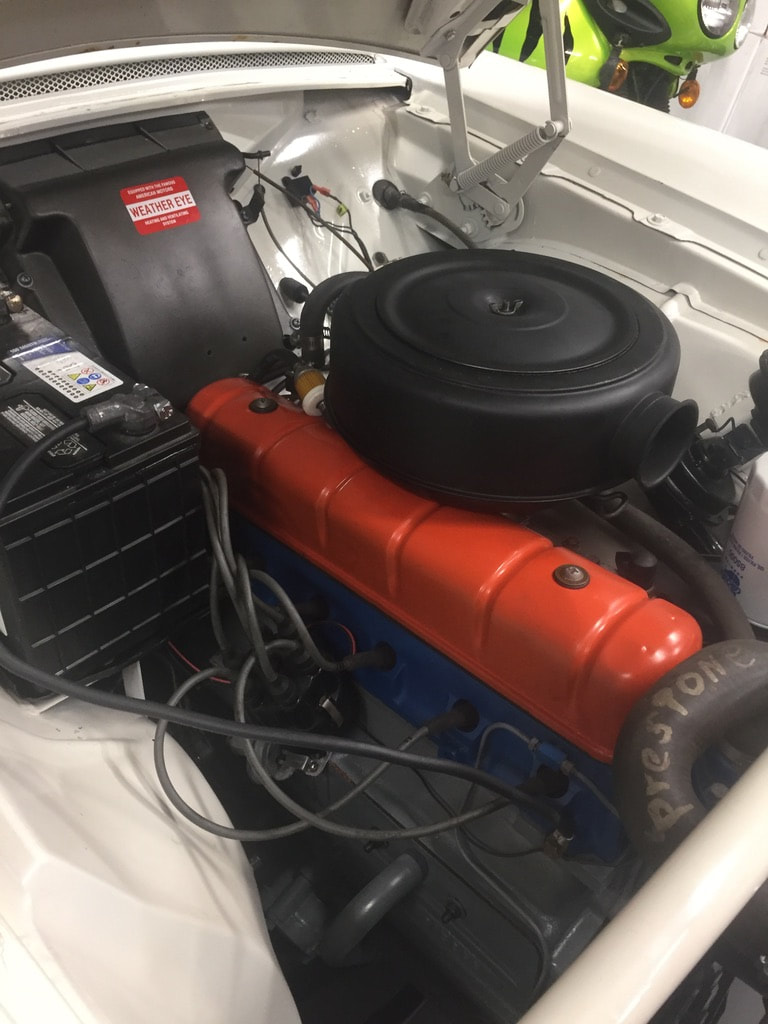
LEFT: From OHV, straight six power to human power. That's me prepping the engine bay for paint. RIGHT: Diggy checks out the new paint.
|
|
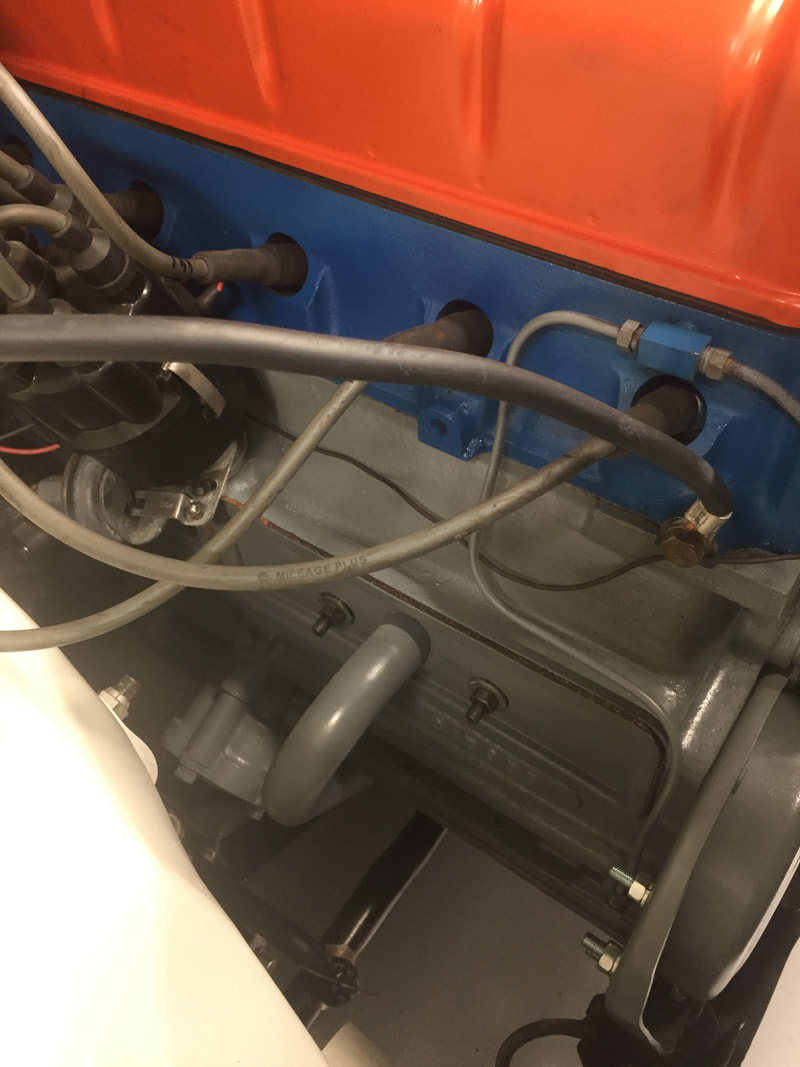
The rebuilt engine in place and running. At this point, I haven't yet replaced fabricated a top battery mount or replaced the hard to find top radiator hose.
The Rambler after a quick bath.
|
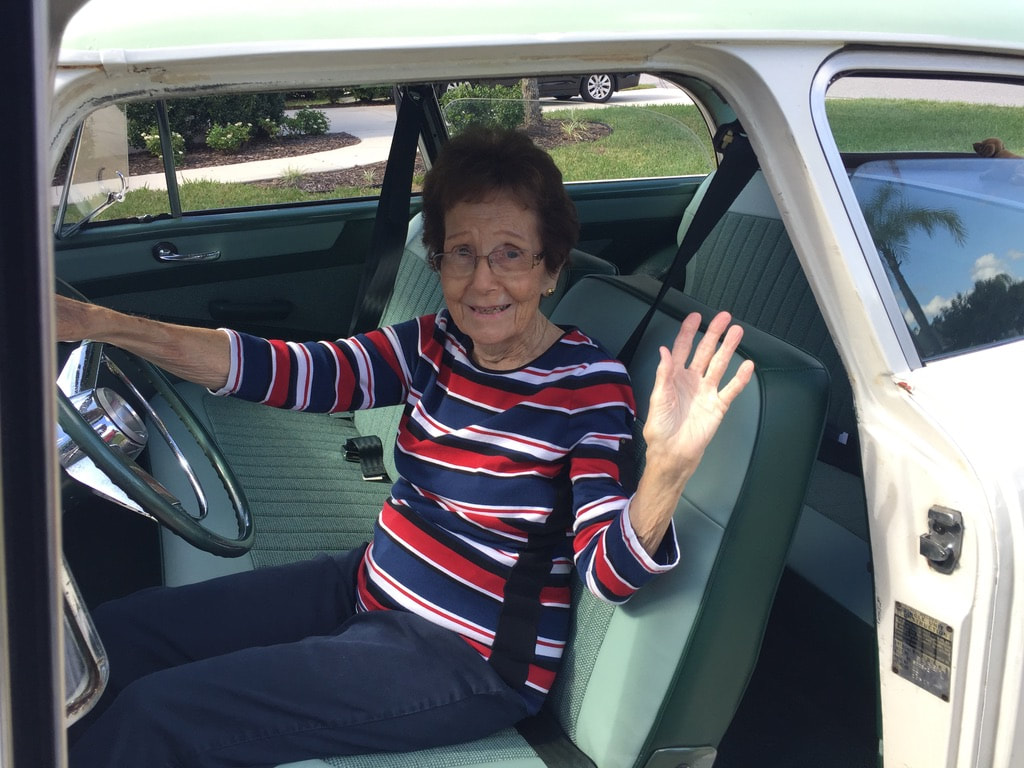
Mom making sure the Rambler is safe for her oldest son to drive.
|
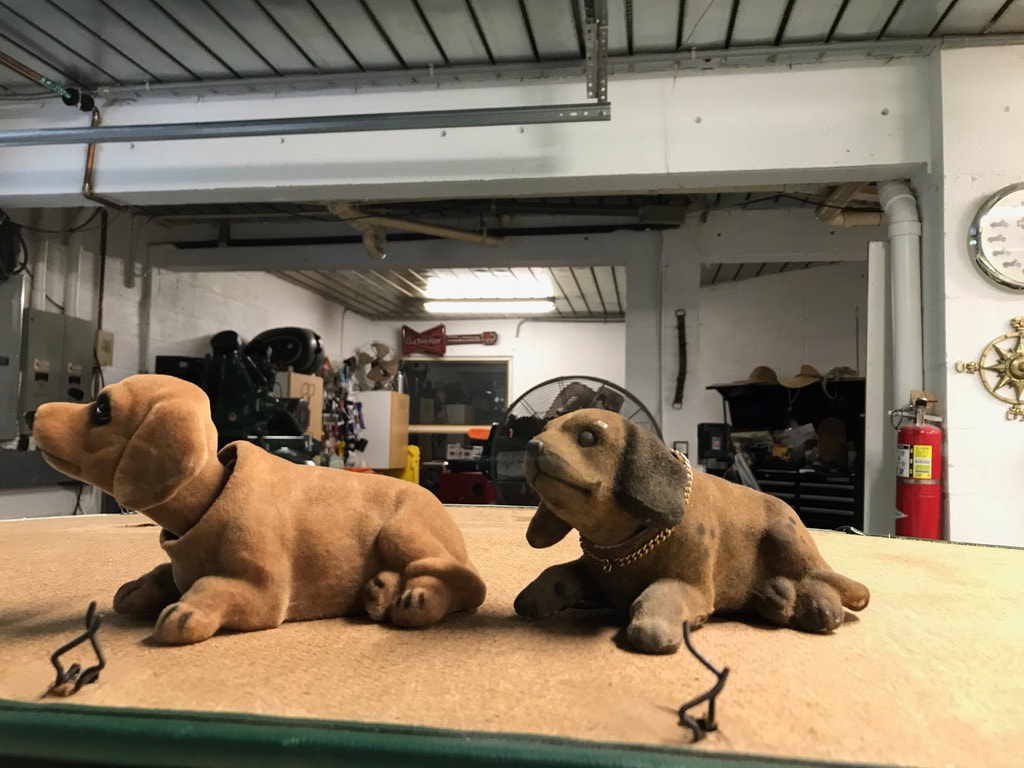
My wife found a replacement for the little bobble head Dachshund that came with the car. These were really popular in the 1960s. My grandmother had one in her '63 Falcon. The one on the right came with the car.
|
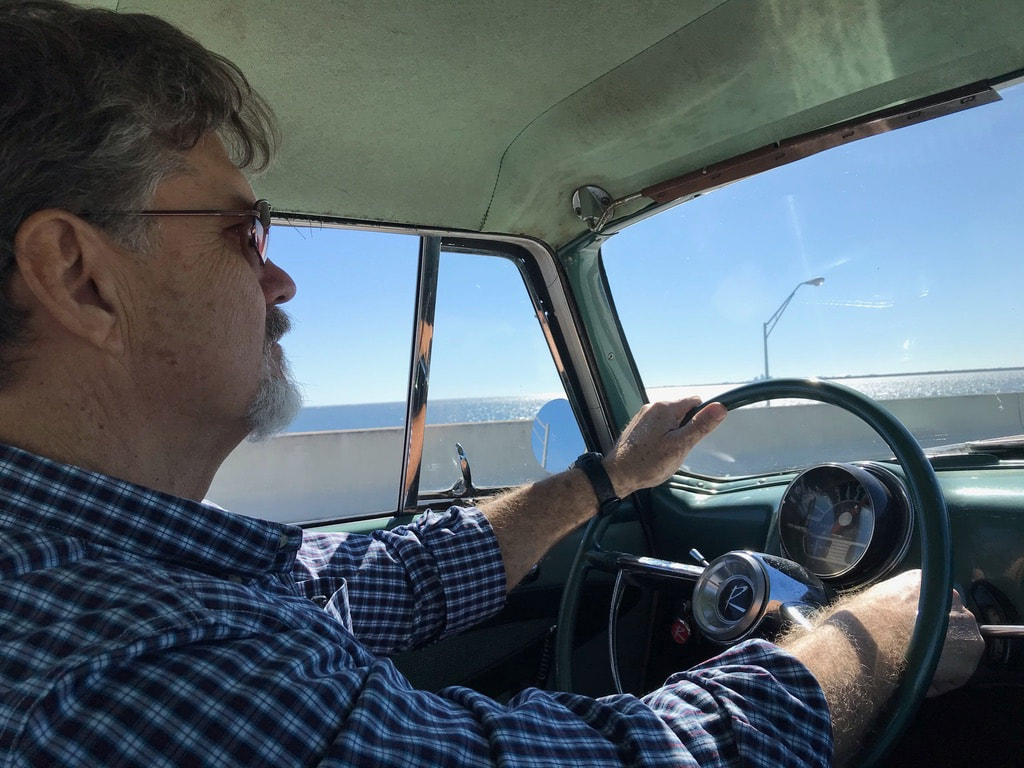
My wife and I enjoy our first long drive in the Rambler. We traveled across Tampa Bay and over the 140' Skyway bridge. Now that's a road test! You might also notice the headline hasn't been completed in this photo.
|
I'VE RUN OUT OF TIME FOR NOW, BUT THERE ARE LOTS MORE PICTURES AND UPDATES TO THIS STORY. HOPEFULLY I'LL GET IT POSTED IN 2021 .... PLEASE CHECK BACK. If you have an old Rambler, please contact me to say hi and send a few pictures!
