THE VINTAGE BIKE BUILDER
  • HOME
    • About
  • Restorations
    • 1969 BMW R60
    • 1976 Honda CB400F
    • 1968 Harley Rapido
    • 1963 Triumph Bonneville
    • 1970 Honda CB450 Cafe
    • 1971 Montesa Cota
    • 1968 Triumph TR6 Tiger
    • 1974 Suzuki RL250
    • 1976 Yamaha DT250
    • 1972 BMW R75/5
    • 1975 G5 Kawasaki
    • 1975 Honda MR50
    • 1986 Husqvarna TE510
    • Stella Scooter with Side Car
    • 1972 BMW R75/5
    • 1984 BMWR100RT
    • 1964 Cushman Truckster
    • 1995 Suzuki Savage
    • 1977 YAMAHA IT250
  • TECH HELP
    • MOTO-SAFETY
    • MOTO-MAINTENANCE
    • CARBURETION >
      • Mikuni Tuning and Jetting Guide
      • Setting Mikuni Float Levels
      • Choosing Aftermarket Carbs
      • DR350 - MIKUNI CARB CONVERSION
      • TT-R125 MIKUNI CARB CARB CONVESION
      • CB450 MIKUNI CARB CONVERSION
      • VM38SS-VM38-9 COMPARISON
      • CB350-400F Carb Rebuild Demonstration
      • CB550K Carb Rebuild Demonstration
    • BUILDING CABLES
    • JENNINGS TWO STROKE HANDBOOK
    • ABOUT MAGNETOS
    • RESTORATION DISASSEMBLY
    • WHEEL TUNING
    • PREPPING AND PAINT
    • ELECTRICAL
  • BRITISH BIKES
    • SEARCHABLE VINTAGE PARTS CATALOG
    • Triumph Alpha-Numeric Parts Decoder
    • Diagrams and tips for Installing a vintage Triumph crankcase breather
    • Bonneville Fuel Line Routing
    • Vintage Nourish 8-Valve Head
    • 650cc Wiring Diagrams 1963-70
  • WET BLASTING SERVICE
  • MOTO-ART
  • PRODUCT REVIEWS
    • Viking AXE Magnetic Tank Bag Review
    • Traileralarm.com
  • Contact
  • Turchan Super Shark
  • 1960 Rambler American Custom
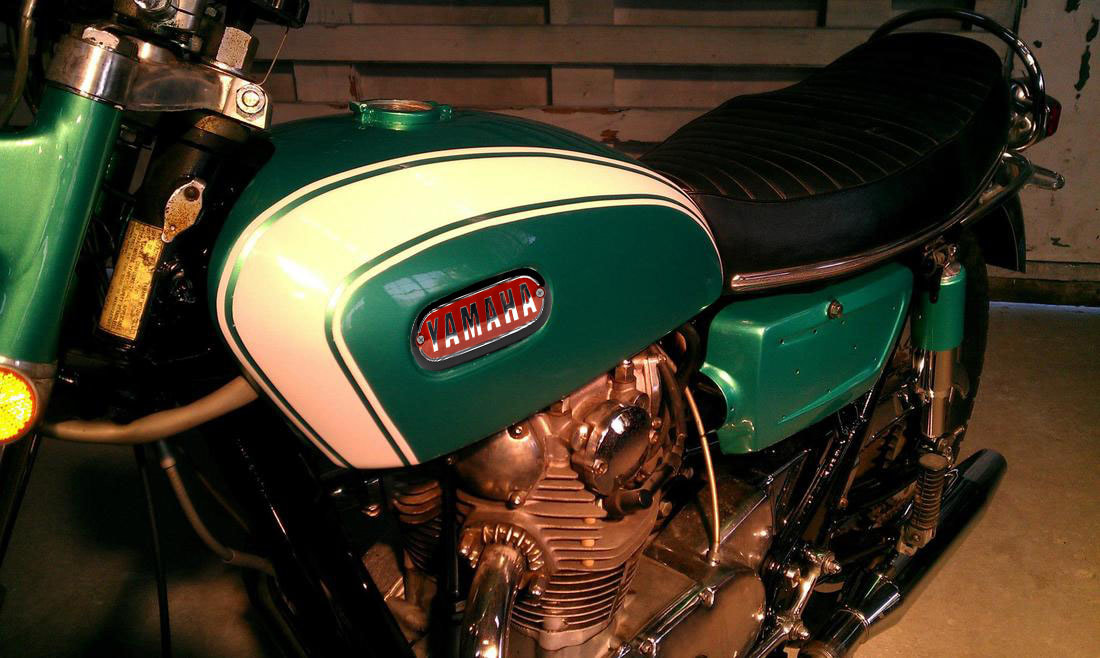
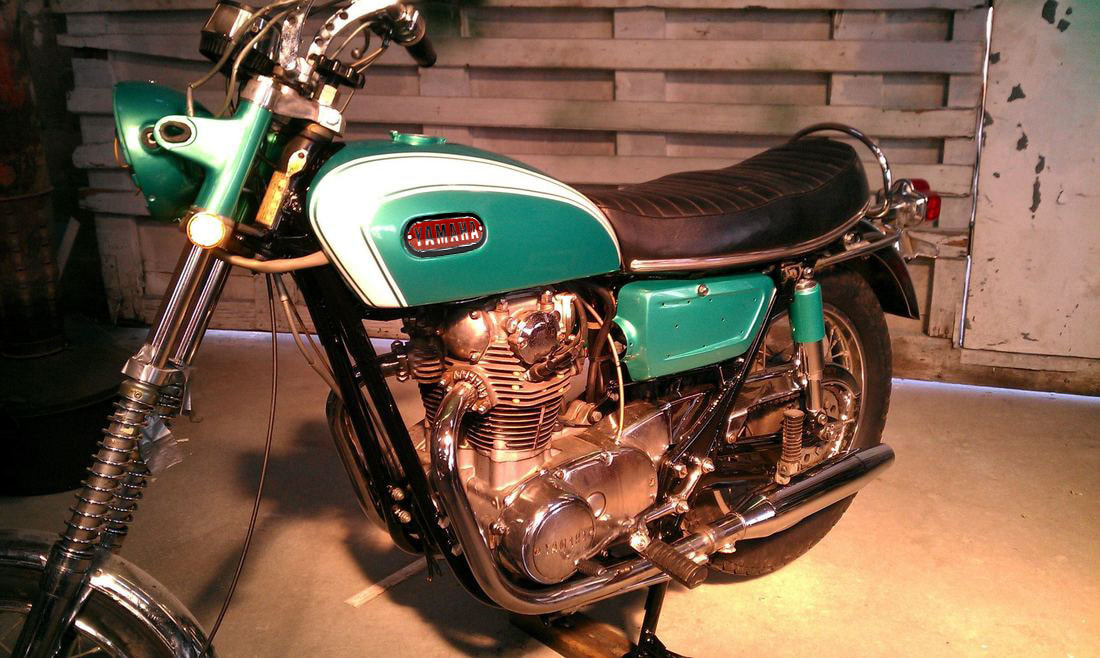
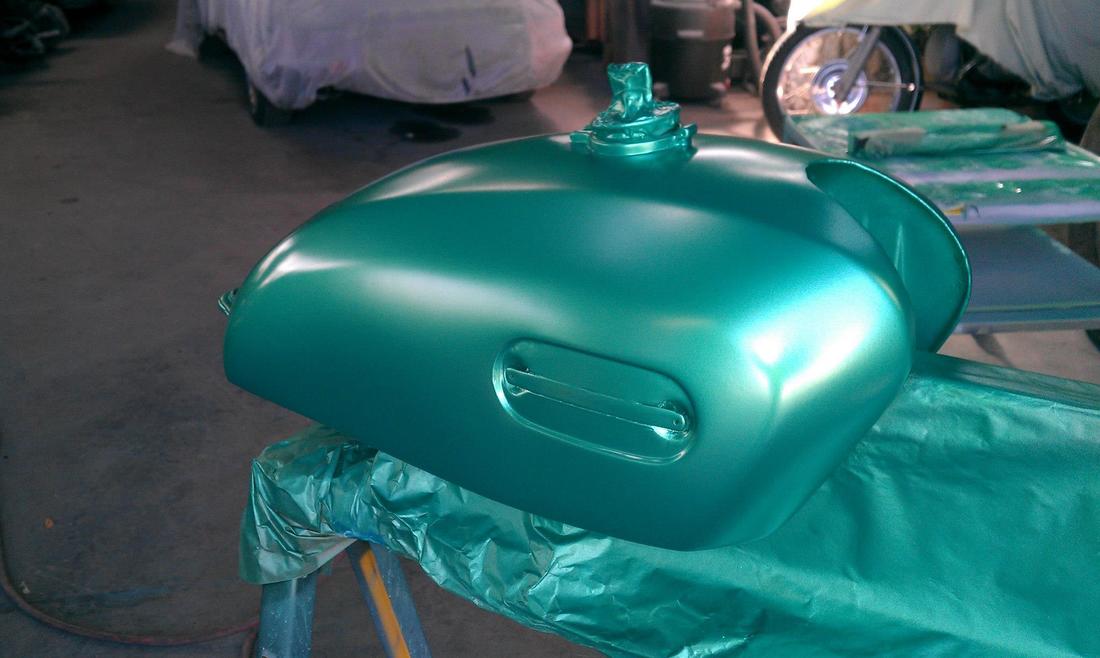
I traded the paint on this bike (frame, headlight shell, headlight ears and side panels) to a guy for a RL250 roller I later restored (see photos of the RL on the site). I think the owner of this bike got the better part of the deal. This is the worst tank I have ever repaired. It looks like it was run over by a car.  I probably took me 40 hours to complete the paint.  The stripe was hand painted and the paint ended up being a flawless reproduction of the original factory paint.  Too bad the front end was extended or it would have ended up as a really nice bike.
Picture

Picture
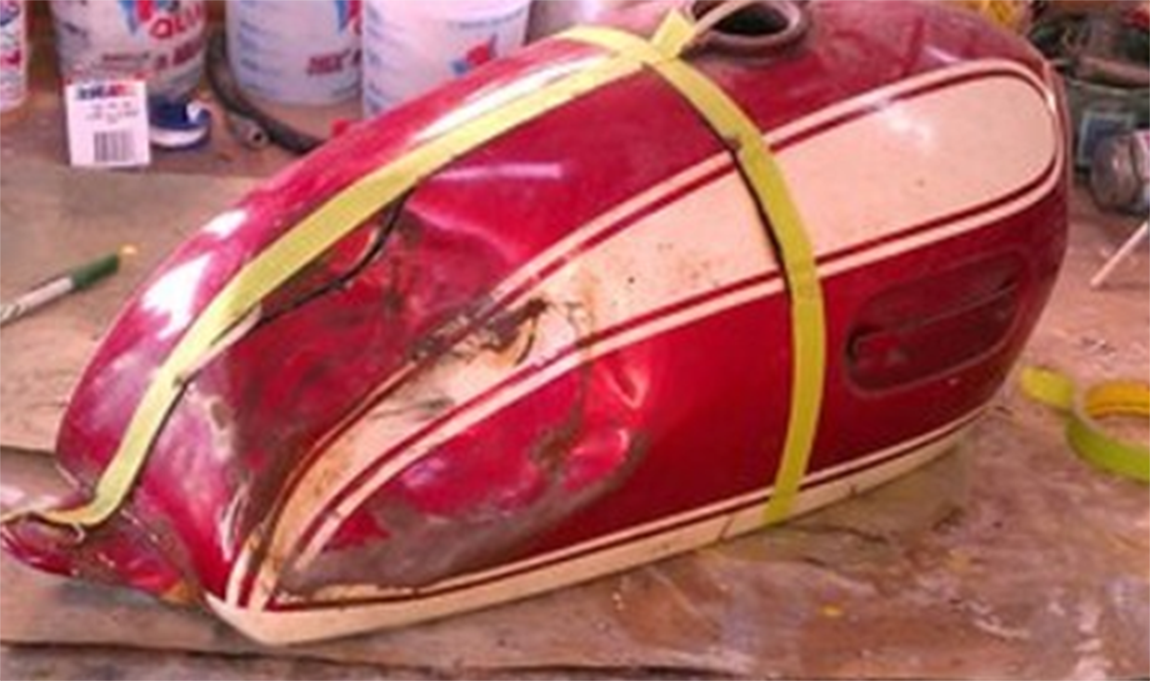
I began the project by trying to figure out the best place to cut the tank while causing the least amount of damage. Rather than work from the bottom like I would normally do, I had to cut the top off the tank and straighten the panel.  I then tig welded the panel back in place and sealed the tank with an epoxy coating. I then put on a skim coat of plastic filler - most of which was removed before priming.  After that the primer was blocked out and re-coated repeatedly to get the finish as perfect as possible before painting the base color coat.  The paint consisted of base coat, a pearlized coat and about 5 layers of clear.  The final coat was sanded with 2500 and hand buffed. This turned out to be about $2500 worth of work which I traded for a bike that was probably worth about $900. Not a great deal for me, but I enjoyed the challenge was pleased with the results. The customer was overjoyed!


Picture
Getting the panel straight was extremely difficult.  Unfortunately, the owner couldn't locate a better tank. Of course, right after doing all this work I ran across several tanks that would have been a breeze compared to this.

Picture
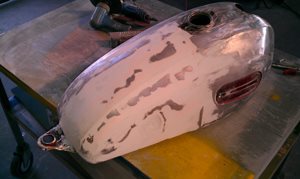
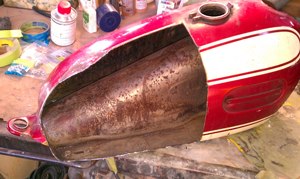
This is the final skim coat prior to sanding. Most of the plastic was removed. I don't use Bondo. I prefer a super-strength, epoxy bonding filler. It's expensive and harder to sand, but it won't bubble or release a few years after being painted.
Picture
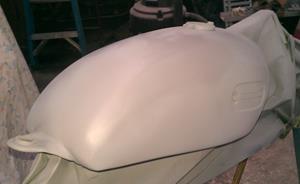
I usually apply several coats of a high-quality primer/sealer. This seals imperfections. Priming is usually several coats. As I get closer, the grip of the paper gets finer. Usually a 600-1000 before I paint. This of course depends on what is called for by the paint manufacturer.
Picture
This paint requires a pearlized top coat. After priming, I applied a white base (to see imprefections) then color base. Next is the pearl and finally several coats of clear.
Picture
  • HOME
    • About
  • Restorations
    • 1969 BMW R60
    • 1976 Honda CB400F
    • 1968 Harley Rapido
    • 1963 Triumph Bonneville
    • 1970 Honda CB450 Cafe
    • 1971 Montesa Cota
    • 1968 Triumph TR6 Tiger
    • 1974 Suzuki RL250
    • 1976 Yamaha DT250
    • 1972 BMW R75/5
    • 1975 G5 Kawasaki
    • 1975 Honda MR50
    • 1986 Husqvarna TE510
    • Stella Scooter with Side Car
    • 1972 BMW R75/5
    • 1984 BMWR100RT
    • 1964 Cushman Truckster
    • 1995 Suzuki Savage
    • 1977 YAMAHA IT250
  • TECH HELP
    • MOTO-SAFETY
    • MOTO-MAINTENANCE
    • CARBURETION >
      • Mikuni Tuning and Jetting Guide
      • Setting Mikuni Float Levels
      • Choosing Aftermarket Carbs
      • DR350 - MIKUNI CARB CONVERSION
      • TT-R125 MIKUNI CARB CARB CONVESION
      • CB450 MIKUNI CARB CONVERSION
      • VM38SS-VM38-9 COMPARISON
      • CB350-400F Carb Rebuild Demonstration
      • CB550K Carb Rebuild Demonstration
    • BUILDING CABLES
    • JENNINGS TWO STROKE HANDBOOK
    • ABOUT MAGNETOS
    • RESTORATION DISASSEMBLY
    • WHEEL TUNING
    • PREPPING AND PAINT
    • ELECTRICAL
  • BRITISH BIKES
    • SEARCHABLE VINTAGE PARTS CATALOG
    • Triumph Alpha-Numeric Parts Decoder
    • Diagrams and tips for Installing a vintage Triumph crankcase breather
    • Bonneville Fuel Line Routing
    • Vintage Nourish 8-Valve Head
    • 650cc Wiring Diagrams 1963-70
  • WET BLASTING SERVICE
  • MOTO-ART
  • PRODUCT REVIEWS
    • Viking AXE Magnetic Tank Bag Review
    • Traileralarm.com
  • Contact
  • Turchan Super Shark
  • 1960 Rambler American Custom